To change the ip settings, E 50) – Casio XJ-UT310WN Network Function Guide User Manual
Page 50
50
To change the IP settings
1.
Press the [MENU] key to display the setup menu.
2.
Use the [
T] key to select “Network Settings” and then press the [ENTER] key.
3.
Use the [
T] key to select “Projector Wireless LAN Settings” and then press the
[ENTER] key.
4.
Use the [
T] key to select “IP Settings” and then press the [ENTER] key.
z You can perform the step below in place of steps 3 and 4 above, if you want.
Use the [T] key to select “Projector Wired LAN Settings” and then press the [ENTER] key.
5.
On the “IP Settings” dialog box that appears, configure the settings described in
the table below.
6.
What you should do next to return to “Network Settings” depends on whether
you started this operation from “Projector Wireless LAN Settings” or “Projector
Wired LAN Settings”.
z Projector Wireless LAN Settings: Press [ESC] twice.
z Projector Wired LAN Settings: Press [ESC] once.
7.
Use the [
T] key to select “Update Network Settings” and then press the [ENTER]
key.
z This will display a confirmation dialog box asking if you want to update network settings.
To do this:
Perform this operation:
Specify auto acquisition of an IP
address
Select “Auto” for “IP Settings”.
Specify the IP address manually
Specify “Manual” for “IP Settings” and input an IP address manually (see
below).
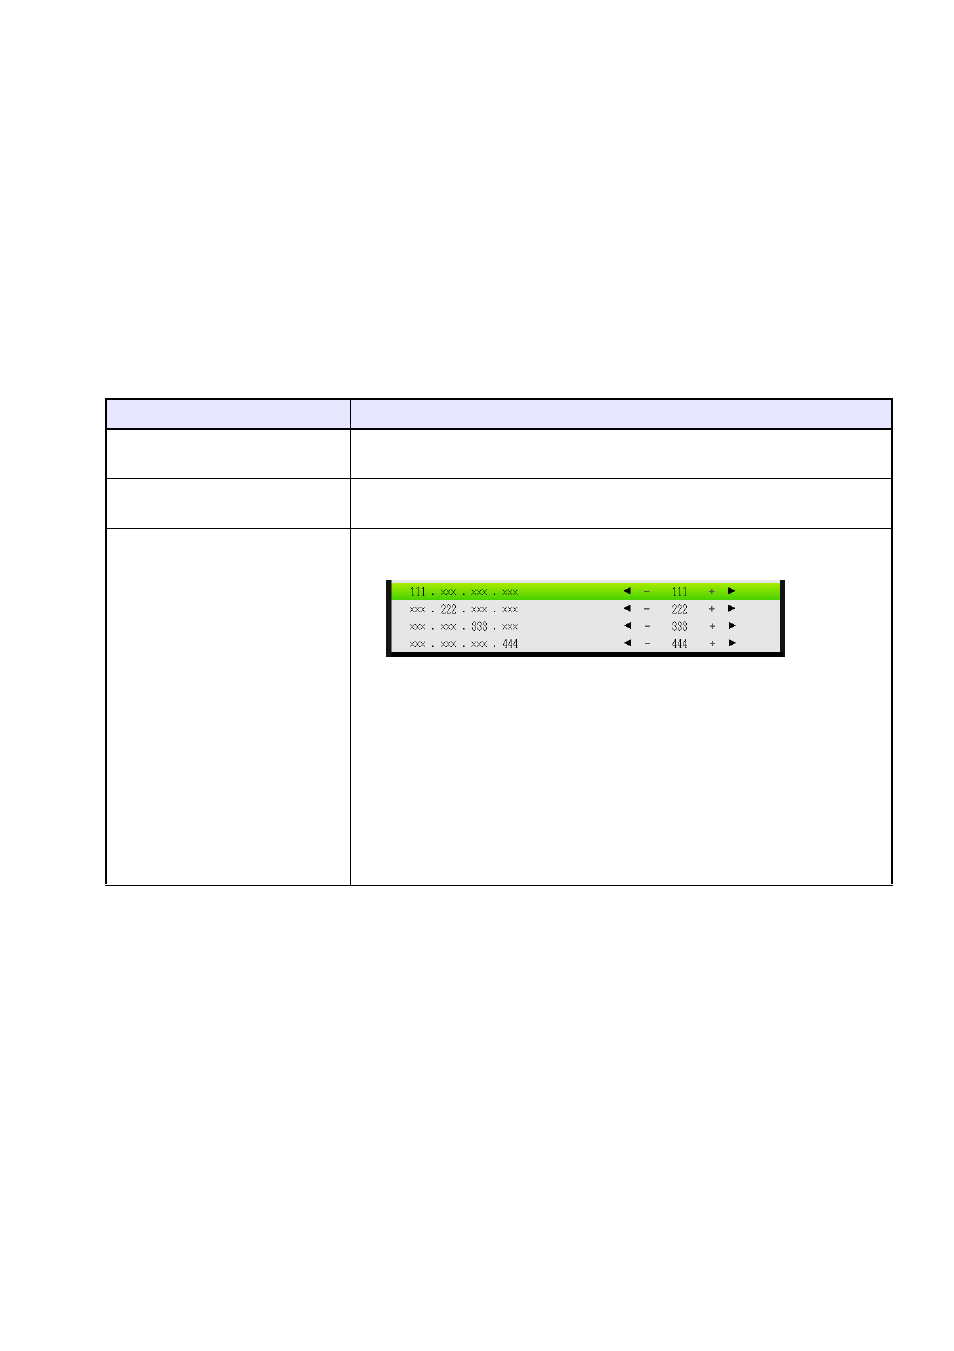
Input an IP address
(1) Use the [T] key to select “IP Address” and then press the [ENTER] key.
z This displays the “Input IP Address” dialog box.
(2) Use the [W] and [X] keys to specify the first octet (three digits) of the IP
address. After the setting is the way you want press the [T] key.
(3) Repeat step (2) to specify octets two through four.
z A value within the following ranges can be specified for each octet:
1st: 1 to 223; 2nd: 0 to 255; 3rd: 0 to 255; 4th: 1 to 254. Specifying a
value outside the above ranges will cause the numbers of the value
to be dimmed. If you advance to step (4) while there is a dimmed
octet number will return the IP address setting to what it was
originally (before you started input).
(4) When the IP address is the one you want, press the [ESC] key.