Casio XJ-UT310WN Network Function Guide User Manual
Page 33
33
To establish a connection between the projector and computer
and project via a wireless LAN access point
Important!
z The procedure below assumes the conditions described below.
• The computer is already connected to the wireless LAN access point.
It makes no difference whether the computer is connected by wireless LAN (Wi-Fi) or wired
LAN (using a LAN cable). If the computer is connected by wired LAN connection, make sure
the computer’s wireless LAN function is disabled.
• Projector settings have already been configured using the procedure under “To connect the
projector to a wireless LAN access point” (page 30), and wireless LAN access point and/or
projector settings have not been changed since then.
• The projector is within range supported by the wireless LAN access point.
Projector Operation
1.
Connect the wireless adapter to the projector (page 10) and then turn on the
projector.
z The input source will automatically switch to “Network” and projection of the LAN connection
standby screen will start.
z If projection of the LAN connection standby screen does not start, press the [INPUT] key. On
the “Input” dialog box that appears, use the [T] and [S] keys to select “Network” and then
press the [ENTER] key.
Computer Operation
2.
Start up Network Connection.
z The Network Connection window will appear with the message “Connecting”.
z If your computer is running Windows 7, 8 or 8.1 and the “Set Network Location” dialog box
appears, click [Cancel] to close the dialog box.
z One of the dialog boxes shown below will appear as soon as Network Connection finds the
projector to connect with.
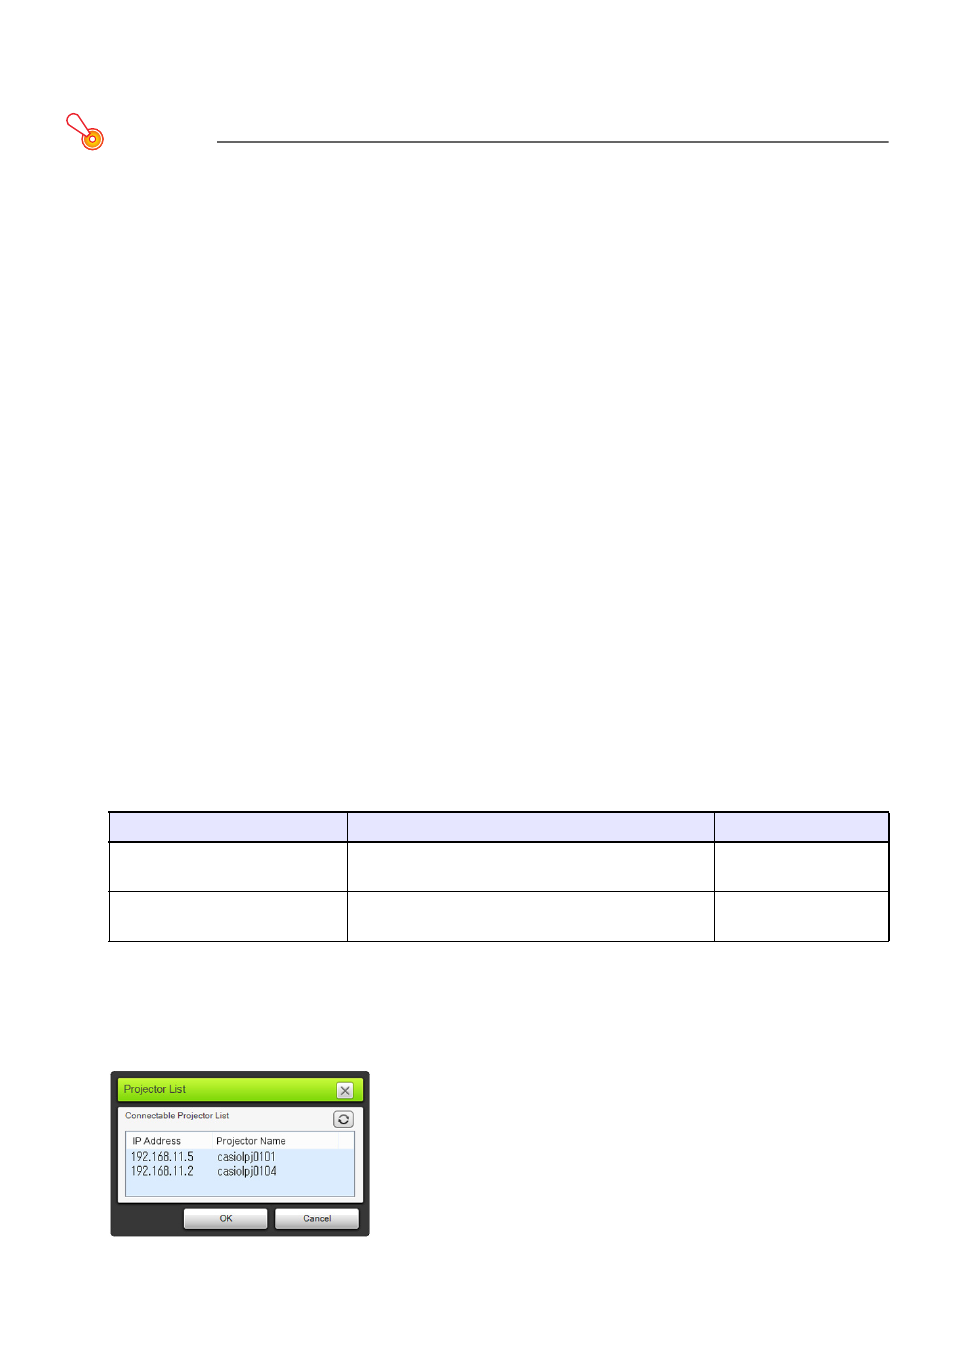
3.
Click the IP address of the projector you want to connect with, and then click
[OK].
z For the projector’s IP address, check “Server IP” in the lower left corner of the projection
screen (LAN connection standby screen).
If this dialog box appears:
It indicates this status:
Advance to this step:
“Projector List”
Multiple connectable projectors were detected on
the network.
Step 4
“Enter the login code.”
One connectable projector was detected on the
network.
Step 5