Main out assign, Choosing the motu asio driver, Nuendo, cubase and v-stack – MOTU UltraLite-mk3 - Hybrid FireWire/USB 2.0 Audio & MIDI Interface User Manual
Page 45: Live
C U B A S E , N U E N D O , L I V E A N D O T H E R A S I O S O F T W A R E
45
independent output pair. As a result, you’ll see
Phones 1-2
as an additional audio destination in
Cubase or Nuendo’s audio output menus.
Main Out Assign
Use the Main Out Assign setting to determine what
audio you will hear on the TRS main outs of the
UltraLite-mk3. If you would like to treat them as
their own separate output pair, choose
Main Outs
.
CHOOSING THE MOTU ASIO DRIVER
Once you’ve made the preparations described so
far in this chapter, you’re ready to run your audio
software and enable the MOTU ASIO Driver.
Check the audio system or audio hardware
configuration window in your software. There will
be a menu there that lets you choose among
various ASIO drivers that may be in your system.
Choose the MOTU ASIO Driver from this menu.
Nuendo, Cubase and V-Stack
To activate the UltraLite-mk3 driver in Nuendo or
Cubase SX, go to the Device Setup window, click
VST Audio System
and choose
MOTU Audio ASIO
from the
ASIO Driver
menu (Figure 7-2). Make the
other settings in the dialog as need for your system
and synchronization scenario.
Figure 7-2: Activating the UltraLite-mk3 ASIO driver in Nuendo and
Cubase.
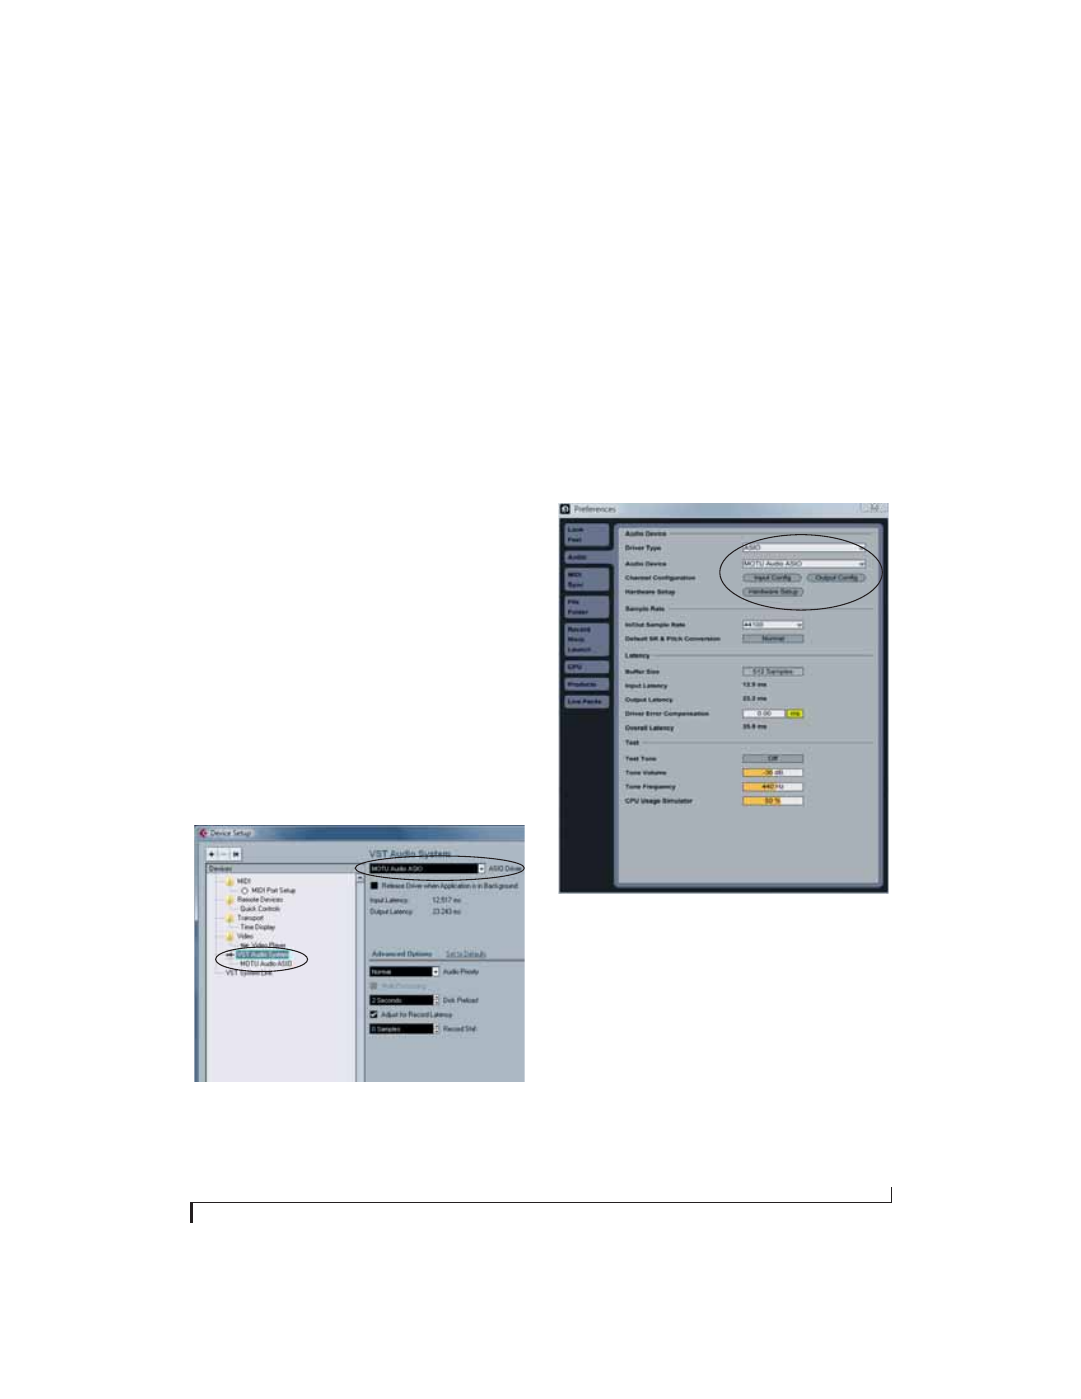
Live
In Ableton Live, access the preferences window and
click the
Audio
tab. Choose
ASIO
from the
Driver
Type
menu. Choose the
MOTU Audio ASIO
from
the
Audio Device
menu as shown below in
Figure 7-3. To enable or disable UltraLite-mk3
input or output channels, click the
Input Config
or
Output Config
buttons. To access MOTU Audio
Console, click the
Hardware Setup
button.
For information about the
Buffer Size
setting, see
“Adjusting the audio I/O buffer” on page 57.
Figure 7-3: Enabling the UltraLite-mk3 in Live.