Using the projector – Optoma ZU725T 7800-Lumen WUXGA Laser DLP Projector User Manual
Page 50
English
50
USING THE PROJECTOR
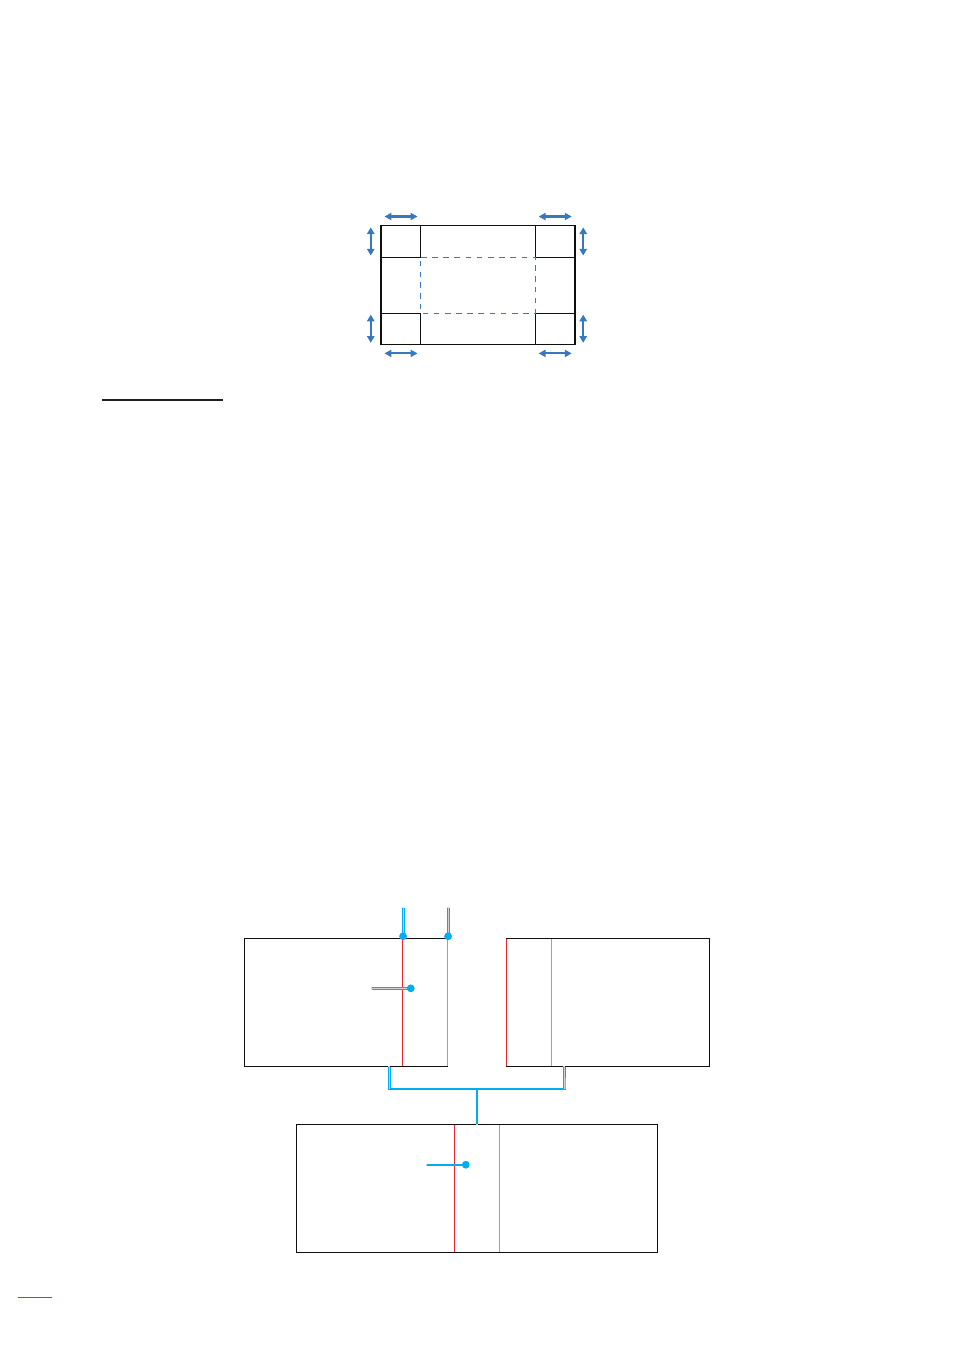
4-Corner:
Reshape the image by moving the 4 corners of the image to have it fit a specific projection
surface.
Advanced Warp
Configure advanced warp settings.
Note:
When Basic or AP of Warp Control is selected, the Advanced Warp will be unavailable.
Grid Color:
Select a grid color for warp and blend pattern between Green, Magenta, Red, and Cyan.
Grid Background:
Select the grid background between Black and Transparent.
Warp Setting:
Configure warp settings.
±
Grid Point:
Set the grid points of warp pattern. Options include: 2x2 (default), 3x3, 5x5, 9x9,
and 17x17.
±
Warp Inner:
Turn on to adjust the inner grid.
±
Warp Sharpness:
When the grid lines are warped from straight into curve, the grid lines will
be distorted and become jagged. To avoid the line jagging, adjust the warp sharpness to blur or
sharpen the edge of the images.
Blend Setting:
Configure the blend settings directly on the projector to merge two or more adjacent
images into one larger and seamless image.
±
Blend Width:
Set the blend pattern width.
±
Overlap Grid Number:
Set the blend overlap grid number.
±
Gamma:
Select the gamma value of the blend area to adjust the curvature of the blending effect.
Note:
For installation flexibility we have not applied a FW limitation to the blending menu of this device.
Distortion may occur if you attempt to warp to an extreme level. For more complex installs, at a cost,
please contact your dealer for external devices for warping.
Blend area
Gamma
Start pixel
Width