Image, Photos, Control – vMix Live Production Software Pro User Manual
Page 55: Saved delay clips, Selecting a photo
vMix User Guide
55 / 208
Seconds:
Select the delay buffer size in seconds. This is an approximate value based on a 30FPS input.
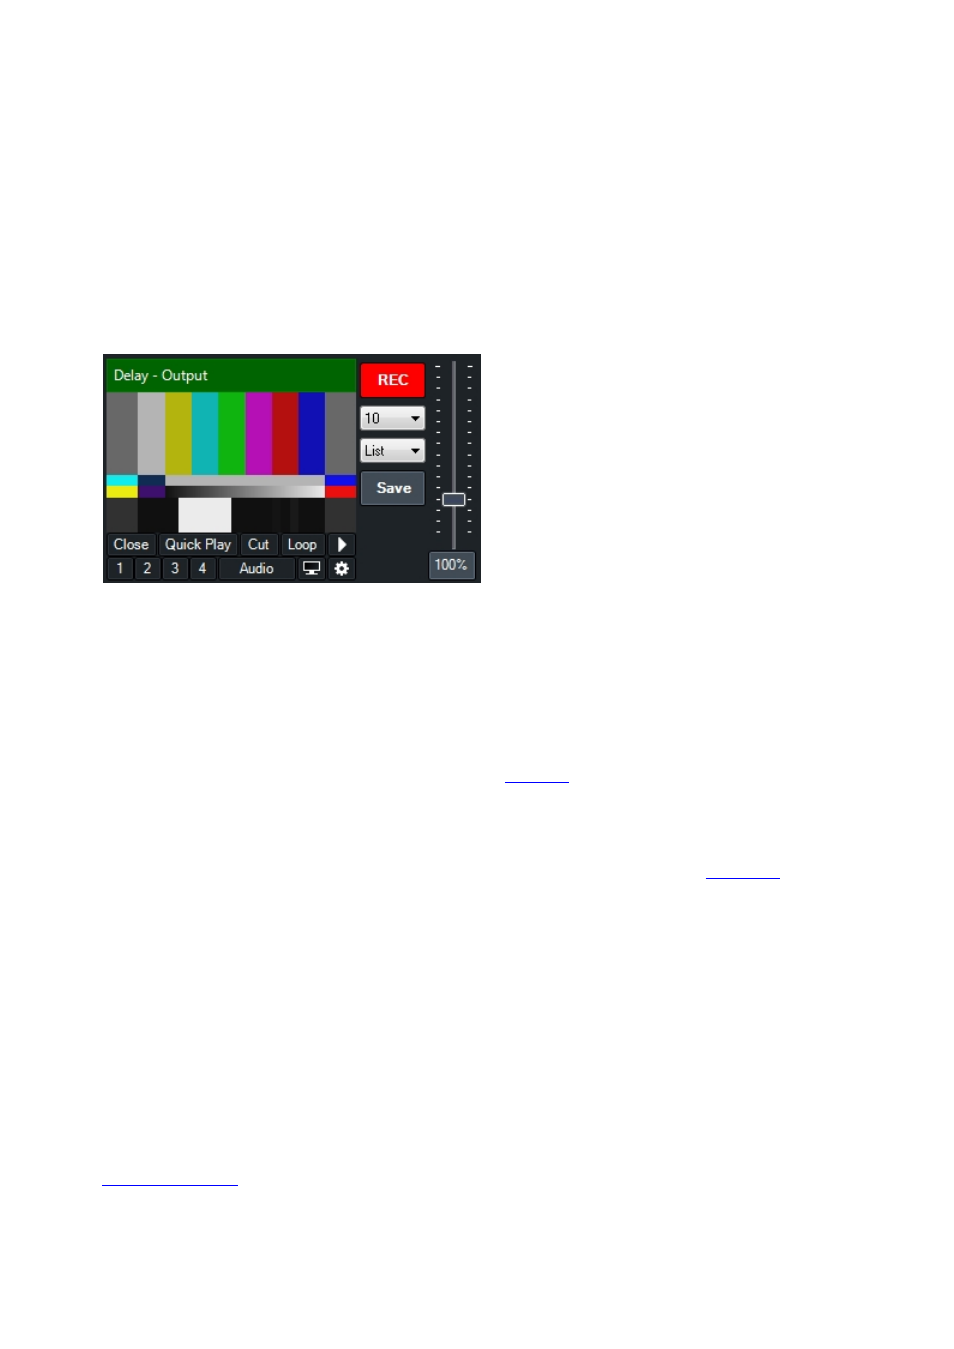
Control
Record:
Turn on or off the updating of the Video Delay.
Speed (100%):
The delay can be played back at a variety of speeds including full speed and slow motion
such as 50%.
Save Seconds (10):
Select the number of seconds of the most recent Video Delay footage to save to file.
Save Location (List):
Select the location to save the video delay clip once the Save button has been
clicked. See
Saved Delay Clips
section below.
Save:
Click this button to begin saving the Video Delay footage to file. This button will light up red while the
save is in progress. The video delay will stop recording until the file has been completed.
Saved Delay Clips
Video clips of delay footage can be saved at any time by clicking the Save button (see Save in the
Control
section above)
There are two locations in vMix the delay clips can be saved to:
List
Each saved clip will automatically be added to a separate
when complete. This List Input is
dedicated to holding all video delay clips in a vMix session regardless of source.
Category
Each saved clip will be added as a separate Input in the selected colour category. See
.
Image
Add an Image to vMix in PNG, JPEG, TIFF or BMP format.
Photos
Load all photos in a directory into a single Input in vMix using this option.
Selecting a Photo
Once the Input has been loaded you can right click the Input to select a photo to display from the
The controls on the Preview or Output windows can also be used to move backward and forward through the
list of photos.