Bounce flash, Wireless flash, Except sd9) – SIGMA ELECTRONIC FLASH EF-610 DG SUPER SA-STTL (シグマ用) User Manual
Page 21
20
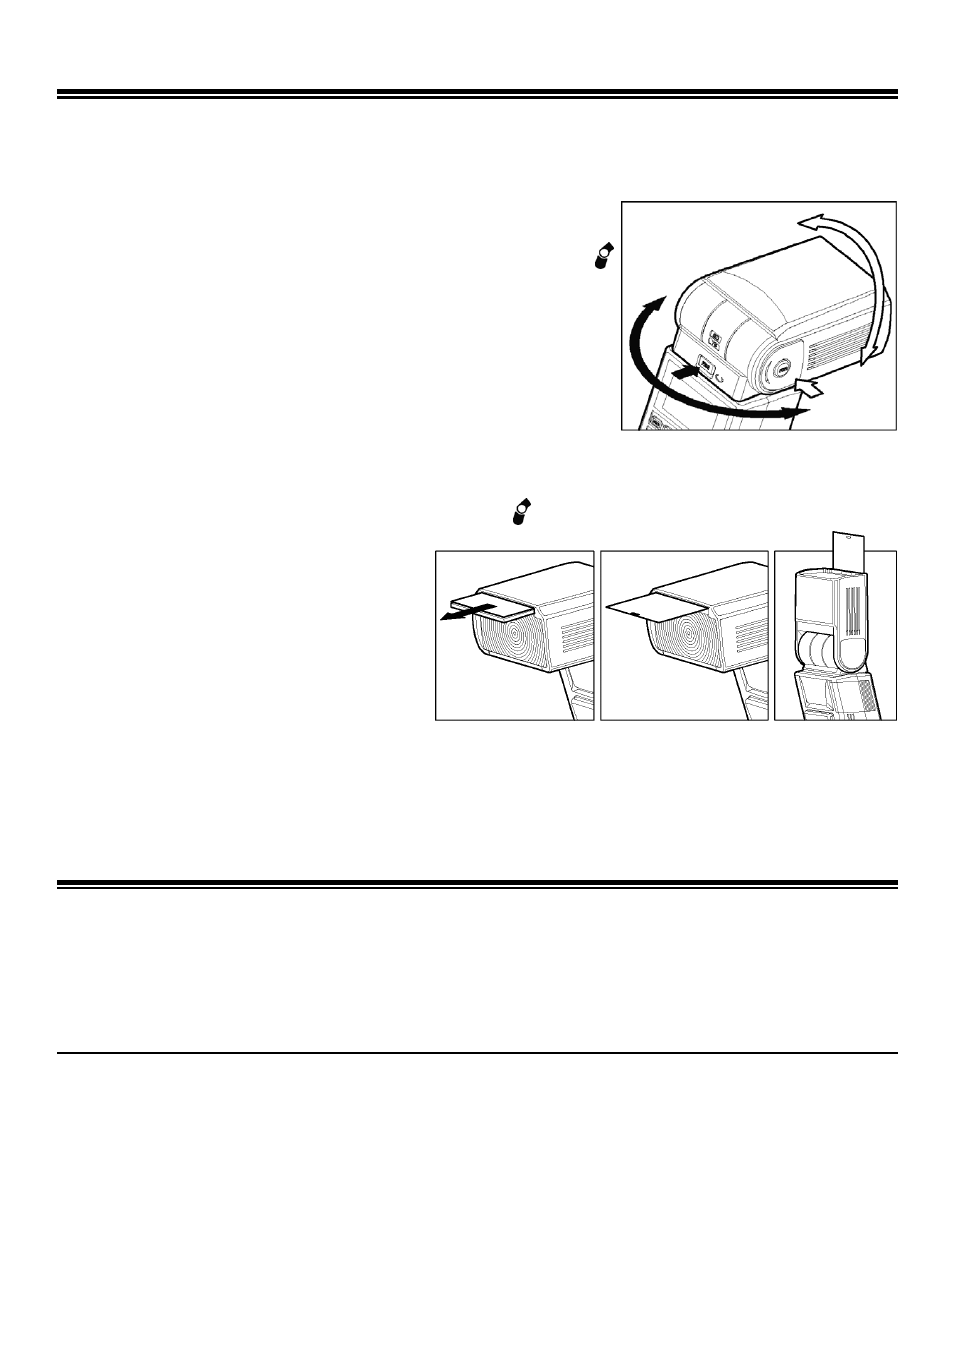
BOUNCE FLASH
When you take a photo with flash in a room, sometimes a strong shadow will appear behind the
subject, if you point the flash head upwards or sideways to reflect the light off the ceiling, wall etc. the
subject will be illuminated softly. Press the lock button and adjust the flash head to set the bounce
angle.
UP: 0°, 60°, 75°, 90°
DOWN: 0°,7°
RIGHT: 0°, 60°, 75°, 90°
LEFT: 0°, 60°, 75°,90°, 120°, 150°, 180°
When the bounce flash mode is activated, a bounce indicator
will appear on the LCD panel.
Choose a white surface for bouncing the flash, otherwise the
image’s colour may be incorrect.
Depending on the reflecting surface, the subject distance and other
factors, the effective distance range for the TTL AUTO may change.
Please check for correct exposure confirmation (TTL mark on the
LCD panel) after releasing the shutter.
CLOSE-UP EXPOSURES
Bounce flash can be tilted 7° downward for close-ups. The Flash will be effective only for the subjects
0.5 meter to 2 meters. When the flash head is tilted 7°,
will blink.
CATCH LIGHT PANEL
This flash is equipped with a built-in catch
light panel, which can create a catch light in
the eyes of the subject when the bounce
flash mode is activated. Slide out the wide
panel and catch light panel, and then put
wide panel back in its place. (Be careful to
slide the panels out smoothly.)
◆
To create a catch light effectively, tilt the flash head upward 90 degrees and take pictures at a close
distance.
WIRELESS FLASH
(Except SD9)
When using the “Wireless Flash” mode, you can take pictures with a more three-dimensional feeling,
or make natural images by using shadowing depending on the flash position. This can be done without
any extension cord connecting the camera body and flash. In case of the EF-610 DG SUPER,
communication between the camera body and the flash will be achieved by the light produced by the
flash. In the “Wireless Flash” mode, the camera will calculate the correct exposure automatically.
CONTROL SYSTEM CHANGE
Control System of “Wireless Flash” is different for each camera. First it is necessary to attach the flashgun to the
camera for activating the control system. If this operation is neglected, wireless function may not work when
flashgun is separated from the camera.
1.
Attach the flashgun to the camera and turn on the power switch of the flashgun and camera.
2.
Press the shutter button of camera halfway. (The camera and flashgun communicate and control
system will be switched automatically.)
3.
Turn off the power switch of the flashgun and camera.