SIGMA ELECTRONIC FLASH EF-610 DG SUPER SA-STTL (シグマ用) User Manual
Page 22
21
WHEN BUILT-IN FLASH IS USED (SA-7, SA-9 SD14 AND SD15)
1.
Press the MODE button to select the
mark.
2.
Press the SEL button to make the channel indicator blink.
3.
Press the + button or – button to set the channel.
4.
Press the SEL button to stop the indicator blinking.
5.
Place the EF-610 DG SUPER SA-STTL at the desired position.
■
Do not place the flash unit within the picture area.
■
Please be set the flash unit between 0.5m~5m (1.6 ~16ft) from the subject, and set the camera
body between 1m~5m (1.6~16ft) from the subject.
■
Be sure to set the camera’s flash mode to “Wireless Flash Mode”, and set the channel number on
the EF-610 DG SUPER SA-STTL Flash unit to the same channel number as that you set on the
camera. Otherwise, the EF-610 DG SUPER SA-STTL and your camera will not communicate with
each other and the EF-610 DG SUPER SA-STTL will not fire, when you take picture.
6.
Pop-up the camera’s built-in flash, and then after both flashes are fully charged, press the shutter
button to take the picture.
■
AF Auxiliary Light on the EF-610 DG SUPER SA-STTL will blink, when the flash unit charged and is
ready to fire.
■
The EF-610 DG SUPER SA-STTL will fire when the built-in flash fires. The camera’s built-in flash is
fired only to control the EF-610 DG SUPER SA-STTL only. The flash lighting of the subject is done
by the EF-610 DG SUPER SA-STTL. The camera will control the flash power level, as a TTL mode
flash, to Obtain correct exposure.
CAMERAS NOT EQUIPPED WITH BUILT-IN FLASH USED (SD10)
For Wireless flash two pieces of EF-610 DG SUPER SA-STTL will be necessary. In this instruction, we
call a flash unit, which is attached to the camera body “Master unit”, and we call a flash unit at a
remote position “Slave unit”.
Master unit Setting
1.
Attach the flash unit to the camera.
2.
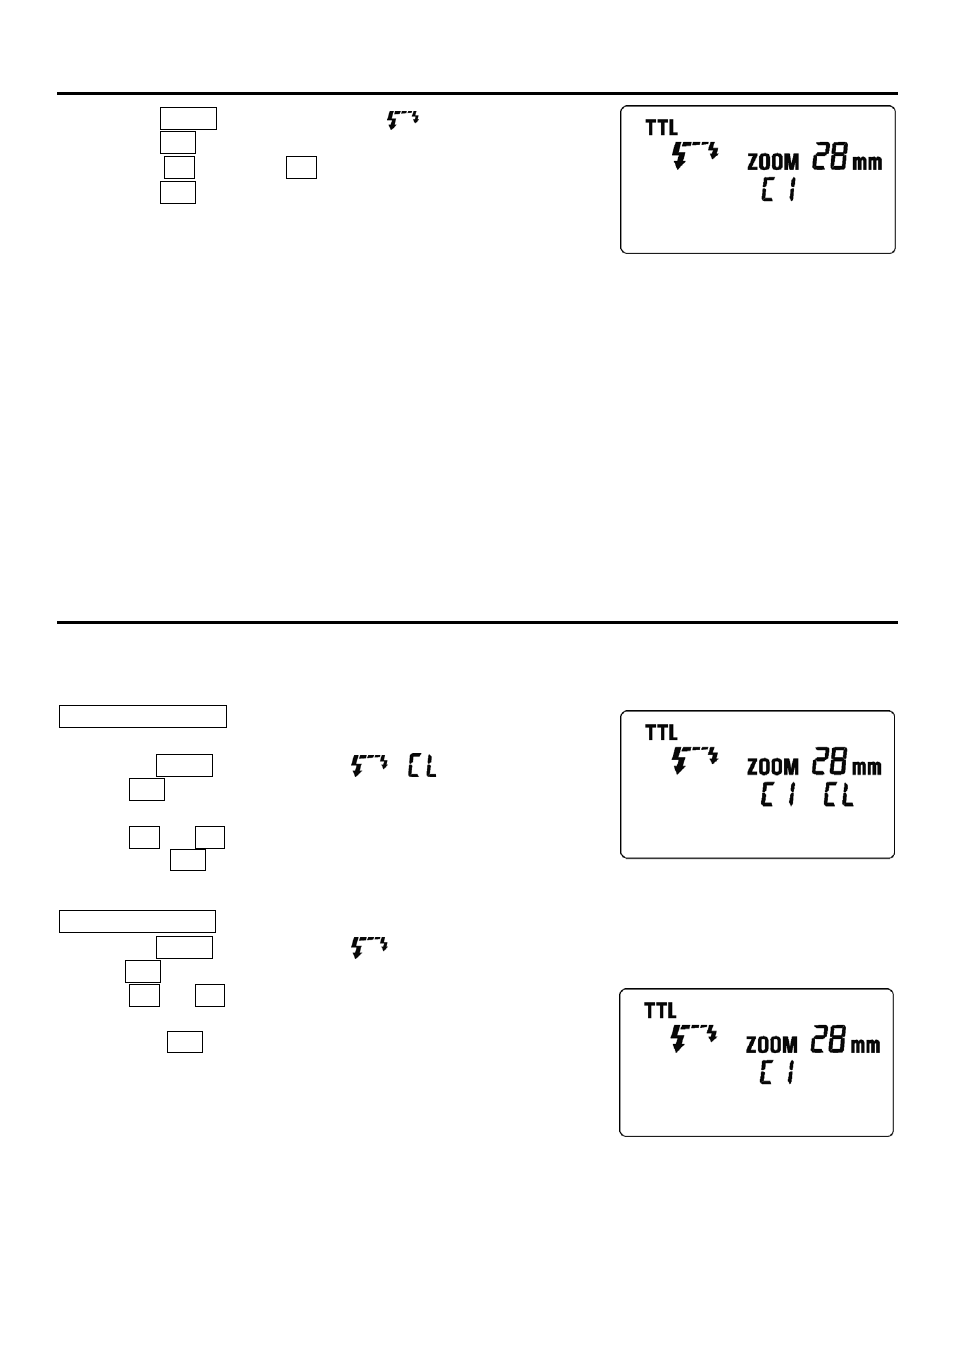
Press the MODE button to select
⁄
mark.
3.
Press SEL button, to make the channel indicator blink on the
display.
4.
Press + or – button to set the desired channel number.
5.
Press the SEL button several times until the display stops
blinking.
Slave unit Setting
6.
Press the MODE button to select
.
7.
Press SEL button, to make the channel indicator blink, on the display.
8.
Press + or – button to choose the same channel number
as set on the Master unit.
9.
Press the SEL button several times until the indicator stops
blinking.
10.
Place the Slave unit at the desired position.
11.
Check that both flashes are fully charged.
■
Ready light lamp will light, and the AF Auxiliary lamp will blink to
indicate that the flash is ready for shooting.
12.
Adjust the focus on the subject, and take the picture.
■
Master unit fires just for controlling the Slave unit, and does not influence photography.
■
When you set a slave unit at the desired position, you can use mini-stand. This mini-stand has a
screw hole for a tripod.