Mounting the switch on a workbench or on the floor, Installation preparation – H3C Technologies H3C S10500 Series Switches User Manual
Page 24
16
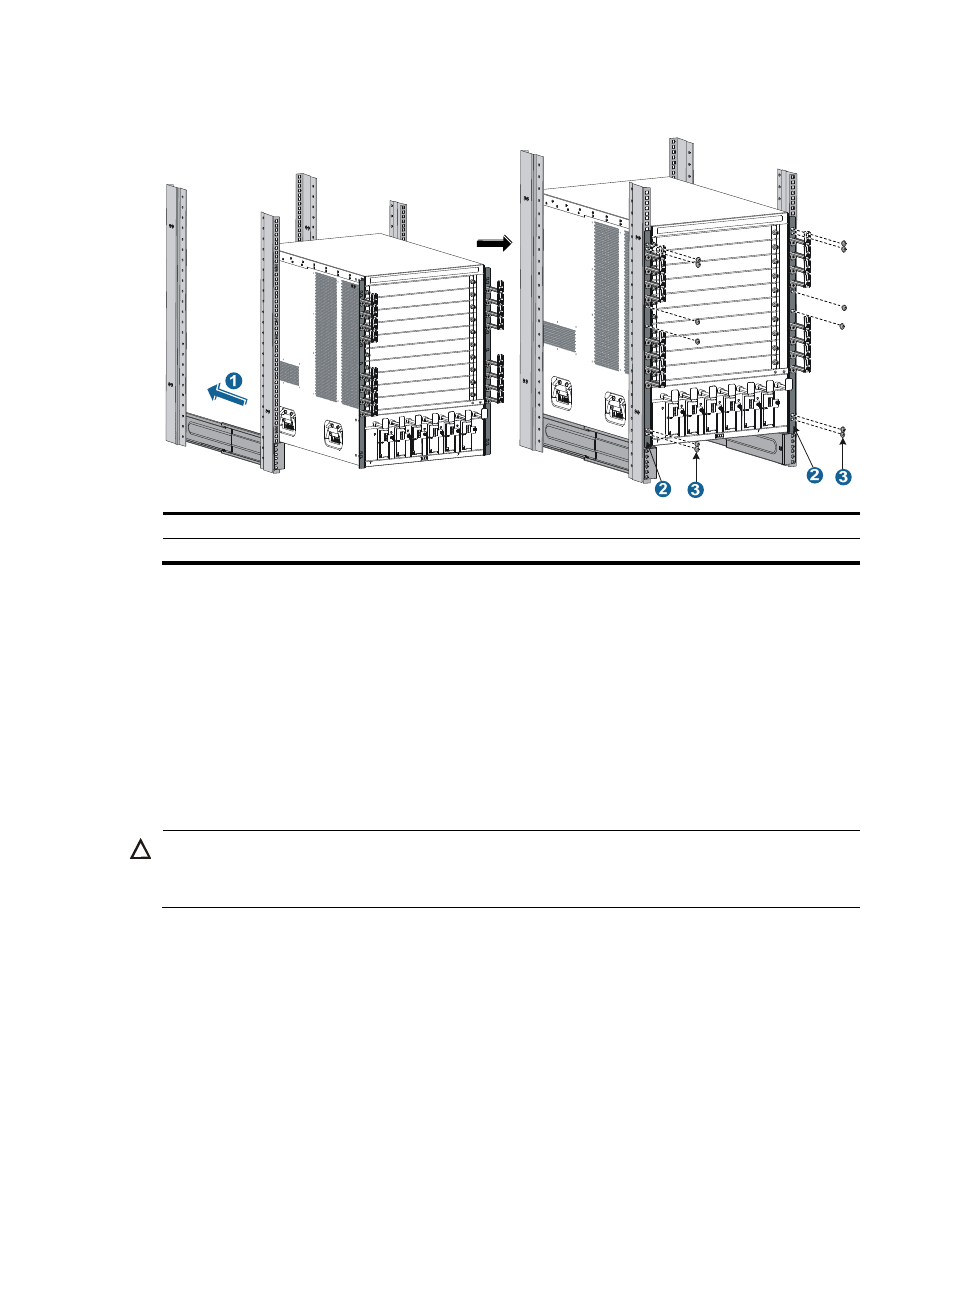
Figure 12 Installing the chassis to the rack (S10508)
(1) Slide the chassis into the rack
(2) Mounting brackets
(3) Screws for attaching the mounting brackets to the rack
If the mounting holes in the mounting brackets cannot align with the cage nuts on the rack, verify that the
bottom edge of the slide rail aligns with the middle of the narrower metal area between holes and that
the cage nuts are installed in the correct holes.
Mounting the switch on a workbench or on the floor
You can install the switch on a clean, sturdy workbench or on the floor.
Installation preparation
CAUTION:
Before you hammer the shank to the workbench or floor, insert the spade-shaped wedges into the grooves
on the shank. Otherwise, the wall anchor cannot be installed correctly.
Before you mount the switch on a workbench or on the floor, make the following preparations:
•
Position the installation holes and drill holes. Make sure the holes are exact in diameter and depth
in order for the anchors to work correctly.
•
Remove the shank and plug from a wall anchor, insert the spade-shaped wedges into the grooves
on the shank, put them into an installation hole, and hammer the shank into the ground. See
.