Installing cage nuts, Installing cable management brackets – H3C Technologies H3C SecPath M9000 Series User Manual
Page 18
10
6.
Repeat steps 4 and 5 to install the other slide rail. Make sure the two slide rails are at the same
height so that the gateway can be placed on them horizontally.
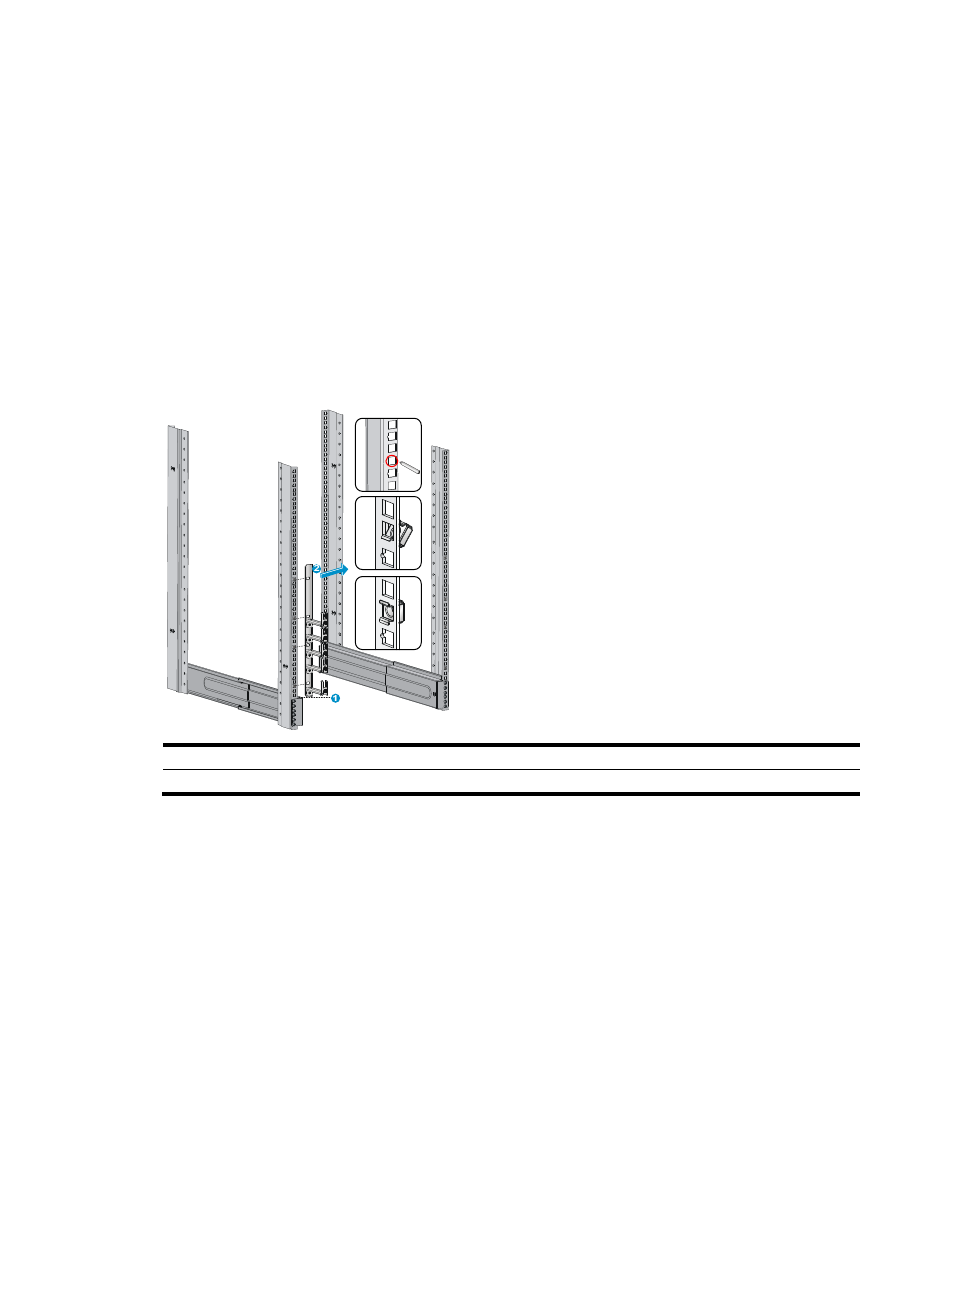
Installing cage nuts
1.
Place a mounting bracket parallel to a front rack post. Make sure the bottom edge of the mounting
bracket aligns with the weight-bearing surface of the slide rail.
2.
Determine and mark the placement of the cage nuts on the rack post according to the holes on the
mounting brackets. Each installation hole on the mounting bracket requires a cage nut.
3.
Install cage nuts on the square holes on the rack post.
4.
Repeat steps 1, 2, and 3 to install cage nuts on another front rack post.
Figure 7 Installing cage nuts on an M9006 gateway
(1) The bottom edge of the mounting bracket aligns with the weight-bearing surface of the slide rail
(2) Install the cage nuts
Attaching cable management brackets and
mounting brackets to the rack
Before installing the gateway to the rack, install the cable management brackets and mounting brackets
shipped with the gateway. Cable management brackets (signal cable and power cable management
brackets) are used for cabling the gateway, and mounting brackets are used for attaching the chassis to
the rack.
Installing cable management brackets
Install the signal cable management brackets separately for the M9010 gateway. M9006 and M9014
gateways come with the signal cable management brackets secured to the mounting brackets. In this step,
you only need to install the power cable management brackets for them.