Setting the input format for channel 4, Setting the output format for main output, O “setting the input format for channel 4 – Roland VR-4HD HD AV Mixer User Manual
Page 14: P. 14), O “setting the output format for main, Output” (p. 14), Video input/output settings
14
Video Input/Output Settings
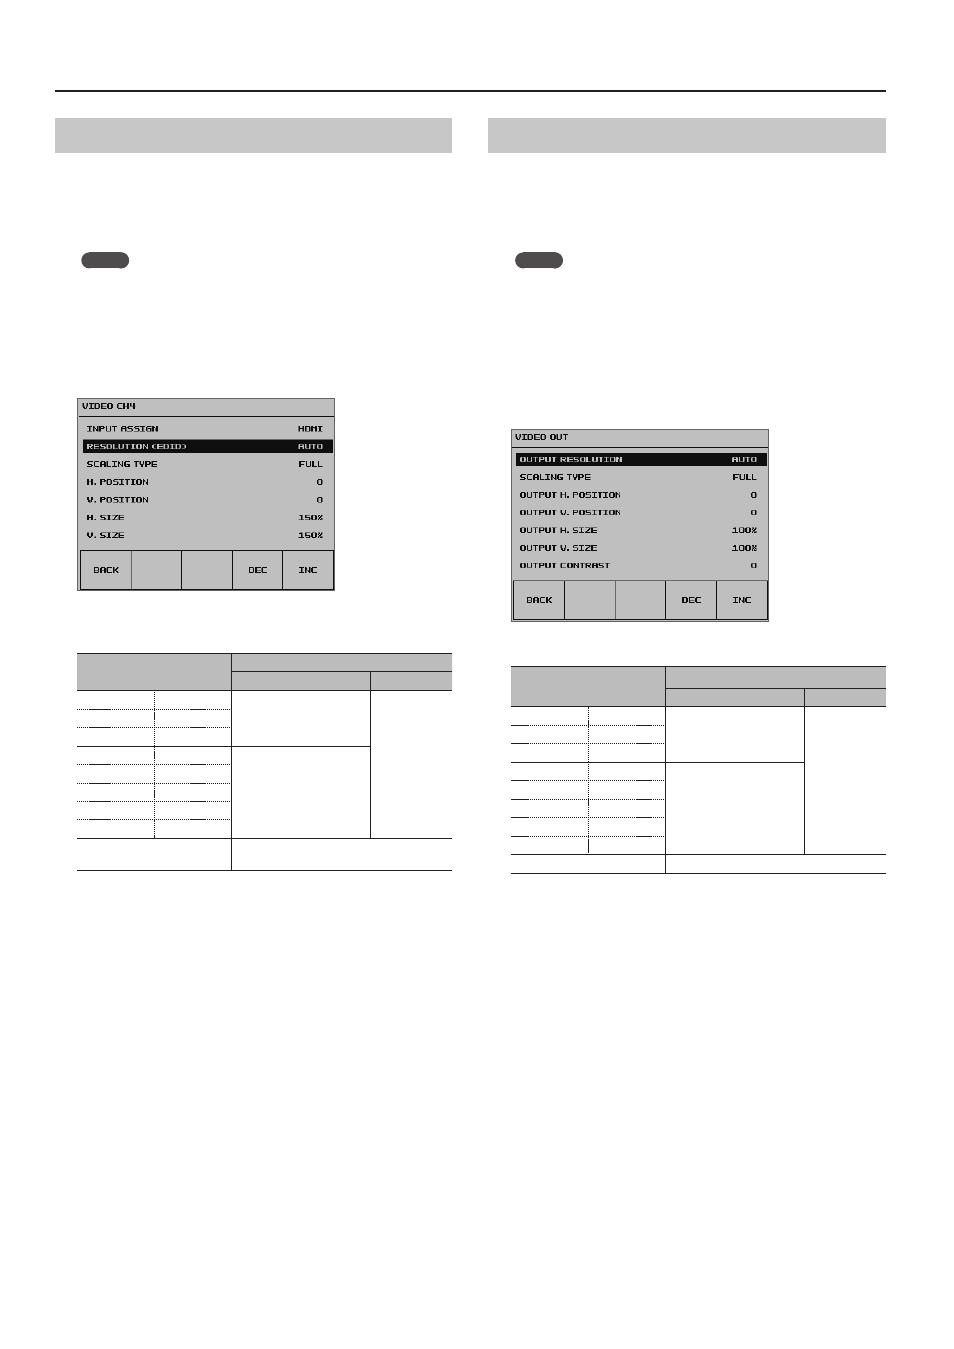
Setting the Input Format for Channel 4
By factory default, the EDID assignment for channel 4 is “AUTO” (set so
that EDID values of all inputtable formats are sent).
To specify an input format of your choice, change the setting of the
EDID information being sent so that it matches the incoming video
signal.
MEMO
5
EDID information is not sent during component signal input.
1.
Press the [SYSTEM SETUP] button to display the setup screen.
2.
Select <VIDEO CH4> to display the VIDEO CH4 menu.
3.
Select <RESOLUTION (EDID)>.
4.
Use the [VALUE] knob to set the input format (the EDID
information to send).
Value
Video signal that is input (channel 4)
RGB/COMPONENT
connector
HDMI
connector
480/576i
480/576p
Component
HDMI
720p
1080i
1080p
640 x 480
800 x 600
RGB
1024 x 768
1280 x 768
1280 x 1024
1366 x 768
1400 x 1050
1600 x 1200
1920 x 1200
AUTO
EDID information for all inputtable formats
is sent.
5.
Press the [VALUE] knob to apply the setting.
* The change is not applied unless you press the [VALUE] knob to
accept the setting.
6.
Press the [SYSTEM SETUP] button several times to quit the
setup screen.
Setting the Output Format for Main Output
By factory default, the format of video output via the HDMI OUT
connector and RGB/COMPONENT output connector is set to “AUTO”
(the same format as the system format on page 13).
To specify an output format of your choice, change the setting to
match the setting on the device receiving the output from the VR-4HD.
MEMO
5
Output video from the HDMI OUT and RGB/COMPONENT output
connectors all have the same video format. Selecting individual
video formats for these is not possible.
1.
Press the [SYSTEM SETUP] button to display the setup screen.
2.
Select <VIDEO OUT> to display the VIDEO OUT menu.
3.
Select <OUTPUT RESOLUTION>.
4.
Use the [VALUE] knob to set the output format.
Value
Video signal that is output
RGB/COMPONENT
connector
HDMI
connector
480/576i (*1)
480/576p
Component
HDMI
720p
1080i (*1)
1080p
640 x 480
800 x 600
RGB
1024 x 768
1280 x 768
1280 x 1024
1366 x 768
1400 x 1050
1600 x 1200
1920 x 1200
AUTO
Follows the system format setting (p. 13).
(*1) The “480/576i” and “1080i” formats are supported for HDMI output only.
When the setting is “480/576i” or “1080i,” no video is output from the RGB/
COMPONENT output connector.
5.
Press the [VALUE] knob to apply the setting.
* The change is not applied unless you press the [VALUE] knob to
accept the setting.
6.
Press the [SYSTEM SETUP] button several times to quit the
setup screen.