Audio operations, Adjusting the volume level of input audio, Adjusting input gain – Roland VR-4HD HD AV Mixer User Manual
Page 26: P. 26, Head amp gain (channels 1–4), Digital gain, Level meter and sig/peak indicator display
26
Audio Operations
Adjusting the Volume Level of Input Audio
You can adjust the input sensitivity, sound position, and volume balance of audio input to the VR-4HD.
Adjusting Input Gain
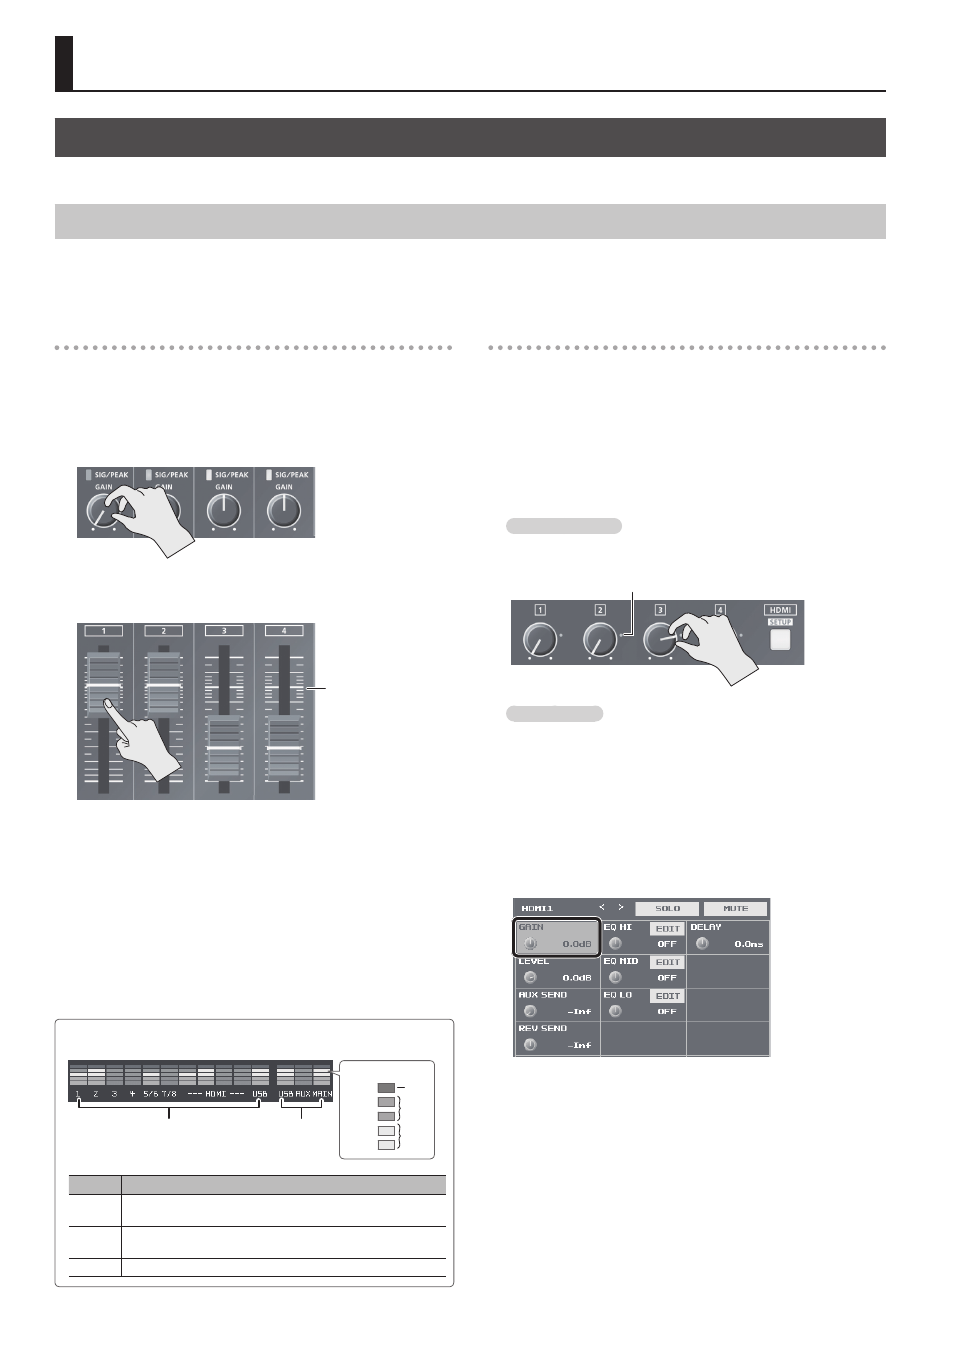
Adjust the input gain (head amp gain or digital gain) so that incoming audio signals are at appropriate levels.
* Head amp gain can be adjusted only for channels 1 through 4.
* Manipulate the knob or fader for the corresponding input connector.
Head Amp Gain (Channels 1–4)
You adjust the head amp gain so that incoming audio signals on
channels 1 through 4 are at appropriate levels.
1.
Turn the [GAIN] knob all the way counterclockwise to turn
down the input sensitivity.
2.
Move the channel fader to near the “Bold line” (0 dB—see
the figure below).
Bold line position (0 dB)
3.
Raise the [MAIN] fader to an appropriate position.
4.
Slowly turn the [GAIN] knob clockwise to adjust the input
gain.
Use the [GAIN] knob to gradually raise the input gain as you play
the actual incoming signal. Boost the input gain as high as possible
without making the SIG/PEAK indicator light up in red.
A level at which the level meter lights up in yellow is appropriate.
Digital Gain
Adjust the digital gain so that audio signals input via channels 1
through 7/8, HDMI 1 through 4, and USB are at appropriate levels.
* For channels 1 through 4, first adjust the head amp gain, and then
adjust the digital gain as needed.
1.
Move the volume knob or channel fader for the incoming
audio whose input gain you want to adjust to the position
shown below.
HDMI 1–4 and USB
Move the corresponding HDMI [1] to [4] knob or the [FROM PC] knob
to near the indicator (0 dB – see the figure below).
Indicator (0 dB)
Channels 1–7/8
Move the channel fader to near the “Bold line” (0 dB—see the figure
at left).
2.
Raise the [MAIN] fader to an appropriate position.
3.
Press the [SETUP] button for the incoming audio whose
input gain you want to adjust, making the setup screen
appear.
4.
Select <GAIN>, then turn the [VALUE] knob all the way
counterclockwise to lower the input gain completely.
5.
Slowly turn the [VALUE] knob clockwise to adjust the input
gain.
Use the [VALUE] knob to gradually raise the input gain as you play the
actual incoming signal. A level at which the level meter lights up in
yellow is appropriate.
6.
Press the [SETUP] button to quit the setup screen.
Level Meter and SIG/PEAK Indicator Display
Input audio
Output audio
Red
Yellow
Green
(dB)
-30
-18
-6
OVER
-48
Indicator Status
Red
This lights up at -3 dB or higher. It indicates an excessive volume
level.
Yellow
This lights up at -18 dB or higher. It indicates an appropriate volume
level.
Green
This lights up at -48 dB or higher. It indicates a too-low volume level.