Applying effects to main output audio, P. 29, Equalizer (eq) – Roland VR-4HD HD AV Mixer User Manual
Page 29: Multi-band compressor (mb comp), Limiter (limiter), Reverb (reverb), Audio operations
29
Audio Operations
Applying Effects to Main Output Audio
You can apply effects (Reverb, Equalizer, Limiter, and Multi-band Compressor) to main output audio to adjust its sound quality.
1.
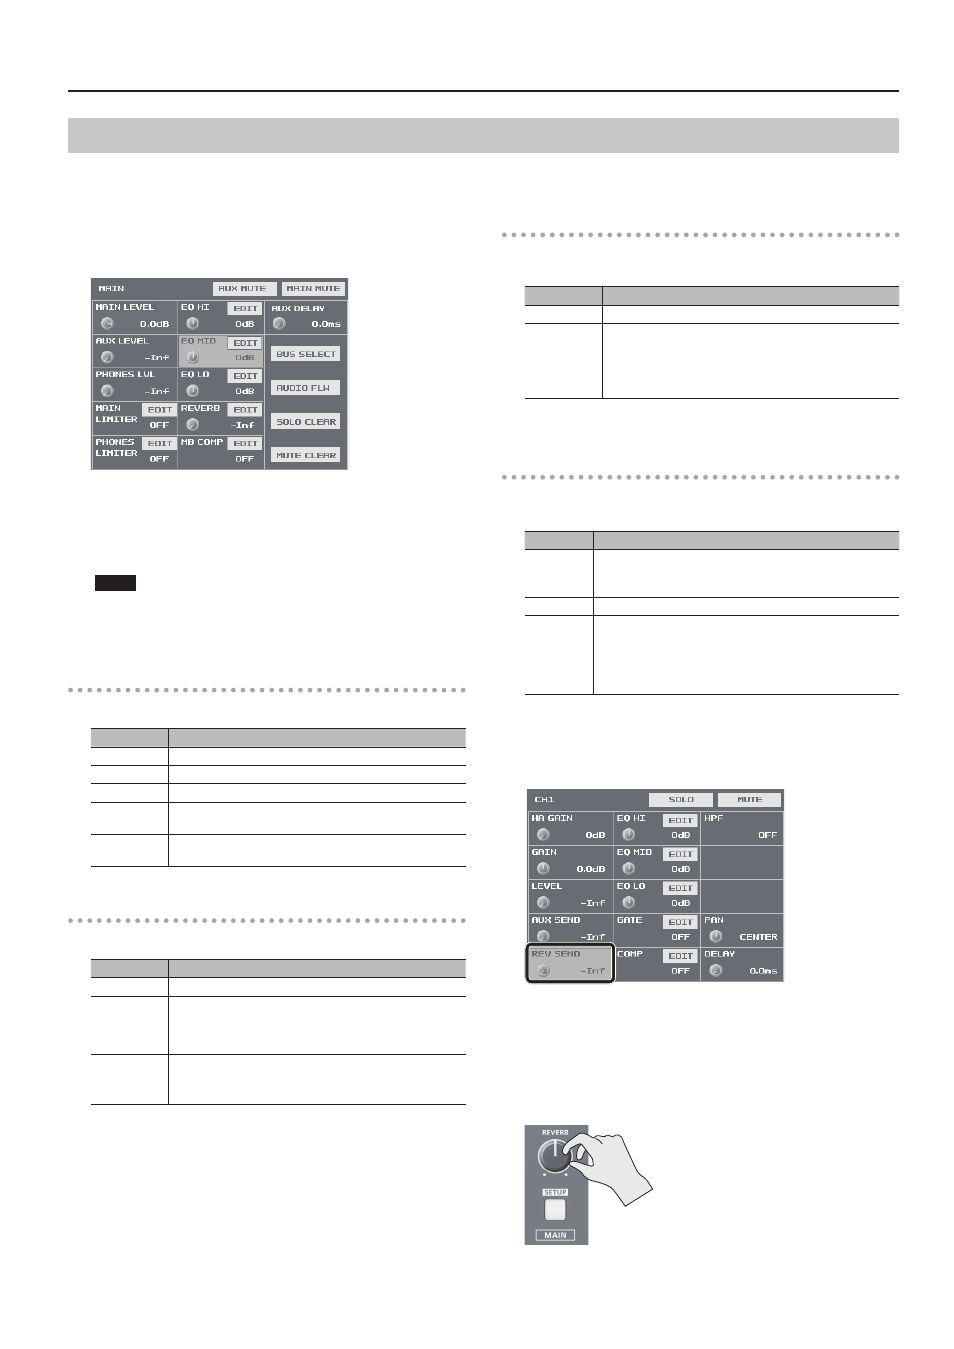
Press the MAIN [SETUP] button to display the setup screen.
2.
Select the setting item for the effect you want to use, then
use the [VALUE] knob to adjust the value.
5
Selecting <EDIT> displays a popup dialog box for detailed settings.
5
For more information about effects, refer to the following section.
3.
Press the MAIN [SETUP] button to quit the setup screen.
NOTE
5
When the popup dialog box for detailed settings is displayed,
on-screen setting values do not change when the [REVERB] knob,
[MAIN] fader or other controls are operated.
Equalizer (EQ)
This adjusts the sound quality for each frequency band.
Setting item
Explanation
EQ HI
This boosts or attenuates the high band.
EQ MID
This boosts or attenuates the middle band.
EQ LO
This boosts or attenuates the low band.
FREQ
(HI, MID, LO)
This adjusts the center frequency for changing sound quality.
Q (MID)
This adjusts the width of the frequency band when boosting
or attenuating the middle band.
Multi-band Compressor (MB COMP)
This applies separate compressors in individual frequency bands.
Setting item
Explanation
MB COMP
This switches the multi-band compressor on and off.
HI THRES
MID THRES
LO THRES
These set the individual levels that become the thresholds for
the high, midrange, and low bands at which the compressor
is applied. Compression is applied to audio that exceeds the
threshold.
HI RATIO
MID RATIO
LO RATIO
These set the amount of compression applied in the high,
midrange, and low bands. The state in which no compression
is applied is defined as “1.”
Limiter (LIMITER)
This compresses audio input that is too high, thereby preventing
distortion.
Setting item
Explanation
MAIN LIMITER This sets the limiter on or off.
THRESHOLD
This sets the level that becomes the threshold at which the
limiter is applied.
Compression is applied to audio that exceeds the threshold.
The volume level of audio that is output is limited so as to
stay to below the threshold.
* You can also make the setting for <PHONES LIMITER> to apply the limiter to
audio output to headphones.
Reverb (REVERB)
This adds lingering reverberations to the audio. You can apply reverb
to audio input via channels 1 through 7/8, HDMI 1 through 4, and USB.
Setting item Explanation
REVERB
This adjusts the return level from reverb of the audio.
* You can also use the [REVERB] knob on the top panel to adjust
this.
TIME
This adjusts the length of the reverb.
TYPE
This specifies the type of reverb (Room or Hall).
Room: Produces the natural reverberations of a highly
resonant room.
Hall:
Produces reverberations like that of a performance in a
concert hall or other such space.
1.
Press the [SETUP] button for the input audio to which you
want to apply reverb, making the setup screen appear.
2.
Select <REV SEND>, then use the [VALUE] knob to adjust
amount of audio sent to reverb.
You can set the send level of audio to Reverb for each separate input-
audio stream, which lets you adjust the degree of reverb individually.
3.
Turn the [REVERB] knob to adjust the return level of audio
from Reverb.
This adjusts the depth of overall reverb applied while maintaining the
balance in the degree of reverb applied to the individual input-audio
streams.
* Turning the [REVERB] knob all the way
counterclockwise results in no reverb applied.
4.
Press the [SETUP] button to quit the setup screen.