Adjusting the input video on channel 4, The pvw out connector/usb 3.0 port, P. 16 – Roland VR-4HD HD AV Mixer User Manual
Page 16: 16). y, Video input/output settings
16
Video Input/Output Settings
Adjusting the Input Video on Channel 4
For video input on channel 4, you can perform operations such as
adjusting the image quality and setting the input format (EDID).
1.
Press the [SYSTEM SETUP] button to display the setup screen.
2.
Select <VIDEO CH4> to display the VIDEO CH4 menu.
3.
Select the setting item.
Adjust the following setting items.
Setting item
Explanation
RESOLUTION (EDID)
This sets the input format (EDID).
g
“Setting the Input Format for Channel 4” (p. 14).
SCALING TYPE
This sets the scaling type.
H. POSITION
This adjusts the display position in the horizontal
direction.
V. POSITION
This adjusts the display position in the vertical direction.
H. SIZE
This adjusts the size in the horizontal direction.
V. SIZE
This adjusts the size in the vertical direction.
CONTRAST
This adjusts the contrast.
SATURATION
This adjusts the saturation.
BRIGHTNESS
This adjusts the brightness.
FLICK FILTER
This reduces flicker.
4.
Use the [VALUE] knob to adjust the input video on channel 4.
5.
Press the [SYSTEM SETUP] button several times to quit the
setup screen.
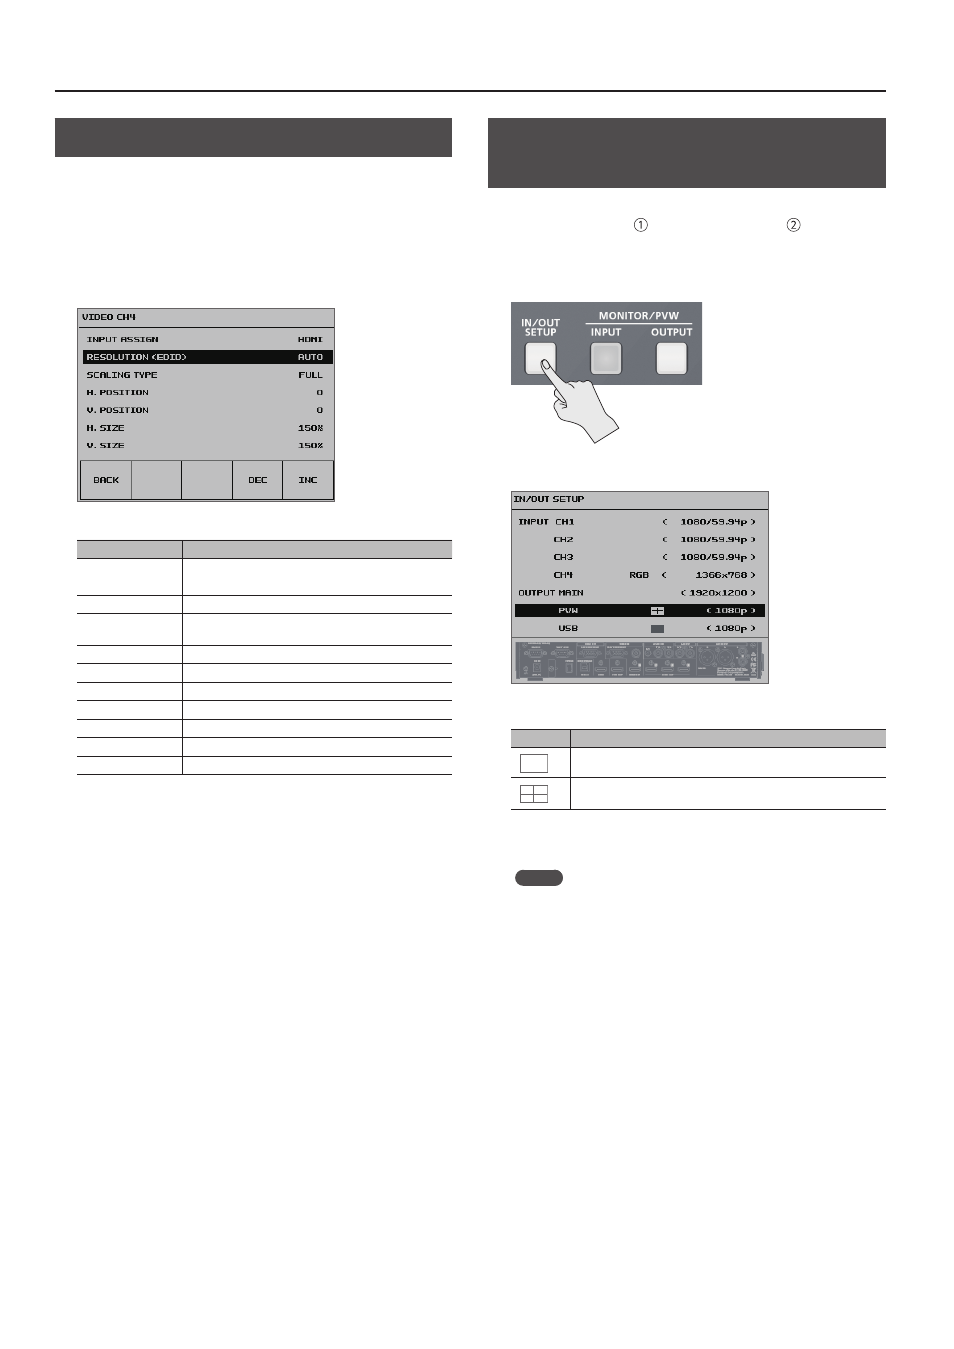
Specifying the Video Output from the
PVW OUT Connector/USB 3.0 Port
For the PVW OUT connector and USB 3.0 port, you can set the video
that is output to either the main output video or the incoming
video for four-way split screen (channels 1 through 4).
1.
Press the [IN/OUT SETUP] button to display the setup screen.
2.
Select <PVW> or <USB>.
3.
Use the [VALUE] knob to set the output video.
Value
Explanation
The main output video is output.
The incoming video on channels 1 through 4 is output as a four-
way split screen.
4.
Press the [IN/OUT SETUP] button to quit the setup screen.
MEMO
5
When you use the [INPUT] or [OUTPUT] button to switch the view
mode for preview output, the “PVW” setting also changes.
Using the panel lock feature (p. 39) lets you lock the buttons to
prevent accidental operation.