Freezing input video (freeze), Capturing a still image from input video, P. 20 – Roland VR-4HD HD AV Mixer User Manual
Page 20: Setting the freeze mode, Freezing input video, Capturing a still image, Outputting a still image, Video operations
20
Video Operations
Freezing Input Video (Freeze)
This temporarily pauses the incoming video.
When you are changing the connections between two computers
during output, freezing the output before disconnecting the first
computer and then ending the freeze after connecting the second
computer makes it possible to change the connections without
creating noise in the output.
Setting the Freeze Mode
Two operation modes are available for freezes: the “ALL mode” and the
“SELECT mode.”
By factory default, this is set to “ALL” (freeze all incoming video).
If you want to select the input video to freeze, use the [SYSTEM SETUP]
button
g
<SYSTEM>
g
<FREEZE MODE> to set the value to “SELECT.”
Freezing Input Video
When the Freeze Mode Is Set to “ALL”
1.
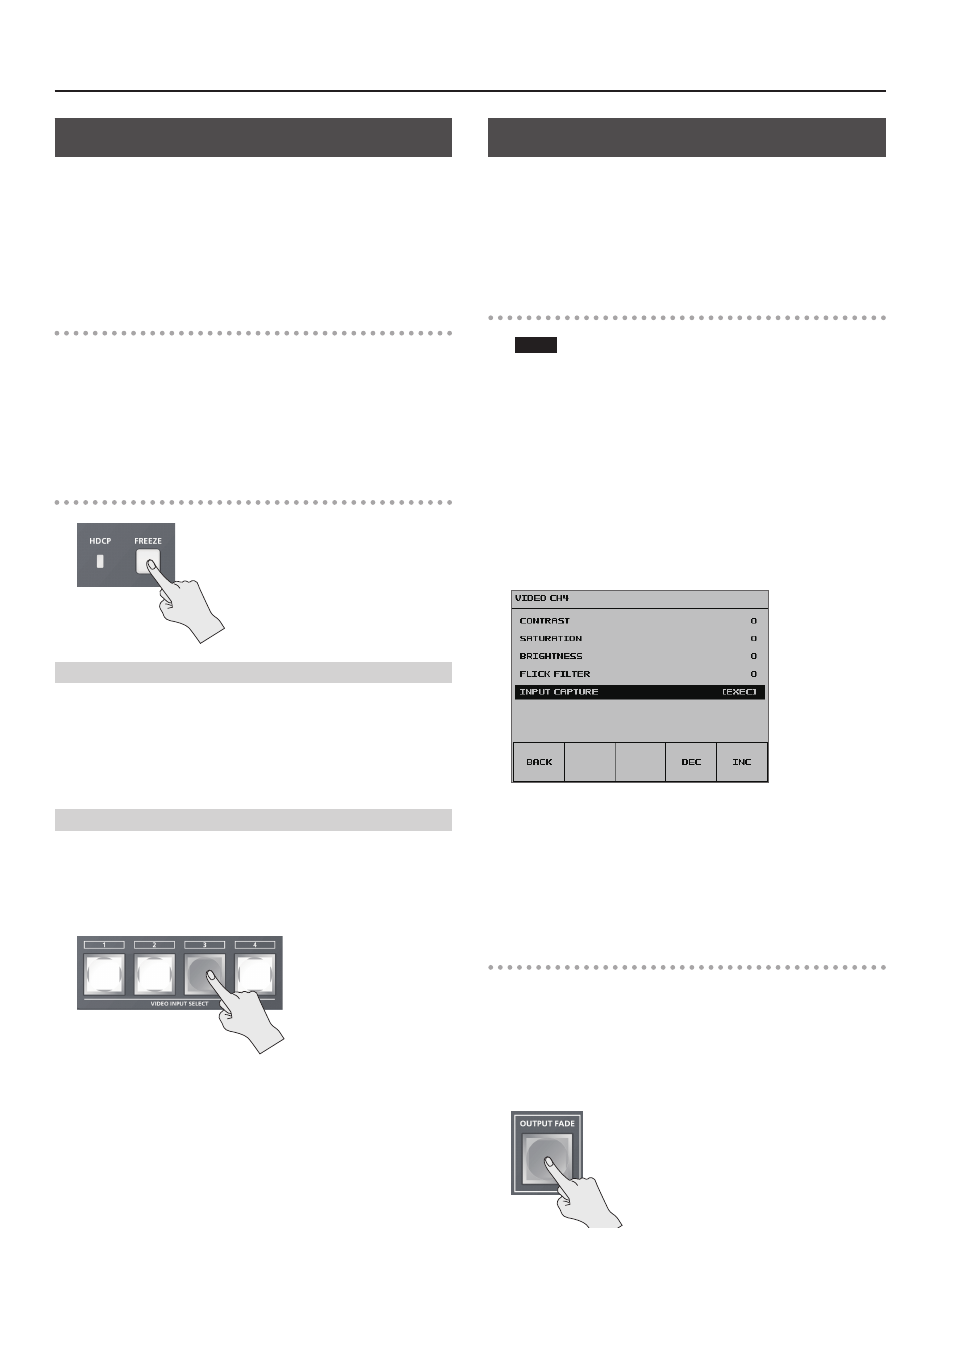
Press the [FREEZE] button to turn on freeze (lighted).
All video that is input freezes.
2.
To turn off freeze, press the [FREEZE] button a second time.
The [FREEZE] button goes dark and normal output is resumed.
When the Freeze Mode Is Set to “SELECT”
1.
Press the [FREEZE] button to turn on freeze (flashing).
The VIDEO INPUT SELECT [1] through [4] buttons all flash in red.
2.
Press one of the VIDEO INPUT SELECT [1] through [4]
buttons to select the incoming video you want to freeze.
The selected input video freezes.
3.
To turn off freeze, press the [FREEZE] button a second time.
The [FREEZE] button goes dark and normal output is resumed.
Capturing a Still Image from Input Video
You can capture still images from input video on channel 4. In addition
to being able to output captured still images in the same way as video,
you can also use them as a source for key compositing (p. 24).
* You can also use VR-4HD RCS dedicated software to send still
images from a computer to the VR-4HD.
Capturing a Still Image
NOTE
5
Either the captured still image or the still image sent from VR-4HD
RCS is temporarily stored in the unit.
If a new still image is captured or is sent from VR-4HD RCS while
a still image is already saved, the previously saved still image is
overwritten. Also, still-image data is deleted when the power is
turned off.
1.
Input video on channel 4.
2.
Press the [SYSTEM SETUP] button to display the setup screen.
3.
Select <VIDEO CH4> to display the VIDEO CH4 menu.
4.
Select <INPUT CAPTURE>.
5.
Check the message and select <OK>.
(If you want to quit, select <CANCEL>.)
Capturing is carried out, and the message “COMPLETE!” is displayed.
6.
Press the [SYSTEM SETUP] button several times to quit the
setup screen.
Outputting a Still Image
1.
Change the functioning of the [OUTPUT FADE] button.
Use the [SYSTEM SETUP] button
g
<VIDEO OUT>
g
<OUTPUT FADE>
to set the value to “STILL.”
This makes the [OUTPUT FADE] button function as a still-image output
button.
2.
Press the [OUTPUT FADE] button.
* When you output a still image, the change
is made using a cut, regardless of the
transition-effect selection.
* All output goes dark momentarily during the
change, but this is not a malfunction.
The still image is output from the VR-4HD.
3.
To return from still-image output to video output, press the
[OUTPUT FADE] button once more.