Xtramus NuTAP-S61 V1.2 User Manual
Page 8
8
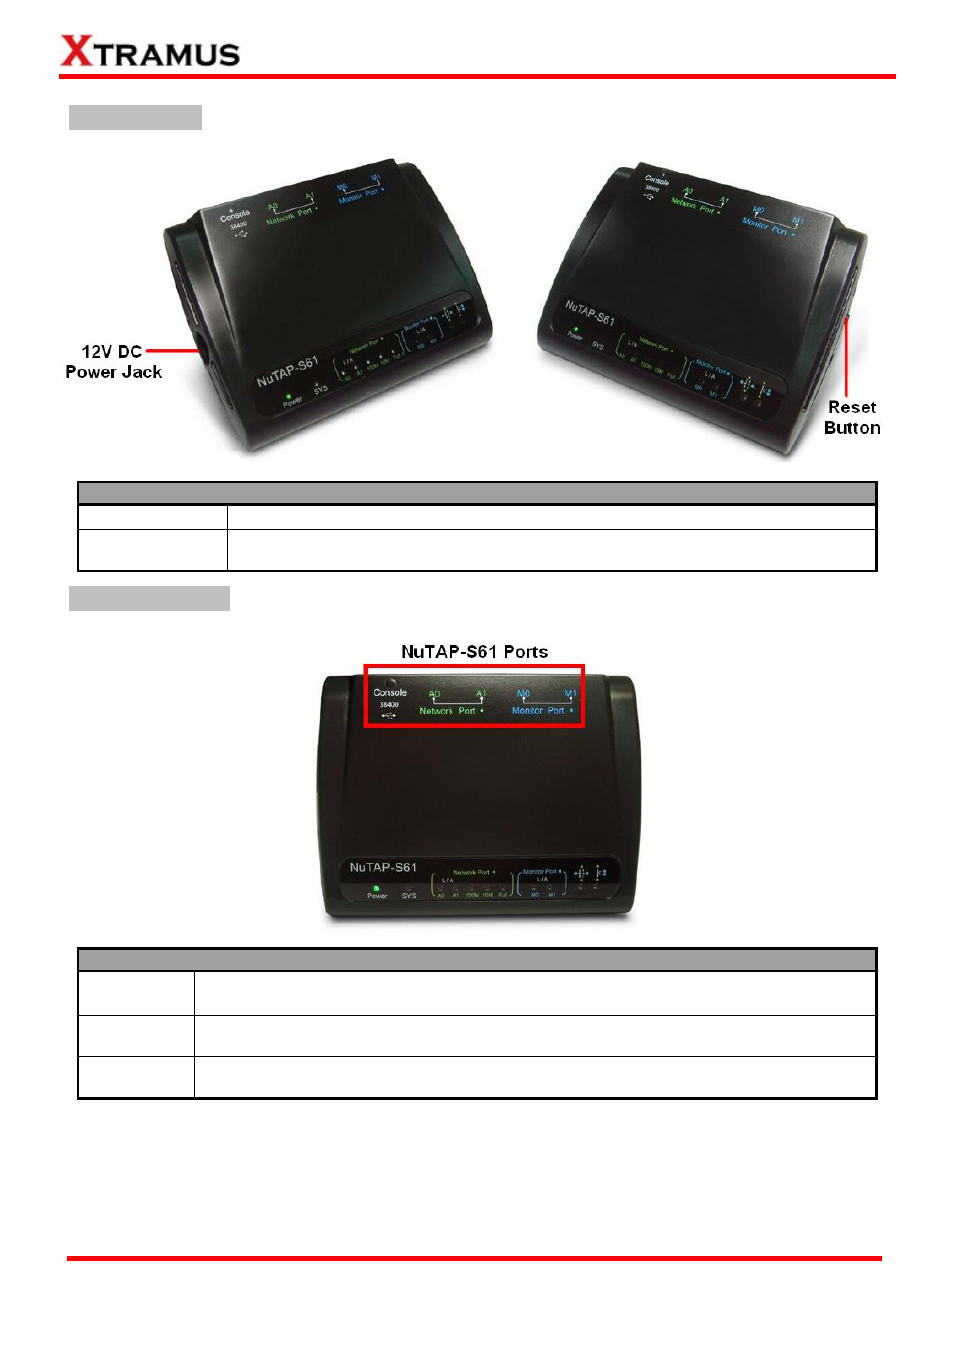
Left/Right Panel
Description – Left Panel Power Jack
Power Jack
12V DC Power Jack × 1
Reset Button
To reset NuTAP-S61’s settings to default value, please press and hold the Reset
Button for 4 seconds. NuTAP-S61 will reset all settings to default after a long beep.
Back Panel & Ports
Description – Back Panel & Ports
Console Port
UTP Port for Firmware/FPGA Upgrading, Configuration Setting, and NuTAP-S61 Power
Supply*.
Network Port
A0/A1
These two 10/100 Mbps Full Ethernet UTP Network Ports can transmit/receive test
packets generated by NuTAP-S61.
Monitor Port
M0/M1
These two 10/100 Mbps Full Ethernet UTP Monitor Ports can monitor/capture test
packets transmitted from Network Ports.
*Note: When using Console Port as NuTAP-S61’s power source, please use the RJ45-to-USB cable that comes
with NuTAP-S61 package. Extending the length of RJ45-to-USB cable might cause NuTAP-S61 power insufficient.
E-mail: [email protected]
Website: www.Xtramus.com
XTRAMUS TECHNOLOGIES
®