Maintenance – Beisler 1911-4 User Manual
Page 42
Short Seam Automat 1911-4 / 1912-4 Working Instructions
- C 42 -
Beisler Automated Sewing Equipment
Fig. 9
C.5
Maintenance
C.5.4 Repairs
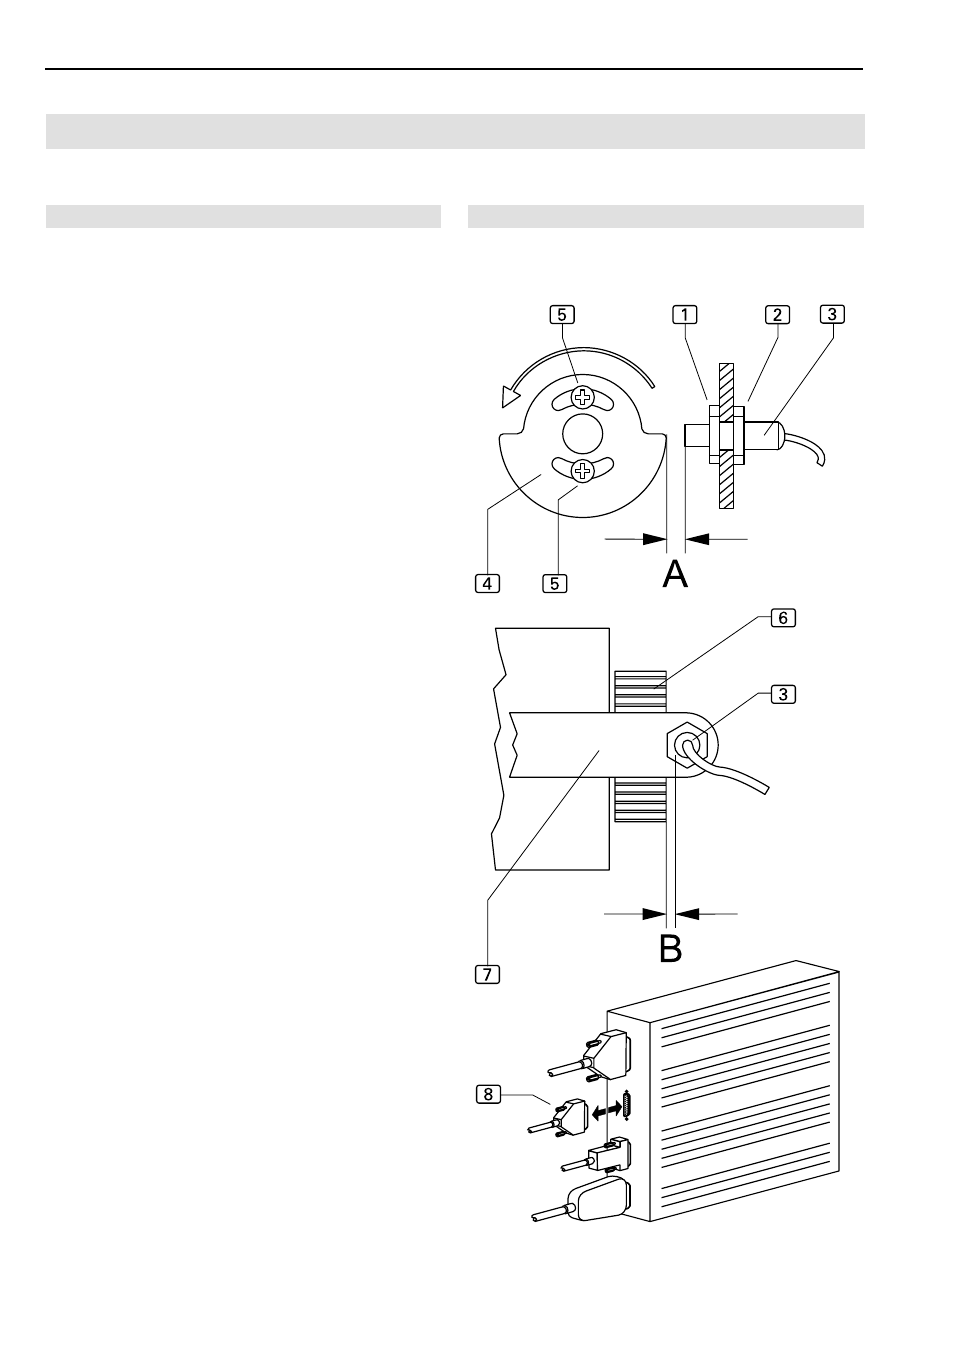
Switch curve and initiator replacement:
To allow activation of the reversing device of the sewing
drive, the toothed disk of the sewing drive must have a
switch curve installed at a certain distance to an initiator
(24 V PNP two-wire version).
Initiator removal:
1. Disconnect machine from power supply system.
2. Disconnect initiator connecting line connector
8 from
receptacle of sewing motor control unit. The sewing
motor control unit is located at the lower storage shelf
of the worktable.
3. Remove lock nut
2 and rotate initiator out of the guide
nut
1 of the holder 7.
Initiator installation:
1. Install lock nut
2 to initiator and install initiator into
guide nut
1 of holder 7.
2. Remove retaining screws
5 from switch curve 4 on
toothed disk
6; do not remove switch curve screws.
3. Install initiator
3 at distance A of 1 mm from switch
curve. Rotate initiator into position in guide nut
1 and
secure it using lock nut
2. The distance B between
toothed disk
6 and initiator 3 must be 0.5 mm.
4. Connect initiator connecting line connector
8 to re-
ceptacle of sewing motor control unit.
Switch curve adjustment:
1. Turn machine on.
2. Rotate sewing head handwheel in direction of machine
rotation until the thread lever reaches the highest point
(pinning position C).
3. Then, rotate sewing head handwheel in counterdirec-
tion until the first pinning position B is reached.
4. Block handwheel by depressing pinning pin of hole at
position B to the left of handwheel.
5. Rotate switch curve until initiator receives switch contact
in direction of rotation exactly at switch curve.
6. Secure switch curve using two retaining screws
5.
Fig. 9