Maintenance – Beisler 1911-4 User Manual
Page 44
Short Seam Automat 1911-4 / 1912-4 Working Instructions
- C 44 -
Beisler Automated Sewing Equipment
C.5
Maintenance
C.5.5 Machine set-up
NOTE - Activating inputs/outputs!
To allow for testing machine movements or interval ope-
ration, the individual stages of movement can be activa-
ted with the inputs/outputs of the machine control unit (see
programming instructions, Section D.4.3., Service menu
level 1).
Usually, the setting up of the machine is controlled by
parameter values of the sewing programs (special para-
meters) and the parameter values of the machine control
unit (global parameters). The following mechanical chan-
ges may be required additionally to ensure correct seams
with the set parameter values.
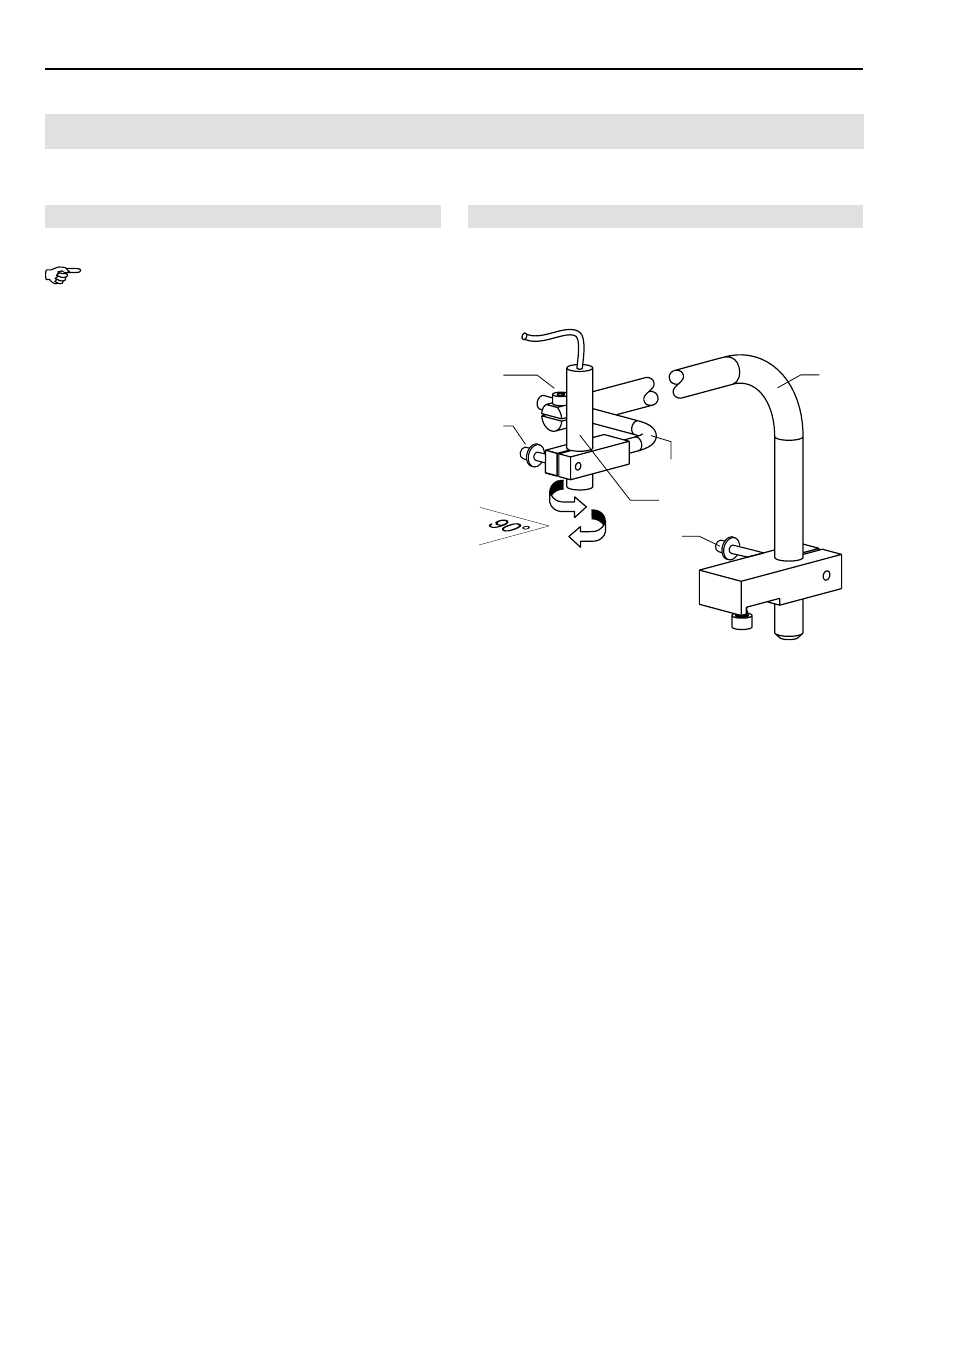
Guide laser adjustment:
The guide laser marks the line-up position of simple la-
bels on the pocket edge. The position of the guide laser
can be adjusted vertically and horizontally.
Adjusting the bracket height:
1. Loosen retaining screw
4 at rear of worktable.
2. Position laser light bracket
3 in the desired height.
3. Tighten retaining screw
4.
Vertical adjustment for tilting the laser light into the desi-
red position:
1. Loosen lock screw
2.
2. Rotate laser light angular bracket
6 to desired posi-
tion.
3. Tighten lock screw
2.
Horizontal adjustment for achieving a 90° angle to the stop
rail:
1. Loosen lock screw
1.
2. Rotate laser light
5 to desired position.
3. Tighten lock screw
1.
Fig. 11
Fig. 11
2
1
4
5
6
3