Maintenance – Beisler 1911-4 User Manual
Page 47
- C 47 -
Short Seam Automat 1911-4 / 1912-4 Working Instructions
Beisler Automated Sewing Equipment
C.5
Maintenance
C.5.5 Machine set-up
Changing the stitch width:
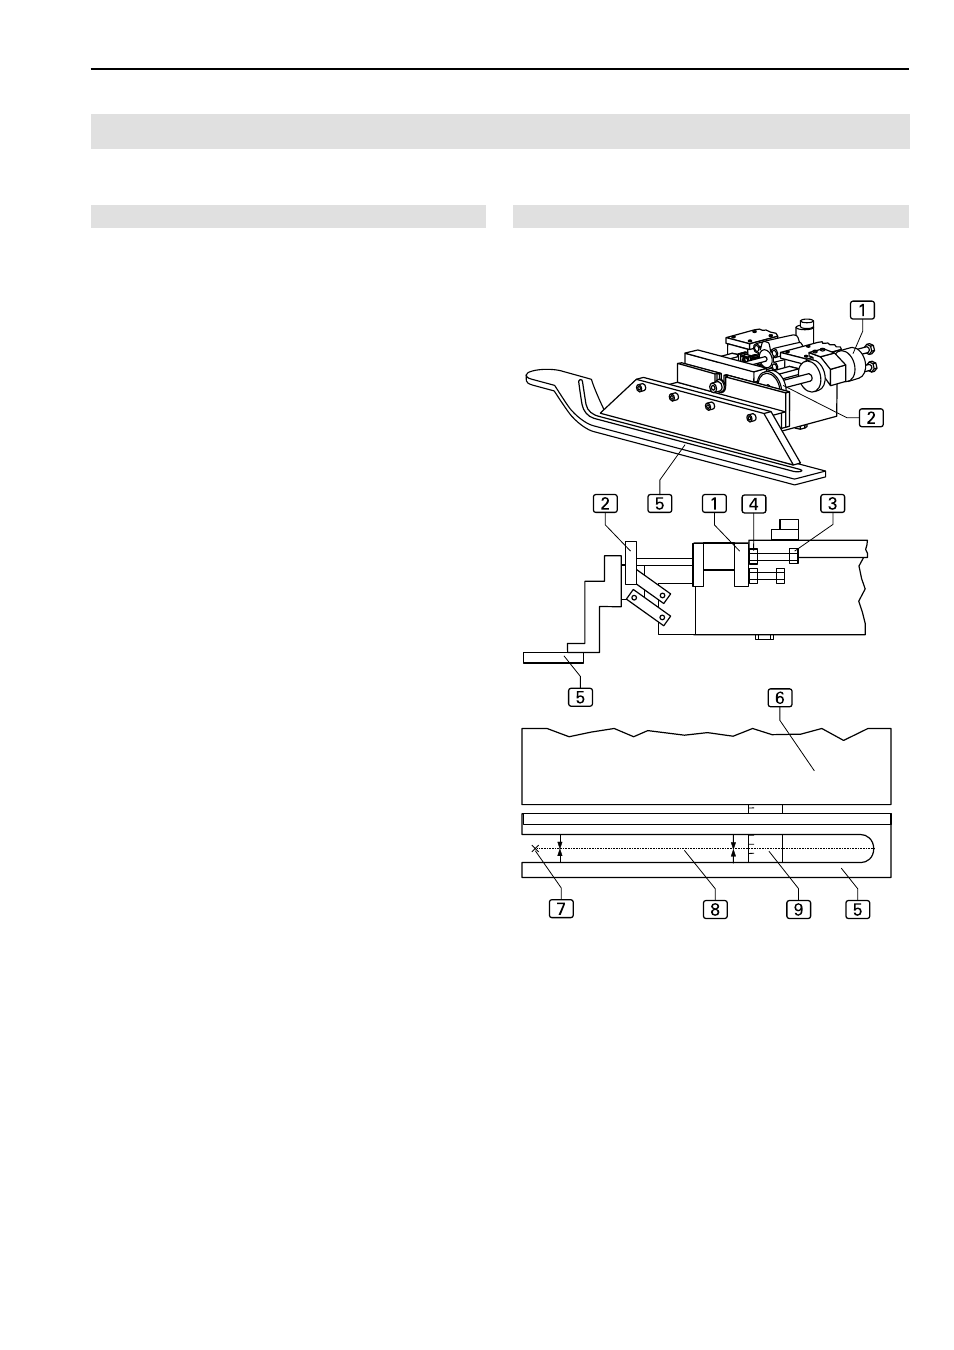
Fig. 15: The correct stitch width setting is determined by
trial and error. It can be set to any value between 29 and
40 mm by changing the stop
1 at the right side of the
main clamp.
1. Disconnect machine from power supply.
2. Using the handwheel
2, select the number of the
seam whose width is to be set.
3. Lining up a ruler
9 or a measuring tape to the stop 6.
Lower main clamp.
4. Set stop screw
3 of selected seam to stitch width by
loosening lock nut
4 and rotating stop screw to desi-
red length. The overall length of the stop screw corre-
sponds with the stitch width of the seam.
Set the stitch width so that the distance between the
stop
6 and the needle 7 is measured from the cen-
ter of the milling
8 of the clamp rail 5.
5. Tighten lock nut
4 and recheck stitch width at sewing
piece.
Fig. 14/15
Fig. 15