Maintenance – Beisler 1911-4 User Manual
Page 48
Short Seam Automat 1911-4 / 1912-4 Working Instructions
- C 48 -
Beisler Automated Sewing Equipment
C.5
Maintenance
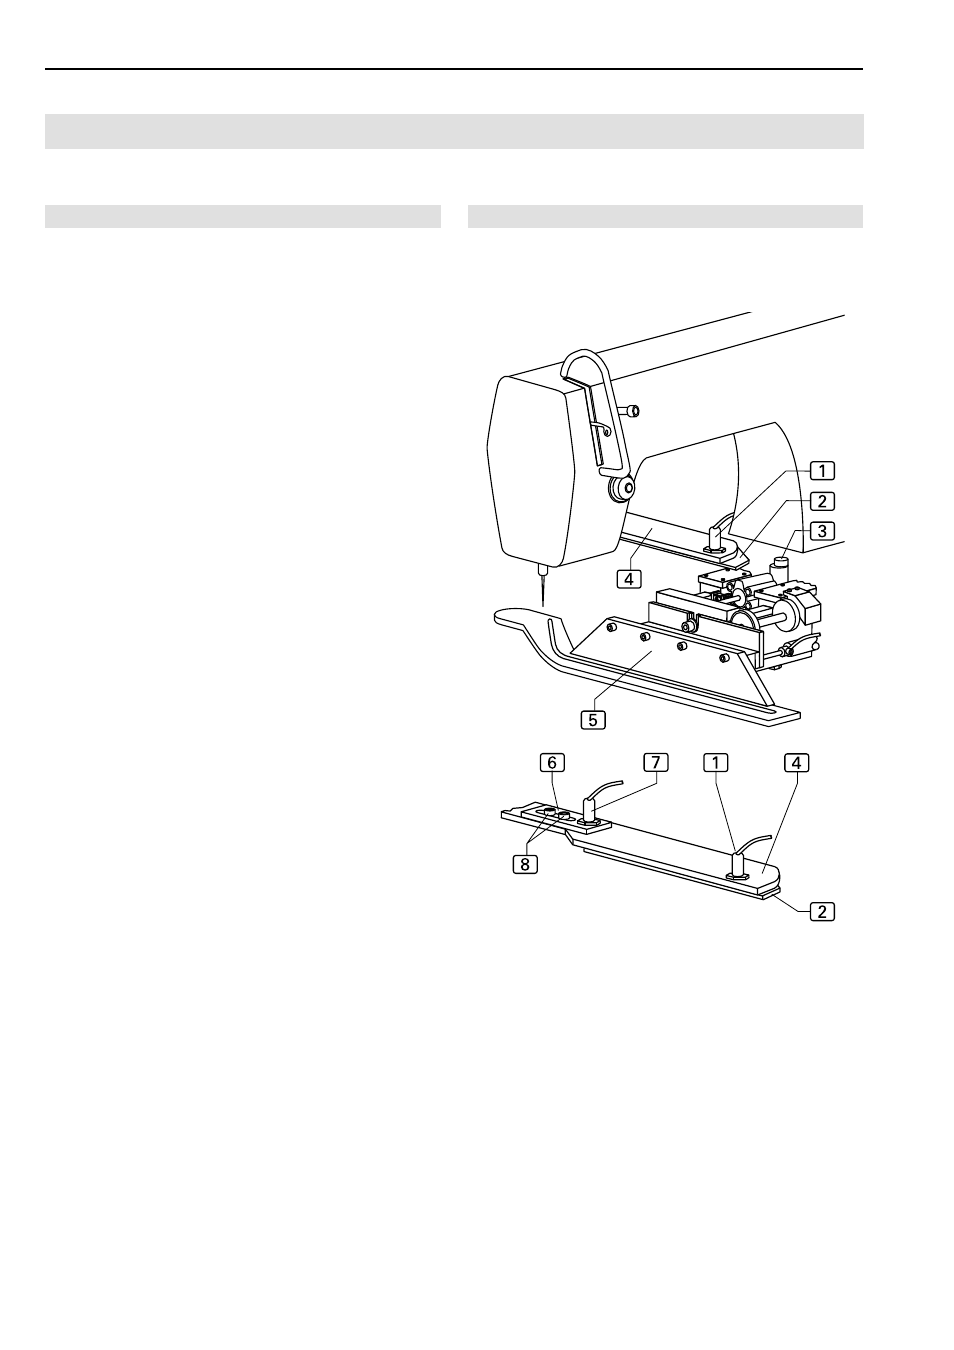
C.5.5 Machine set-up
Setting the synchronization of the clamp rail and
the needle:
The synchronization of the clamp rail and the needle is
determined by three switching settings.
•
When the main clamp
5 approaches the control curve
4, the driver roller 3 repositions the switch tag 2
during this movement.
•
The switch tag activates the initiator
1 which redu-
ces the main clamp traveling speed to the preset va-
lue.
•
If the switch tag is completely shifted against the control
curve, the initiator
7 which starts the sewing process
is activated.
Setting procedure:
1. Lower main clamp.
2. Depressurize machine by disconnecting the compres-
sed air hose of the machine from the on-site compres-
sed air supply system.
3. Move main clamp manually under sewing head.
4. Fig. 16: Check contact point of initiator
1. While the
switch tag
2 is not in contact with the pin 3, the in-
itiator must not be in contact (indicator must not light).
If the initiator has permanent contact, loosen initiator
lock nut and unscrew initiator to switch-off point, then
tighten lock nut.
5. Push switch tag
2 to control curve 4 until it reaches
the stop. If switch tag and control curve are flush, the
initiator
5 must have contact (indicator lights).
6. If the initiator does not have contact when the switch
tag
2 is in this position or if the initiator is activated
when the switch tag is in a different position, change
the position of the slide
6.
7. Loosen the two lock screws of the slide and move the
slide with the initiator to the exact contact point.
8. Tighten the two lock screws
4.
Fig. 16
Fig. 16