4 valve setup, 1 close direction, 2 close seating – Flowserve MX Electronic Actuator User Manual
Page 43: 3 open seating, Figure 4.5 – new password
43
Limitorque MX Electronic Actuator FCD LMENIM2306-06 – 10/13
flowserve.com
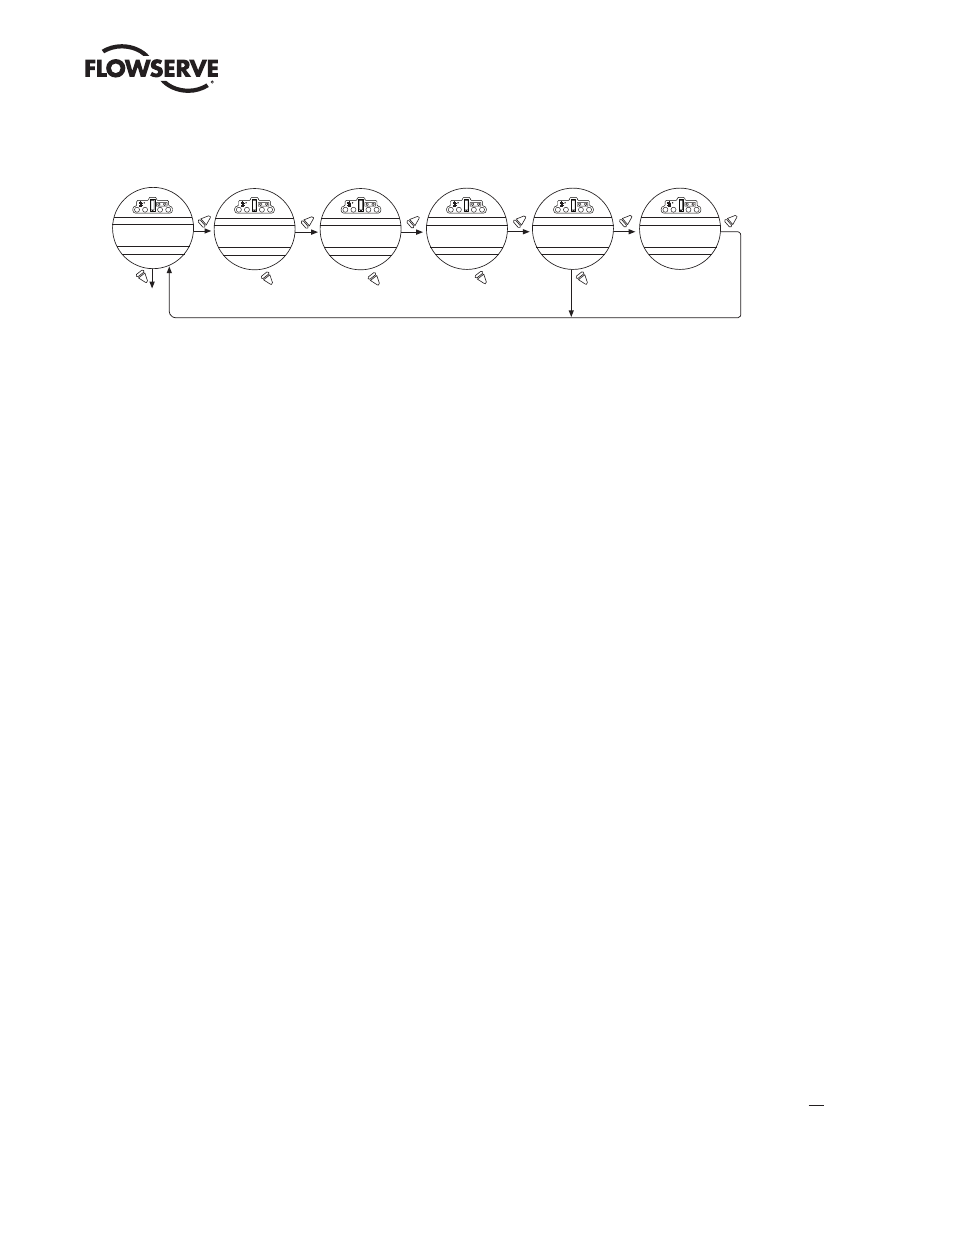
Figure 4.5 – New password
Digit 1 will be
in parentheses;
“
NO ” alters
digit 1
Digit 2 will be
in parentheses;
“
NO ” alters
digit 2
Digit 3 will be
in parentheses;
“
NO ” alters
digit 3
CHANGE
PASSWORD
PASSWORD IS (0)0 0
DIGIT 1-OK?
PASSWORD IS 4(0) 0
DIGIT 2-OK?
PASSWORD IS 42(0)
DIGIT 3-OK?
PASSWORD IS 423
PASSWORD OK?
RECORD PASSWORD
423-OK?
NO
NO
NO
NO
NO
YES
YES
YES
YES
YES
YES
4.4 Valve Setup
Valve setup enables the actuator to be changed to suit the type of valve that it is mounted on.
4.4.1 Close Direction
Default = CW to Close
The majority of valves require clockwise (CW) rotation of the actuator drive sleeve when viewed from above the actuator.
1. Engage manual override and check whether the valve closes with CW or CCW rotation of the handwheel.
2. Select “NO” until the required direction is displayed, then “YES.”
NOTE: If in doubt as to valve seating, consult the valve manufacturer.
NOTE: For torque seated valves, ensure that the “POSITION” limit is not set at “TORQUE” seat. It is recommended that
the “POSITION” limit be set approximately one handwheel turn (360˚) in the opposite direction from the “TORQUE”
seat.
4.4.2 Close Seating
Default = Position Seating
1. Configure the actuator to close on “TORQUE” limit for seating valve types such as wedge gate and globe.
2. Select “POSITION” limit for valve types such as ball, butterfly, plug, sluice gate, parallel slide, knife gate, and
through conduit.
3. Select “NO” until the required seating is displayed.
4. Select “YES.”
4.4.3 Open Seating
Default = Position Seating
The majority of valves, regardless of their construction, seat on position limit in the open direction. Some valves are
“back-seating” and require torque limit in the open direction.
1. Select “NO” until the required seating is displayed.
2. Select “YES” to return to the “VALVE SETUP?” display.