Installation - indoor installation – Greenheck DG / DGX with Direct Spark (464043 IOM) (Pre-2008) User Manual
Page 3
3
Installation - Indoor Installation
Installation
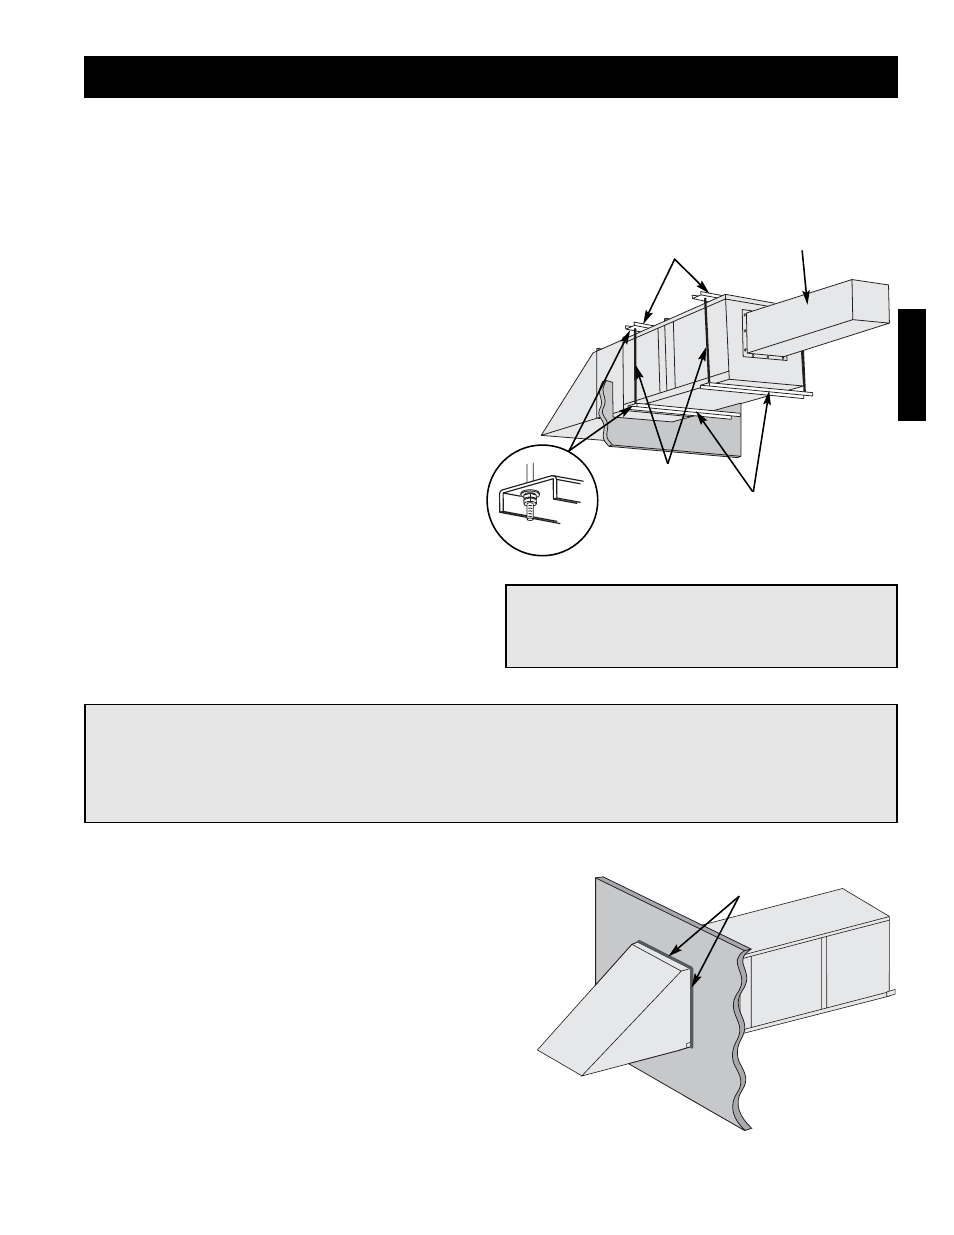
Step 1 Install Hangers
Install threaded hangers from ceiling supports. When locating hangers, allow enough room to open access
panel(s). Two nuts must be used on the end of each threaded hanger. Ceiling supports are supplied by others.
Step 2 Install Unit
Using sheet metal screws, attach the
weatherhood/thru-wall/filter section to the
blower/burner section. The flange on the
weatherhood/thru-wall/filter section should overlap
the flange on the blower/burner section.
Raise the assembled unit into place.
Using two nuts per hanger, fasten the unit supports to
the hangers under the unit. Appropriate unit supports,
such as the optional Greenheck hanging bracket kit
or c-channel and angle iron (supplied by others)
should be used.
Using self-tapping screws, attach ductwork to unit.
In order to prevent the unit from swinging and to
provide a safe environment for service and
maintenance, additional measures must be taken to
secure the unit in all directions.
Step 3 Seal Wall Opening
Apply sealant around the perimeter of the
weatherhood to prevent water penetration and drafts
into the building.
NOTE!
Two nuts must be used on each end of each
threaded hanging rod for proper support.
NOTE!
Good duct practices should be followed for all ductwork. Ductwork should be installed in accordance
with SMACNA and AMCA guidelines, NFPA 96 and any local codes. Reference the CAPS submittal for
duct sizes.
Sealant
Unit
Supports
Ceiling
Supports
Hangers
Ductwork
Indoor Mounting
Sealing Wall Opening