Removal -40, Replacement -40, Max200 machine torch removal and replacement -40 – Hypertherm MAX200 Service Manual User Manual
Page 81: Removal -40 replacement -40, Max200 machine torch removal and replacement

3-40
MAX200
Service Manual
1-99
MAINTENANCE
MAX200 Machine Torch Removal and Replacement
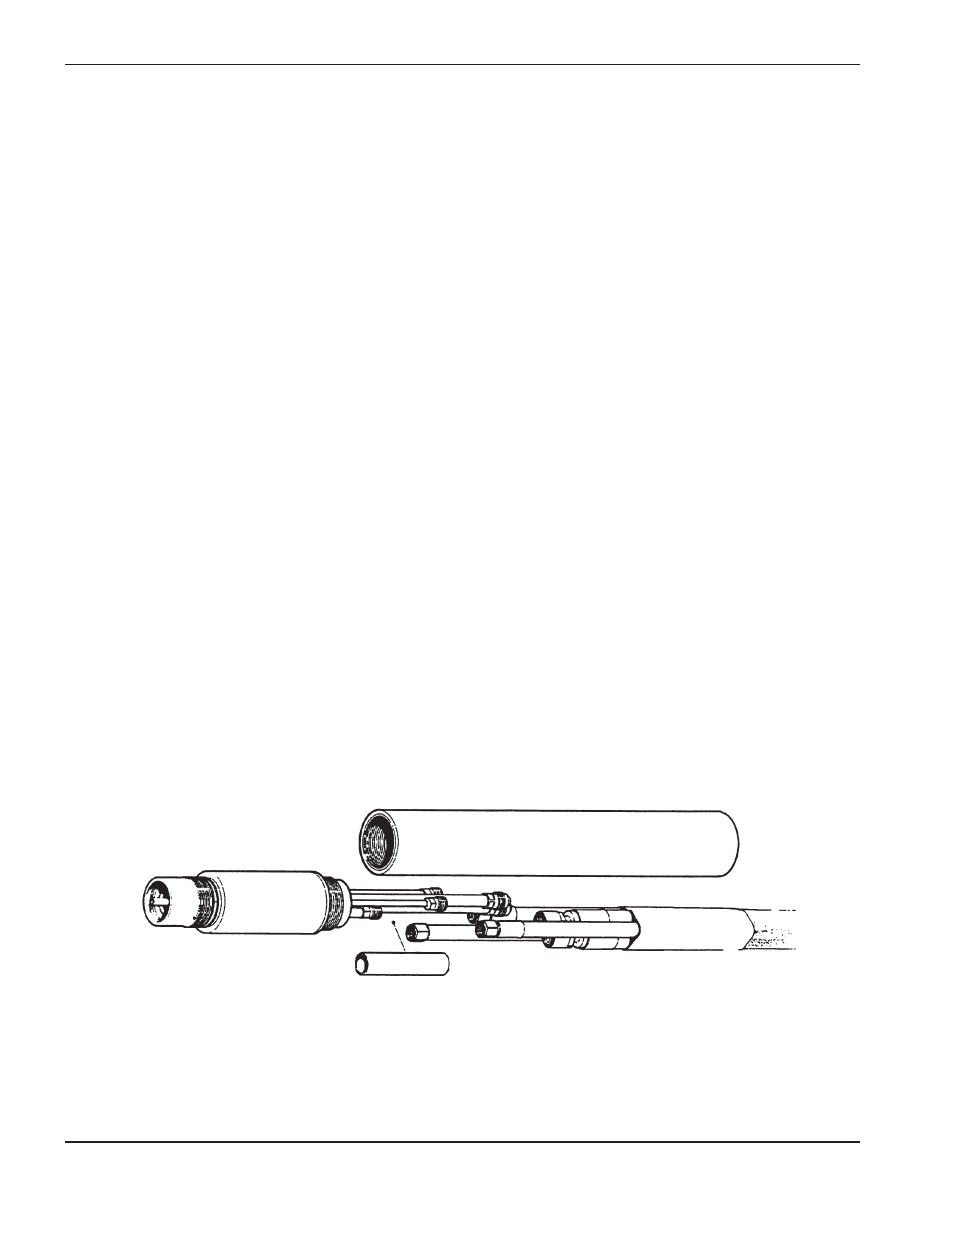
To remove and replace the torch main body from the torch lead, perform the following procedure and see
Figure 3-6.
Removal
1. Unscrew the insulating sleeve from the torch main body and slide the sleeve out of the way in order to expose
the torch lead fittings.
2. On the larger leads, use a 3/8" open-end wrench to hold the torch body fittings and a 1/2" open-end wrench to
turn the torch lead fittings.
On the smaller leads, use a 5/16" open-end wrench to hold the torch body fittings and a 7/16" open-end wrench
to turn the torch lead fittings.
Turn the torch lead fittings counterclockwise (ccw) to loosen the connections. Note that the red lead fitting is
reverse threaded and must be turned in the opposite direction (clockwise).
3. Remove the torch main body.
Replacement
1. Connect the torch leads to the replacement torch main body. Thread the torch main body fittings and the torch
lead fittings together clockwise (cw). Use the size wrenches called out in the Removal procedure above. Note
that the red lead fitting is reverse threaded and must be turned in the opposite direction (counterclockwise).
2. Ensure the lead insulator is positioned over the pilot/shield gas lead fitting.
3. Slide the insulating sleeve to the torch main body and screw together.
LEAD INSULATOR
TORCH MAIN
BODY
INSULATING SLEEVE
TORCH LEAD
Figure 3-6
MAX200 Machine Torch Assembly