Clinical try-in – Ivoclar Vivadent IPS e.max CAD Abutment Solutions User Manual
Page 19
19
Optional
– Clinical T
ry-In
Clinical try-in
Hybrid abutment and dedicated crown
Important note: Any intraoral inspection of the occlusion/articulation and necessary grinding adjustments may only be
carried out if the components have been attached to one another with Virtual Extra Light Body Fast Set. Virtual has a
cushioning effect during the try-in procedure, in particular, if any grinding adjustments have to be made. Therefore, it
prevents chipping in the transition area between the hybrid abutment and the crown.
The following procedure should be observed during the clinical try-in:
– The prepared hybrid abutment (provisionally secured in place) and the clean corresponding crown are laid out.
– Remove the provisional restoration.
– Screw the hybrid abutment in manually with the dedicated screw.
– Check the geometry of the hybrid abutment (e.g. fit gingival anaemia) in relation to the gingival margin.
– If desired, the screw channel on the hybrid abutment can be sealed with a foam pellet.
– Tip: Isolate the inner aspect of the crown with glycerine gel, e.g. Try-in paste, Liquid Strip
– Place the crown on the hybrid abutment intraorally to check and adjust the proximal contacts, if necessary.
Note: No occlusal functional inspection must be performed at this stage.
– For the functional inspection, the crown has to be secured on the hybrid abutment with Virtual Extra Light Body Fast Set.
Try-in paste must not be used for this purpose, as this material is not sufficiently resistant to compressive force.
– Insert the Virtual cartridge in the dispenser and remove the protective cap.
– Screw on the mixing tip and attach the Oral Tip to the mixing tip.
– Apply Virtual Extra Light Body Fast Set to the inner aspect of the crown.
– Press the crown onto the hybrid abutment using the fingers until it has reached the final position. Hold the crown in the
final position until the Virtual material has set.
– Remove excess Virtual material.
– Check the occlusion/articulation and make adjustments with suitable grinding instruments, if necessary (see separate
IPS e.max recommended grinding instruments for ceramics – use in the dental practice).
– Carefully remove the crown from the hybrid abutment and the hybrid abutment from the implant (including the Ti base).
– Rinse the implant site e.g. with Cervitec Liquid (antibacterial mouth wash with chlorhexidine) to clean and disinfect it.
– Place the temporary restoration.
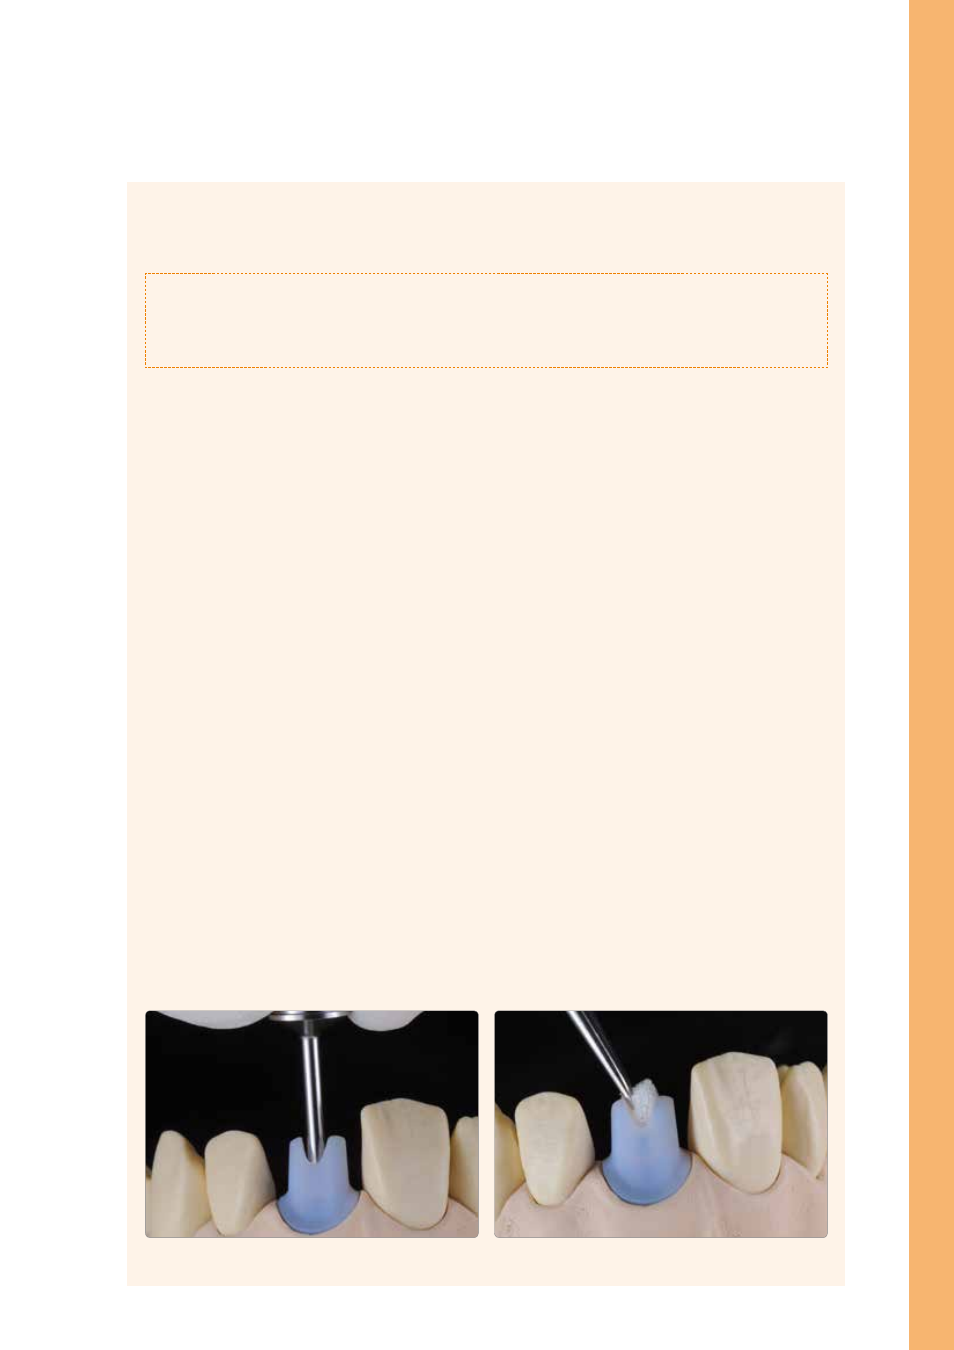
The hybrid abutment is manually screwed in place with the dedicated screw. The
geometry of the hybrid abutment (e.g. fit, gingival anaemia) is checked in relation to
the gingival margin.
If desired, the screw channel of the hybrid abutment
can be sealed with a foam pellet.