Measurement Computing LogBook Series User Manual
Page 140
LV-14 LogView
989592
Software
Reference
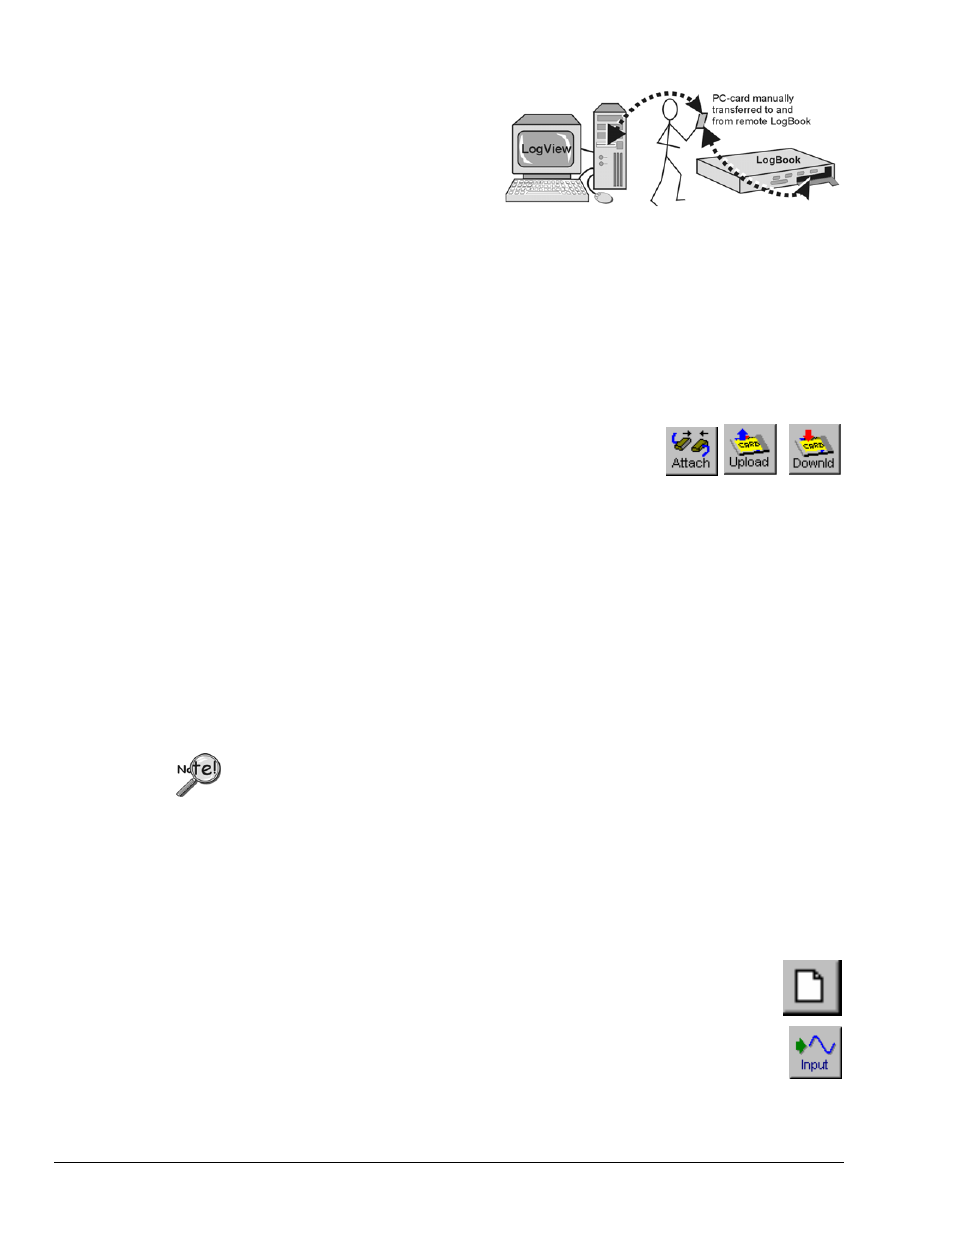
Using LogBook “Unattached”
When using a LogBook “unattached,” LogView
does not communicate in real time with
LogBook; instead, LogView downloads the
acquisition setup file to a local PC-Card that can
later be manually transferred to LogBook.
After the acquisition is complete, the PC-Card
that collected data in LogBook must be
manually transferred to the PC where LogView can then upload the data. The PC-Card must first be
properly initialized :
1. Take any ATA PC-Card memory device, and insert it into a corresponding socket on the PC. If this
is the 1st time this type of card has been inserted, Windows may require driver information. Follow
the on-screen instructions, or refer to the documentation included with the PC-Card.
2. Launch LogView from your PC (unless you set up a shortcut, you can find LogView in the Programs
group in the Start menu). The control window and the Analog Input Channel Configuration window
should appear.
3. Under the Device menu, click Select PC-Card. Use the drop down list to tell LogView which drive
letter is associated with the PC-Card. Note: as PC-Cards are inserted
and removed from the sockets, Windows will arbitrarily assign drive
letters. If 2 PC-Cards occupy 2 sockets, the order of their insertion
usually dictates the assignment of drive letters. The <Attach>,
<Upload>, and <Download> buttons on the Control Window should now be enabled.
4. In LogView’s Analog Input Channel Configuration and Acquisition Configuration windows, set up
the channels and trigger parameters you wish to use (see Simple Data Logging below).
5. Download the acquisition setup file (
logbook.sys
will also be downloaded if not already present).
6. Eject (remove) the PC-Card from the PC socket, and transport it to the remote LogBook site. Insert
the PC-Card into LogBook's socket, and power up LogBook. LogBook will automatically load the
setup file and arm the system.
7. After the remote LogBook has collected all the data, remove the PC-Card from LogBook's socket,
transport it to the PC, and insert it into the PC's socket. If LogView is running, it will soon recognize
the presence of the card and enable the <Upload> and <Download> buttons.
8. Click Upload to pull the data into the PC.
After telling LogView which drive letters are associated with PC-Card disks, LogView will periodically poll
the system for their presence. As cards are inserted and ejected, LogView will automatically enable and
disable the <Upload> and <Download> buttons.
If a large quantity of data will be recorded, you should return to the remote LogBook
in time to swap PC-Cards [before the first card is full]. Card swapping is discussed in
the introduction chapter of the user’s manual. All PC-Cards to be swapped must first be
initialized as discussed in the previous section.
Simple Data Logging
To log data, you need to configure the hardware, set up the channels, and configure the acquisition
parameters. The following steps are generic and will vary with different applications.
1. Launch LogView, and Attach LogView to your Logbook if working in an attached mode
or to a PC-Card inserted in your PC if working in a remote, unattached mode
(see previous 2 procedures if necessary).
2. Select New under the File menu or the new file button (see figure at right), and give the
acquisition setup file a name relevant to your application.
3. Click the Analog <Input> button to display the setup grid in the Analog Input Channel
Configuration window. Turn all but the 1st 4 channels off (or as applicable) by placing
the cursor in the On/Off column and double-clicking to toggle the setting on and off
(unused channels that are left ON will limit the maximum scan rate possible). To change
the Range for a particular channel, click the cursor on the affected and then use the drop
down user input box to select an appropriate range (can be bipolar or unipolar).