Assign ip address, Assign ip address via front lcd panel, Assign ip address -2 – Quintum Technologies Call Routing Server User Manual
Page 24: Assign ip address via front lcd panel -2
3-2
P/N 480-0028-00-00
Chapter 3: Using the LCD front panel/Setting IP address
Assign IP Address
Before you can configure Tenor Call Routing Server, you need to assign a valid IP address; the default factory
IP is 0.0.0.0. An IP address is a 32 bit (up to 12 numeric characters) address used to identify each network
device in the TCP/IP network. If the chassis does not have an IP address, data will not be able to be sent to or
from the chassis.
There are two ways to assign an IP address: through the unit’s serial port or through the LCD panel on the
front of the unit. See below for instructions.
Assign IP address via Front LCD Panel
When you turn on the unit, you are able to set the LAN 1 IP, Subnet Mask, and Gateway IP through the LCD
screen. The LAN 2 is reserved for future use.
Configure the information as follows:
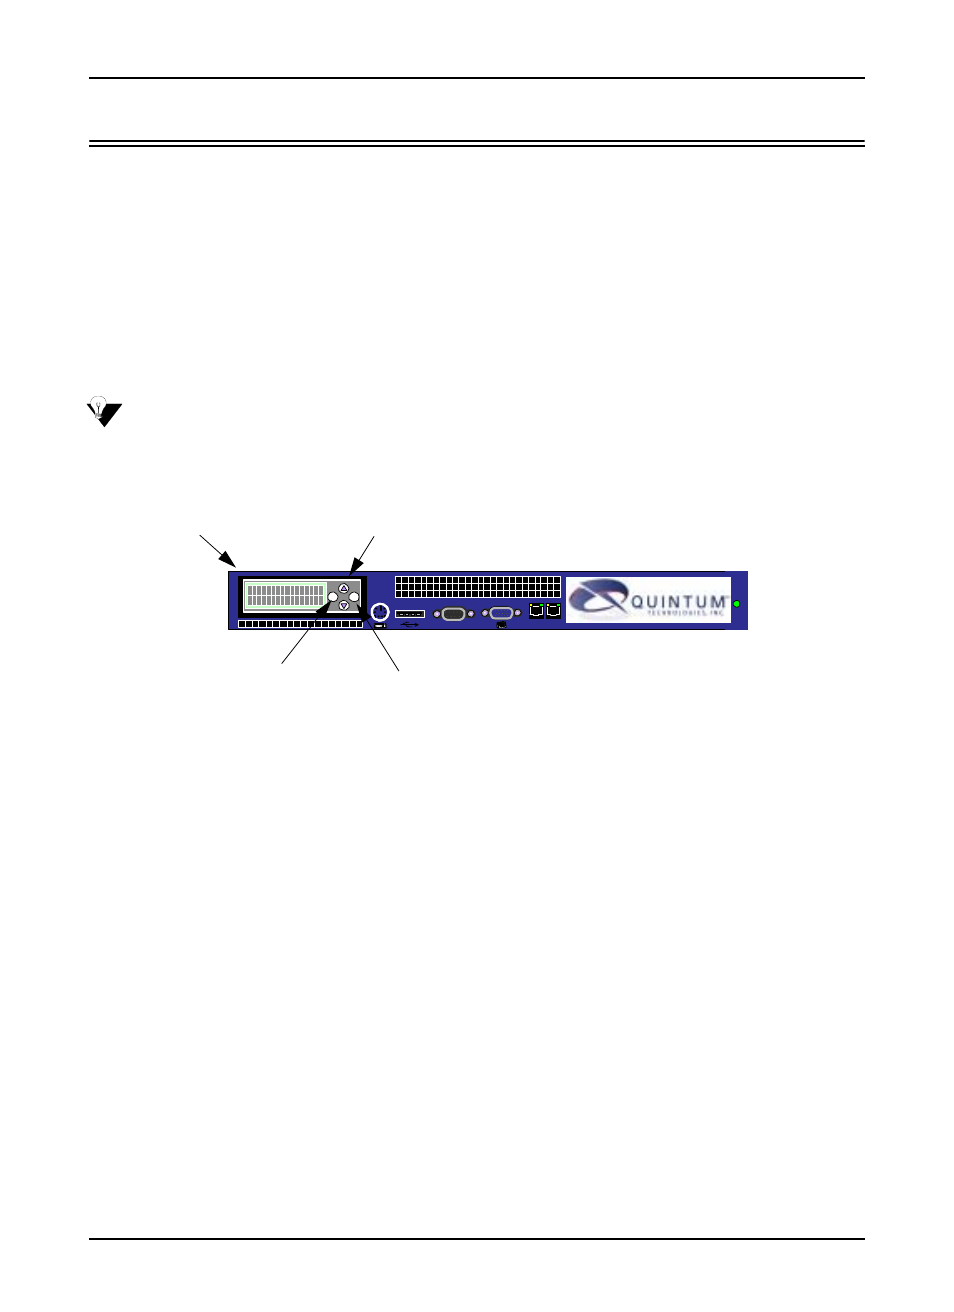
Figure 3-1 Assign IP Address via LCD Display
When you first turn on the unit, the Quintum Call Routing Server screen will be displayed.
1. To set LAN 1 IP, click on the up arrow through the menu items until you reach “Routing Server Change
LAN 1 IP” and press ENTER.
2. Enter the LAN 1 IP address. For each number of the IP address, use the Up and Down arrows to cycle
through the numbers 0-9 and the period (.). When you reach the desired number or period, press on the
ENTER button. For example, to enter IP address 192.168.20.142: press the Up arrow until you reach 1
and press ENTER, press the Down arrow until you reach 9 and press ENTER, press the Up arrow until
you reach 2 and press ENTER, etc. Once all the digits are enter, press ENTER for the IP address to be
entered into the database. The “Enter Subnet Mask” menu option will appear automatically.
3. Enter the Subnet Mask IP (the same way as you entered LAN1 IP) and press ENTER.
4. Press the Up arrow until you reach the “Change GW IP” menu option, and press ENTER. The “Enter
Gateway IP” screen will be displayed.
5. Enter the Gateway IP address (for using the arrows to set the IP, use the same directions as setting LAN 1
IP) and press ENTER.
Once the IP information has been set, you are ready to configure the Call Routing Server via the network. See
Chapter 4: Getting Started via Quintum Routing Server Manager and Chapter 5: Configure via Command
Line Interface (CLI).)
LAN 1 LAN 2
10101
ESC
ENTER
LCD
Display
Up/Down Arrows
Enter
Esc