Rose Electronics UltraConsole Remote 2 User Manual
Page 14
8
ULTRACONSOLE REMOTE 2 INSTALLATION AND OPERATIONS MANUAL
Hardware and Firmware
The versions for the unit are displayed in these fields. Data can not be changed.
Keyboard Layout
Using the left and right arrow keys, select the keyboard type expected from the host computers.
Admin password
Enter an administrator password of at least six characters that has a mix of letters and numerals. The background
color provides an indication of password suitability. It is initially red to indicate that the password is not sufficient.
When a password with reasonable strength has been entered it changes to blue.
Time and Date
Set the time and date to the correct values. Use the 24 hour base inputs. All entries in the activity log are time
stamped using this information.
Encryption
Arrange this setting according to your security requirements.
When all items have been updated, click on “Next” to configure the network information. The network information
entered (IP Address, Net Mask, and Gateway) must be compatible with the network UltraConsole Remote 2 will be
connected to.
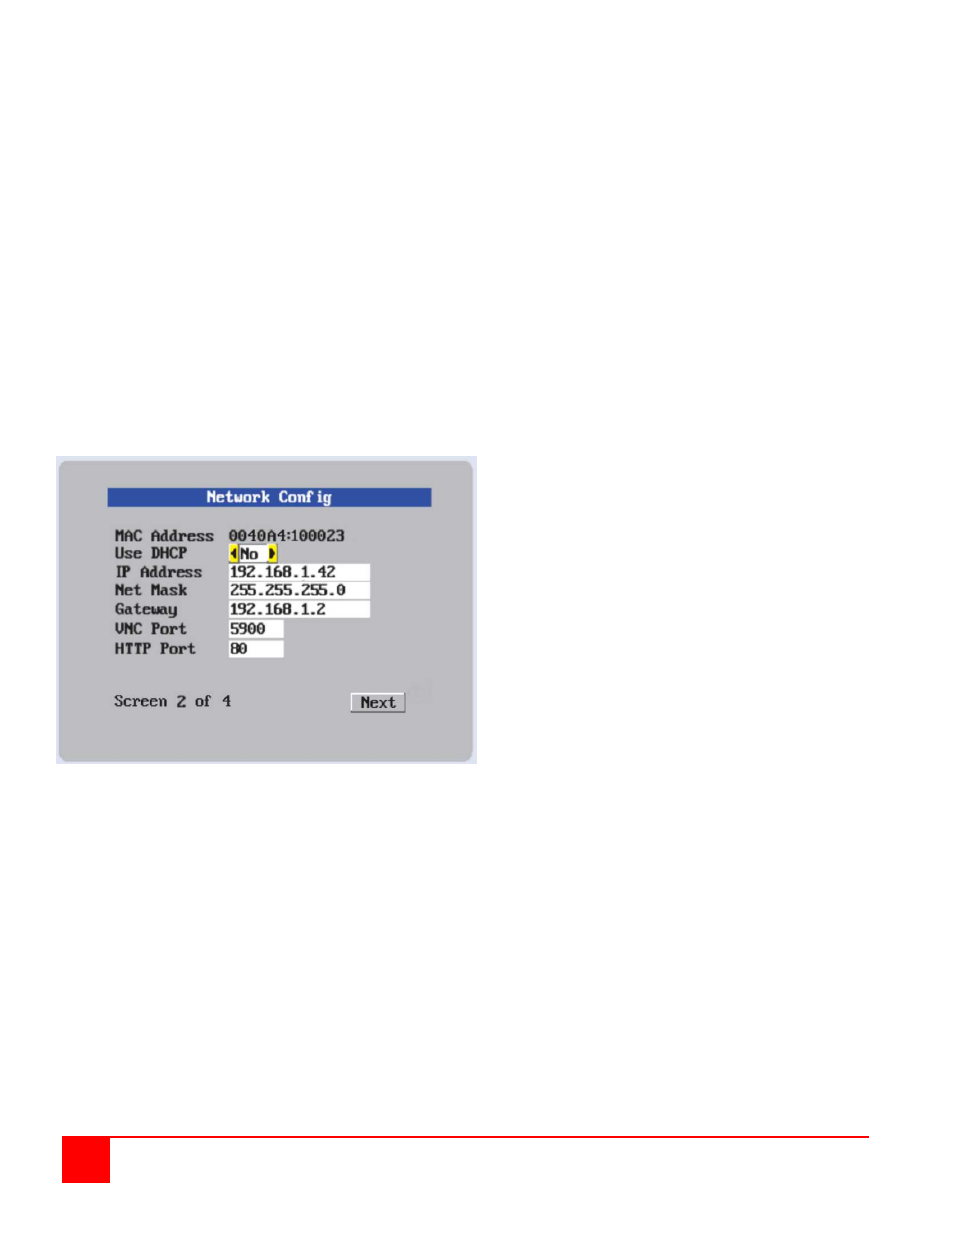
Figure 4. Network Configuration Menu
MAC address
Media Access Control address – this is the unique and unchangeable code that was hard coded within your
UltraConsole Remote 2 unit when it was built. It consists of two 6-digit hexadecimal (base 16) numbers separated by
colons. A section of the MAC address identifies the manufacturer, while the remainder is effectively the unique
electronic serial number of your particular unit
Use DHCP/IP address/Net Mask/Gateway/VNC port/HTTP Port
1. You need to either set the DHCP option to ‘Yes’ or manually enter a valid IP address, Net mask and Gateway.
If you set the option to use DHCP, remote users must be informed of the IP address assigned so they can
remotely access the unit.
2. Change the IP Address to the IP address assigned to the unit by your network administrator
that is compatible with your network.
3. Change the Net Mask and Gateway addresses if needed.
4. The VNC and HTTP ports should remain set to 5900 and 80, respectively, unless they clash with an existing
setup within the network.
5. When all network information has been entered, click on “Next” to calculate a “Secure Key”.