Rear view – ATEN CL5808N 8-Port 19" Dual Rail LCD Combo KVM Switch User Manual
Page 20
CL5808/CL5816 User Manual
10
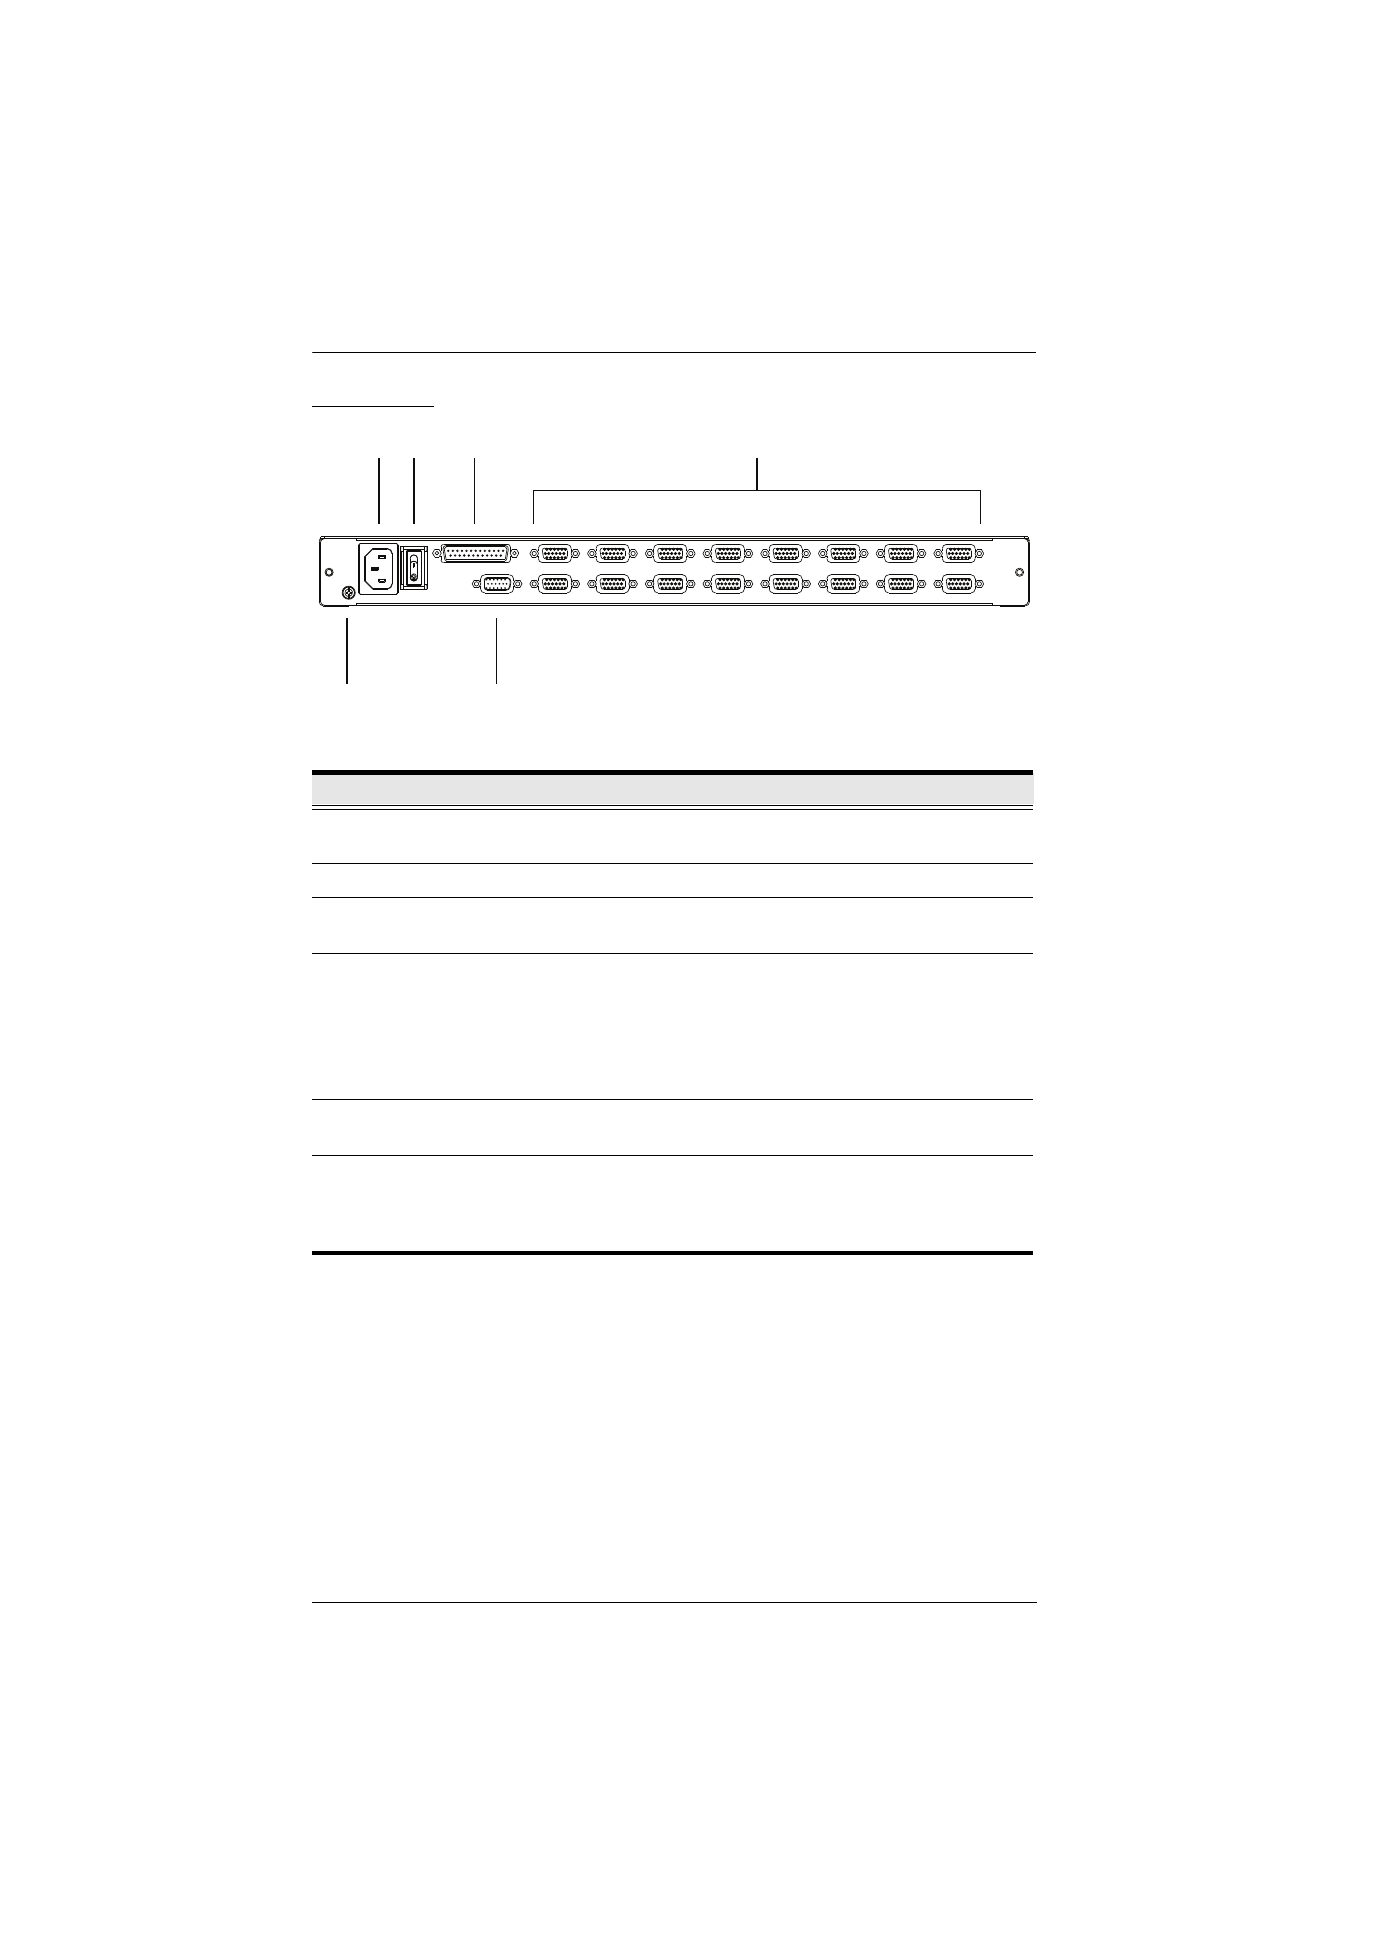
Rear View
No.
Component
Description
1
Power Socket
This is a standard 3-prong AC power socket. The power cord
from an AC source plugs in here.
2
Power Switch
This standard rocker switch powers the unit on and off.
3
Daisy Chain Port When daisy chaining units, the daisy chain cable plugs in
here.
4
KVM Port
Section
The cables that link to the computers plug in here.
Note:
The shape of these SPHD connectors has been
specifically modified so that only KVM cables designed to
work with this switch can plug in (see
details). Do
NOT
attempt to use ordinary 15 pin VGA
connector cables to link these ports to the computers.
5
Grounding
Terminal
The grounding wire used to ground the switch attaches here.
6
External
Console Port
For flexibility and convenience, the CL5808/CL5816 supports
an independent, external, KVM console. If you choose to
install an external console, the Console Cable (supplied with
the CL5808/CL5816 package), plugs in here.
1
2
3
4
5
6