Acoustic calibration check – Casella CEL CEL-450 User Manual
Page 39
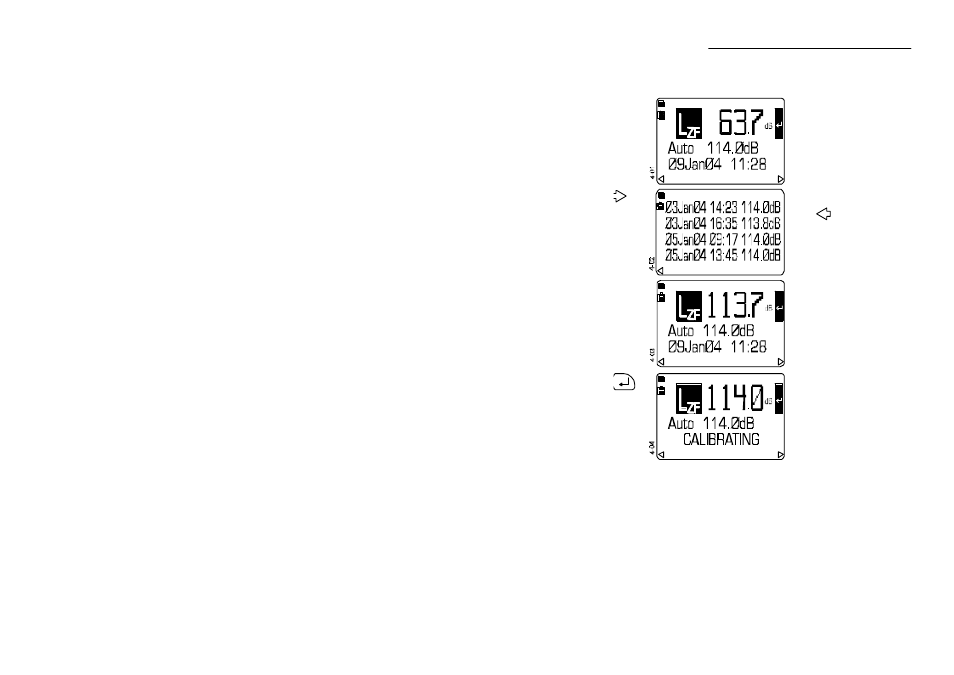
Operation Press
Display Shows
Comments
1. Start with
the Auto
calibration
screen
This is the Automatic
calibration check screen.
It shows the current sound
level.
2. Inspect
other
stored
calibration
levels
The last four calibration
levels are stored.
Press
to return.
3. Switch the
Calibrator
ON
This shows the level
determined by the sound
level meter.
The calibration levels
required for CEL Class 1 and
Class 2 microphones and for
Free Field and Random
Response are shown in
Table 1.
4. When the
correct
calibration
level
should be
114.0 dB
Start an automatic
calibration to the level
shown at “Auto”.
(In this example 114.0 dB.)
A CALIBRATING message
will be displayed, then after
a few moments either
FAILED, or CALIBRATED.
The Automatic calibration
can fail if the input signal is
outside the calibration
adjustment range (approx.
±6 dB).
Refer to Step 6 to change
the Auto calibration level.
CEL-450/490 Operators Handbook - Page 39
Acoustic Calibration Check