Coupling the hearing instrument for ansi tests, Calibration check for coupler microphone – Audioscan Axiom User Manual
Page 43
Axiom
®
User's Guide Version 1.8
May 2015
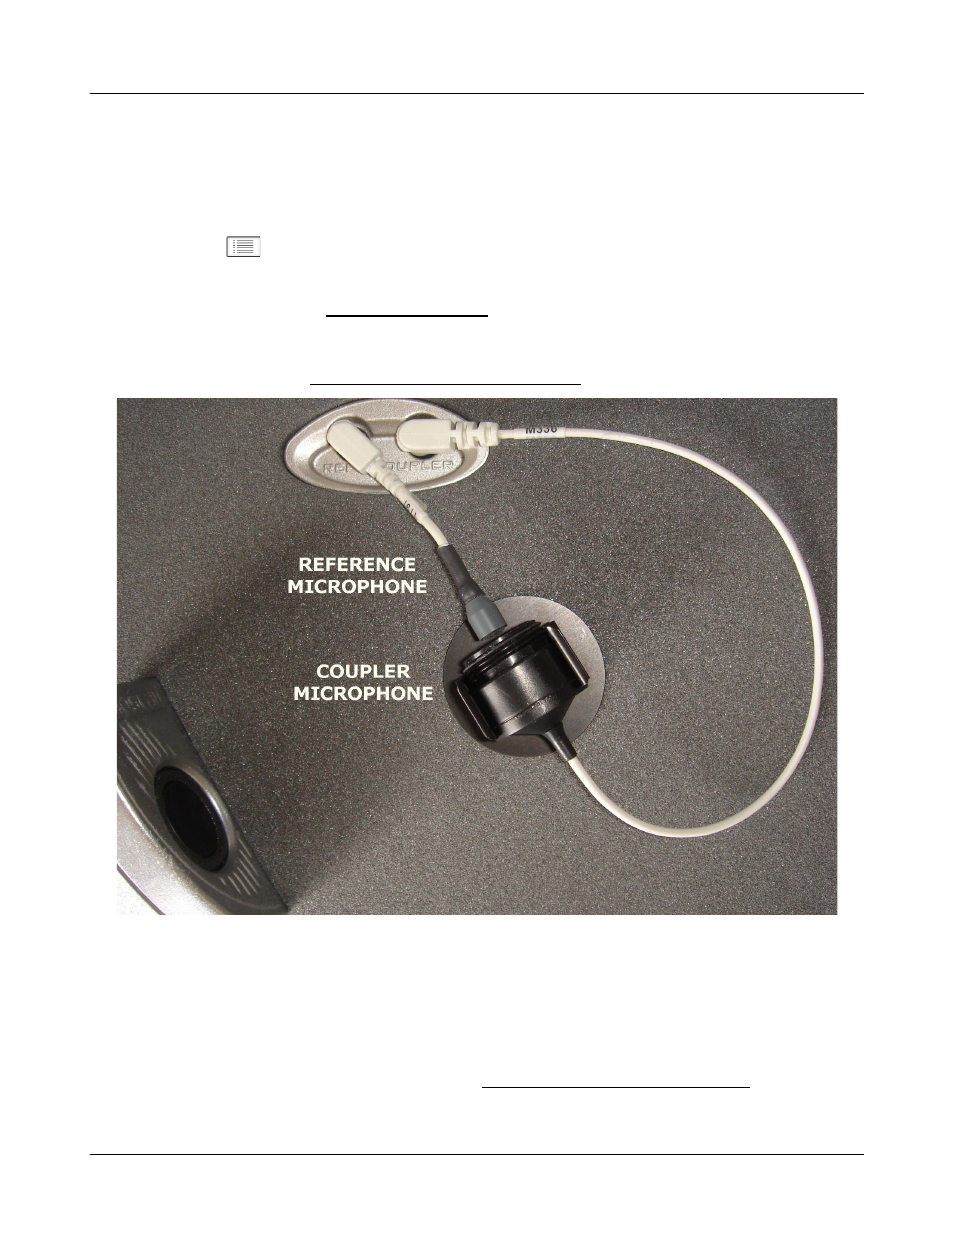
Remove any coupler from the coupler microphone before calibration.
1. Position the test box reference microphone opening concentric with the coupler microphone opening and
about 1 – 2 mm from as shown below.
2. Close and seal the test chamber by tightening the latch at the front of the lid.
3. Click on
, then click on the [Calibration] option within the Test box menu.
4. Click on [Daily] or [Weekly] to select the calibration interval.
5. Click on[Calibrate]. See Test box calibration facts
It is recommended that you print a copy of the initial calibration curve and compare it with your daily or weekly
curve. Any change in this curve indicates a drift in either the coupler or the reference microphone which needs
further investigation. See Calibration check for coupler microphone for an additional check.
Calibration check for coupler microphone
Accuracy of test box measurements depends on the calibration of the coupler microphone. This should be
checked regularly using a microphone calibrator with an adapter ring. The RE780 (1 1/8 in.) and RE781 (1in.)
rings are designed for Quest CA22 and QC-10/20 respectively. To verify the coupler microphone calibration:
1. Calibrate the test box reference microphone. See Calibrating test box reference microphone
43