Fm fitting and verification – Audioscan Axiom User Manual
Page 95
Axiom
®
User's Guide Version 1.8
May 2015
7. Click on another Test button, click on
and select the same stimulus and stimulus level used in Test 1.
8. Click on
to measure and store the long-term signal-averaged result.
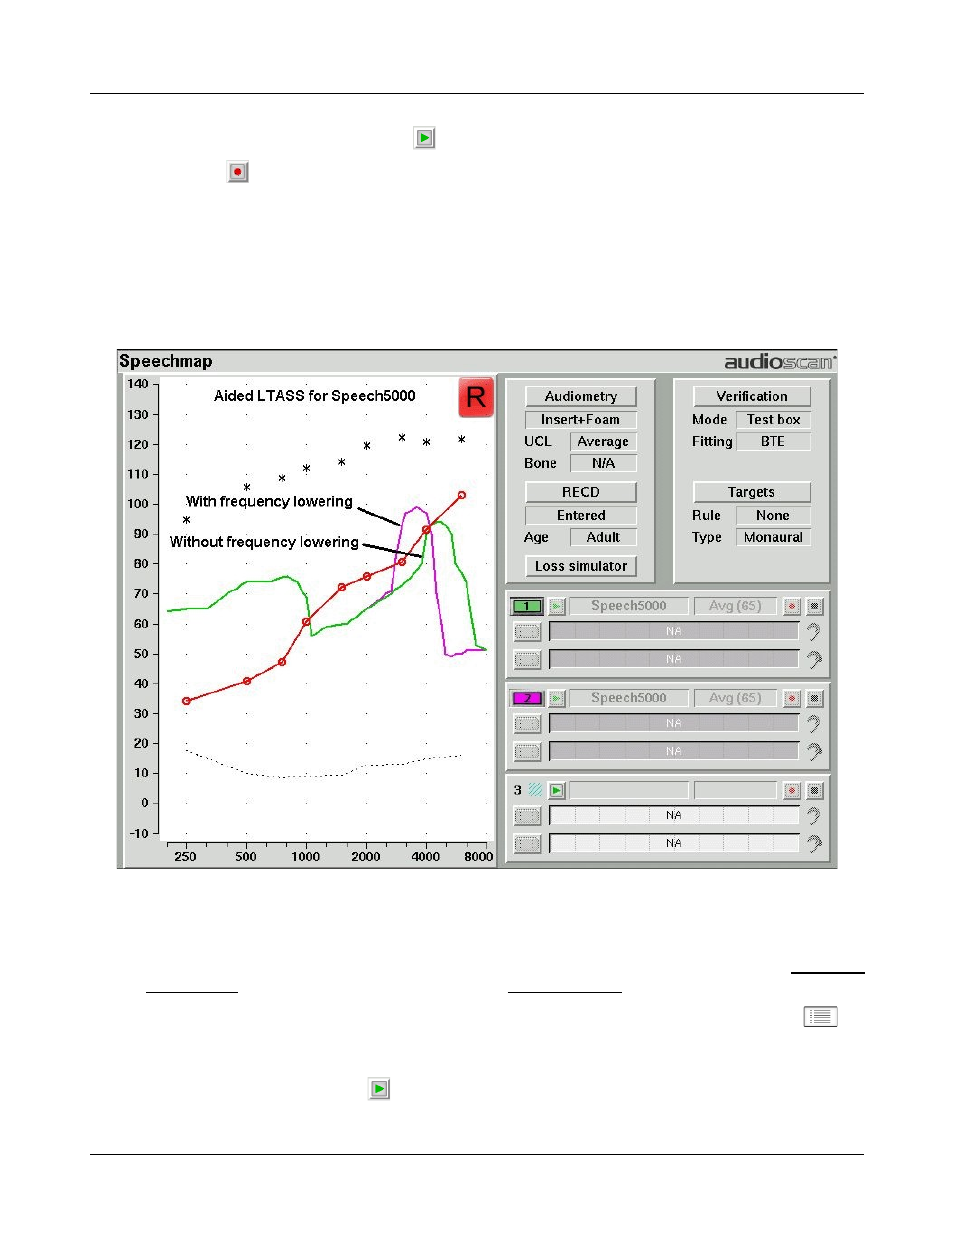
9. The isolated band should now appear at a lower frequency and should reach or exceed threshold at its new
location as shown below. Note that the 'cavity' between 1 kHz and the isolated band may be partially or
completely filled in by noise within the hearing aid which will make the isolated band appear less distinct in
the test curves.
10. Once the frequency-lowering properties of the hearing instrument have been verified, use one of the Speech-
std stimuli to verify aided speech audibility or target match (as described elsewhere in this section) for
frequencies below the isolated band.
FM fitting and verification
FM Offset or FM Transparency method in Speechmap (after Platz 2004)
It is assumed that the hearing aid has been set up for optimal audibility and maximum output. See Speechmap
screen choices for setup and audiometric data entry. See Using Speechmap
1. Before attaching the FM receiver, couple the hearing aid to the 2cc coupler in the test box, click on
and
select Speechmap from the Test box menu. Click the [Verification] button and select the appropriate Fitting
type (typically BTE).
2. Click on the Test 1 button and
, then choose Speech-std(1), (2) or the ISTS at a Level of 65 dB. Click on
95