4 connecting to an exacqvision system, Initiating the connection – Exacq exacqVision E-Series User Manual User Manual
Page 14
14
4
Connecting to an exacqVision System
NOTE: The latest version of exacqVision Client can be downloaded
Initiating the Connection
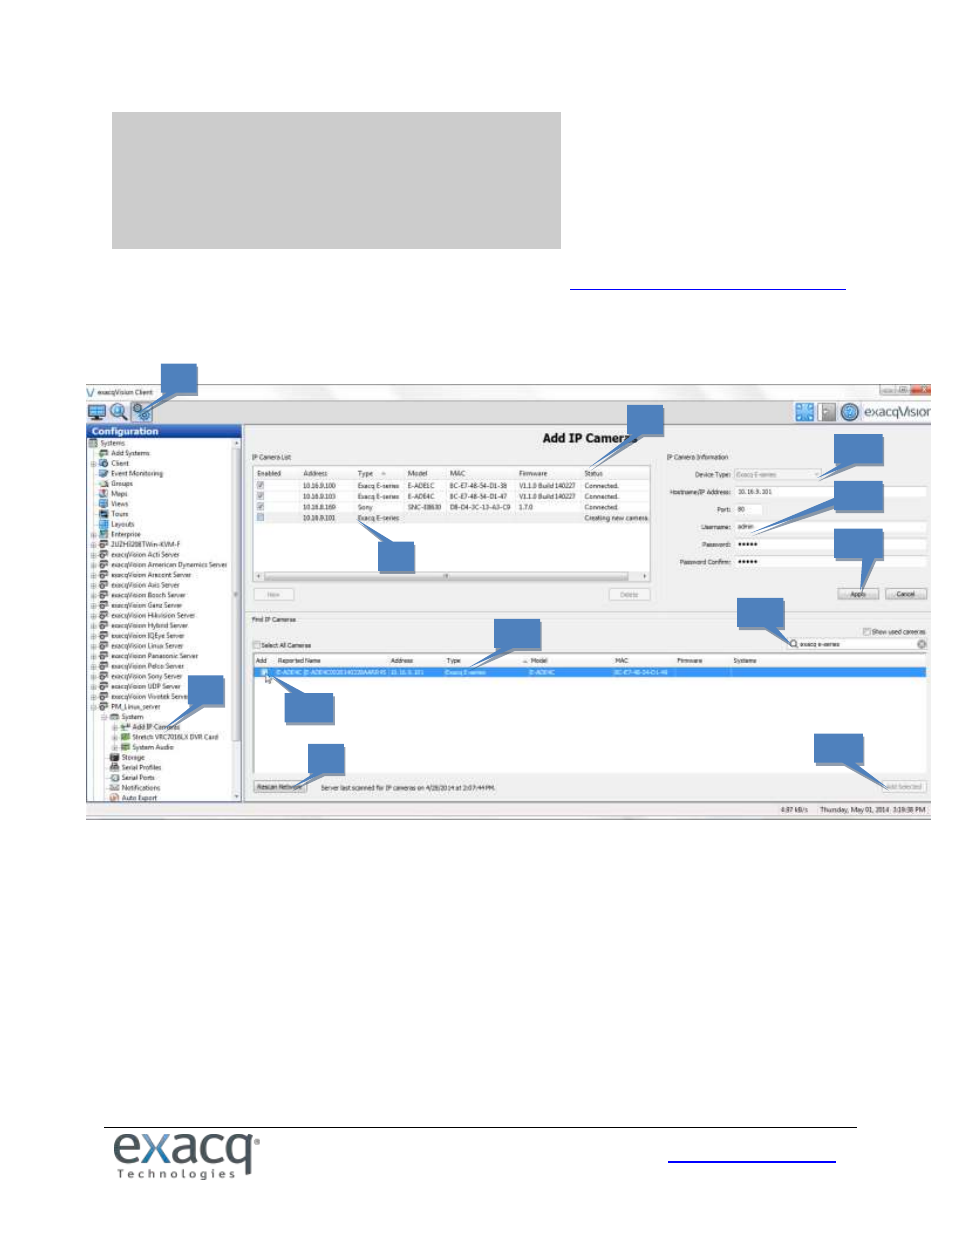
To add the encoder to the exacqVision system using exacqVision Client, complete the following steps:
1. Open exacqVision Client and select the Config (Setup) page.
2. In the site tree, find the exacqVision server that the encoder will be associated with. Expand the server until you
can select Add IP Cameras.
3. Click Rescan Network to ensure all cameras and encoders are displayed in the Find IP Cameras list.
4. Locate the encoder in the Find IP Cameras list (4a). To narrow the list, type information about the encoder, such
as “E-Series” or the IP address, in the search box (4b).
5. Select the encoder entry in the list to display the encoder in the IP Camera Information section (5a). Enter the
username and password (5b), and then click Apply (5c).
NOTE: Alternatively, you can select Add (5d) next to the encoder’s entry, click Add Selected (5e), enter the
username and password of the encoder in the pop-up box, and click OK.
6. Verify that the encoder has been added to the IP Camera List.
7. Look at the Status column to ensure the encoder is detected and connected.
1
2
4a
5d
6
7
4b
5e
5a
5b
5c
3