Configuring time settings – Exacq exacqVision E-Series User Manual User Manual
Page 26
26
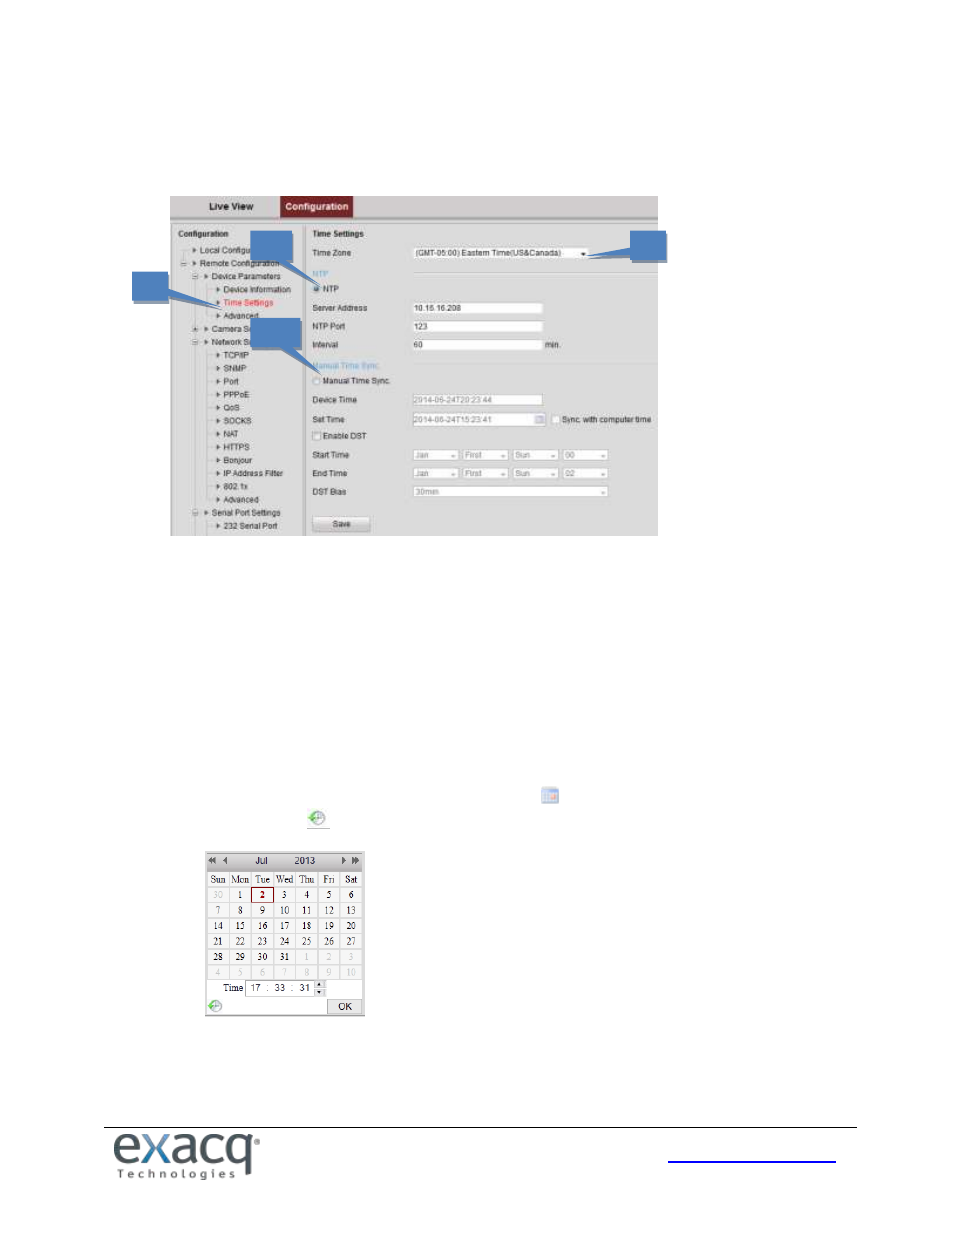
Configuring Time Settings
1. On the Remote Configuration menu, select Device Parameters, and then Time Settings to open the Time
Settings interface:
2. Select the Time Zone from the drop-down menu.
3. Select a time synchronization mode:
NTP: A Network Time Protocol (NTP) Server can be configured on your device to ensure the accuracy of
system date/time. If the device is connected to a DHCP network with time server properties configured, the
camera will synchronize automatically with the time server. If you select this option, enter the NTP server’s
IP address, port, and frequency of synchronization (from 1 to 10,080 minutes).
NOTE: If the device is connected to a public network, you should use a NTP server that has a time
synchronization function, such as the server at the National Time Center (IP Address: 210.72.145.44). If the
device is in a customized network, NTP software can be used to establish an NTP server for time sync.
Manual Time Sync.: If you select this option, click the
icon to set the date from the pop-up calendar.
You can click the
icon to select the time.
You can also select Sync. with Computer Time to synchronize the time with the local computer, and enable
daylight saving time (DST) and its parameters if observed in the local area.
4. Click the Save button to save the settings.
2
3a
3b
1