Configuring video settings – Exacq exacqVision E-Series User Manual User Manual
Page 44
44
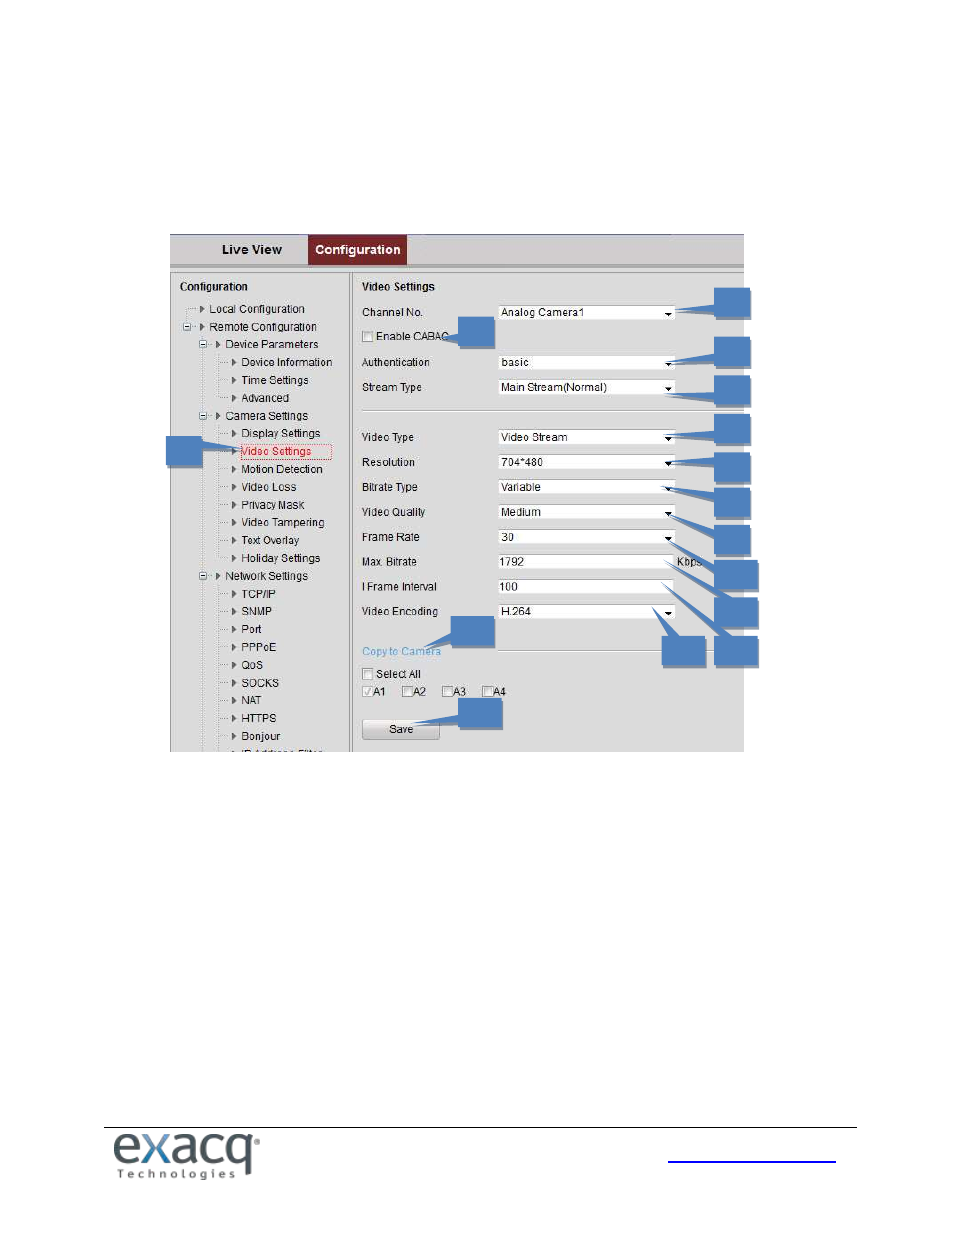
Configuring Video Settings
To configure video settings, complete the following steps:
1. From the Remote Configuration menu, select Camera Settings and then Video Settings to open the Video
Settings interface:
2.
Select the Channel from the drop-down list.
3.
Select the Enable CABAC checkbox if applicable.
4.
Select Enable or Basic from the Authentication drop-down list.
5.
Select the Stream Type of the camera: Main Stream (Normal), Main Stream (Event), or Sub Stream. The main
stream is usually for recording and live viewing with good bandwidth, and the sub stream can be used for live
viewing when the bandwidth is low.
6.
Select the video type (Video Stream or Video&Audio). The audio signal will be recorded only when the Video
Type is Video&Audio.
7.
Select the Resolution of the video input.
8.
Select the Bitrate Type (Constant or Variable).
9.
If the bitrate is Variable, select the Video Quality. Up to six levels of video quality can be configured.
10. Set the Frame Rate from 1 to 30 fps (or 1 to 15 fps if Video Encoding is set to MJPEG).
11. Set the Max. Bitrate from 32 to 8192 Kbps. This is not configurable if Video Encoding is set to MJPEG.
12. Set the I Frame Interval from 1 to 400. A higher value results in lower video quality.
13. Set the Video Encoding standard to H.264 or MJPEG.
14. To copy the display settings of the current camera to other cameras, expand the Copy to Camera panel and
select the cameras, or click Select All to select all cameras.
15. Click Save to activate the settings.
2
2
3
2
4
2
5
2
6
2
1
2
7
2
8
2
9
2
10
2
11
2
12
2
13
2
14
2
15
2