Record setup, General – Eneo PNR-5304/4TB User Manual
Page 42
Part 3 - Configuration
42
Record Setup
Refer to the Menu Use on page 35 for basic
information on using the Setup menus.
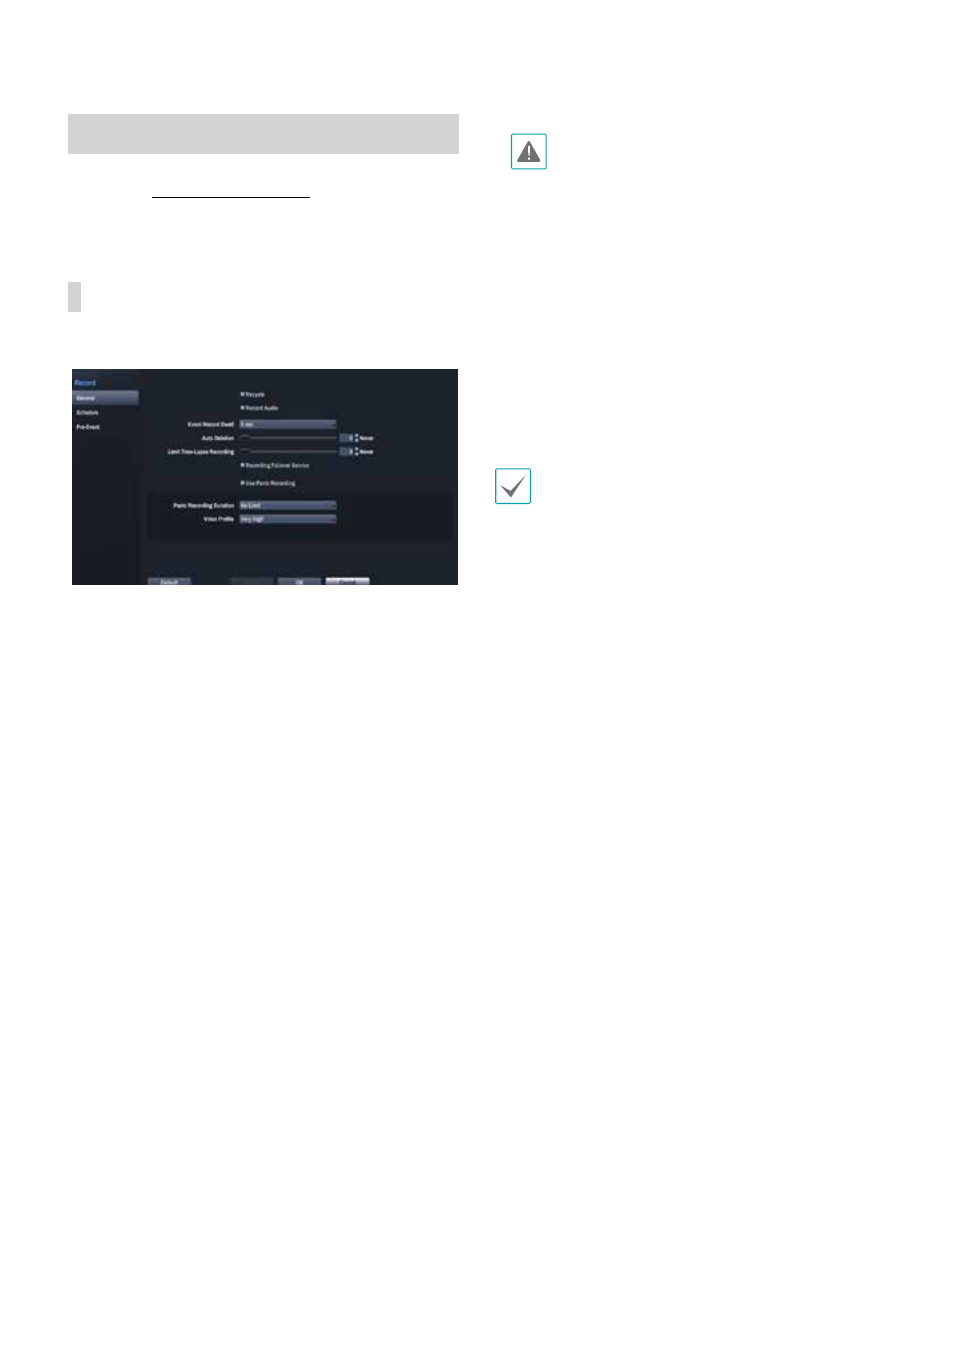
General
Configure general recording settings.
• Recycle: When the recording disks become full,
the system overwrites existing data with new data,
starting with the oldest first. If Recycle is disabled,
recording will simply stop when the recording disks
reach their maximum capacity.
• Record Audio: The camera will record audio along
with video.
• Event Record Dwell: If linked recording is designated
as an event-triggered action, recording takes place for
the duration specified under this setting.
• Auto Deletion: Configure this option to delete
recording data automatically after the specified
number of days has elapsed. Select between 1 day
and 999 day.
To disable Auto Deletion, select Never. If enabled,
recording data will be stored on the NVR for
the specified number of days and then deleted
automatically. Expired recording data are deleted
automatically at midnight and will be deleted even
if the system reboots or the Auto Deletion setting
has been changed.
• Limit Time-Lapse Recording: You can store event
recording data for longer. If you do not wish to use
Limit Time-Lapse Recording, select Never. This
function is activated when data has been stored for
longer than as configured because the recording
disk has sufficient capacity and saves new data by
overwriting Time Lapse Recording data that are
older than as specified under Recycle mode.
• If the recording stored on the disk is shorter than
the duration specified under Limit Time-Lapse
Recording, the older of Event Recording or Time
Recording data is deleted first.
• The system's recording time may change depending
on recording quality, resolution, motion, and other
configurations made by the user. The duration
specified under Limit Time-Lapse Recording may
not be guaranteed in certain situations.
• Recording Failover Service: If the network goes
down, this feature will transfer temporary data stored
in the camera's buffer to the NVR when the network
goes online again.
• Use Panic Recording: Enable/disable Panic
Recording.
• Panic Recording Duration: Disable Panic Recording
automatically. Select between 5 mins and 1 hr. If you
do not wish to disable the feature automatically,
select No Limit.
• Video Profile: Select a recording profile value for
Panic Recording.