Eneo PNR-5304/4TB User Manual
Page 61
Part 3 - Configuration
61
• Smart IR: Adjust the IR LED's brightness level. Select
On to allow the system to adjust the brightness level
automatically. Deselect On to select a brightness level
manually between 0% (darkest) and 100% (brightest).
• Setup Mode: Select desired setup mode between
Normal and Number-Identification. In Number-
Identification mode, when a certain area of images
is too bright due to backlight under low lighting
conditions and it causes the other area to be too
dark, this function provides the other area of images
brightly and clearly by blocking the backlight in
the certain area. Dark parking lot entrances and
gas station entrances at night, for example (Local
Exposure compensates for the bright light coming
from incoming vehicle headlights and makes it
possible to see the license plates). When setting to
the Number-Identification mode, some option
settings will be adjusted automatically, and you
cannot change them as long as the Setup Mode is not
changed.
• Mirror: Select Horizontal or Vertical to flip the image
horizontally and/or vertically.
Select Apply after setting up a camera to see images
from the concerned camera on the left side of the
screen. Selecting Apply or OK displays a popup screen
that indicates whether the camera has been set up
successfully or not.
White Balance Options
• Preset: Use preconfigured white balance settings.
- Auto: Allow the system to adjust the white
balance automatically. The system will assess the
lighting conditions and adjust the white balance
automatically.
- Incandescent - Fluorescent Cold: Select a lighting
type to apply the appropriate white balance.
• Manual: Adjust the white balance manually. Adjust
Red and Blue gain values. Greater the value, greater
the intensity of the corresponding color.
Select Apply after setting up a camera to see images
from the concerned camera on the left side of the
screen. Selecting Apply or OK displays a popup screen
that indicates whether the camera has been set up
successfully or not.
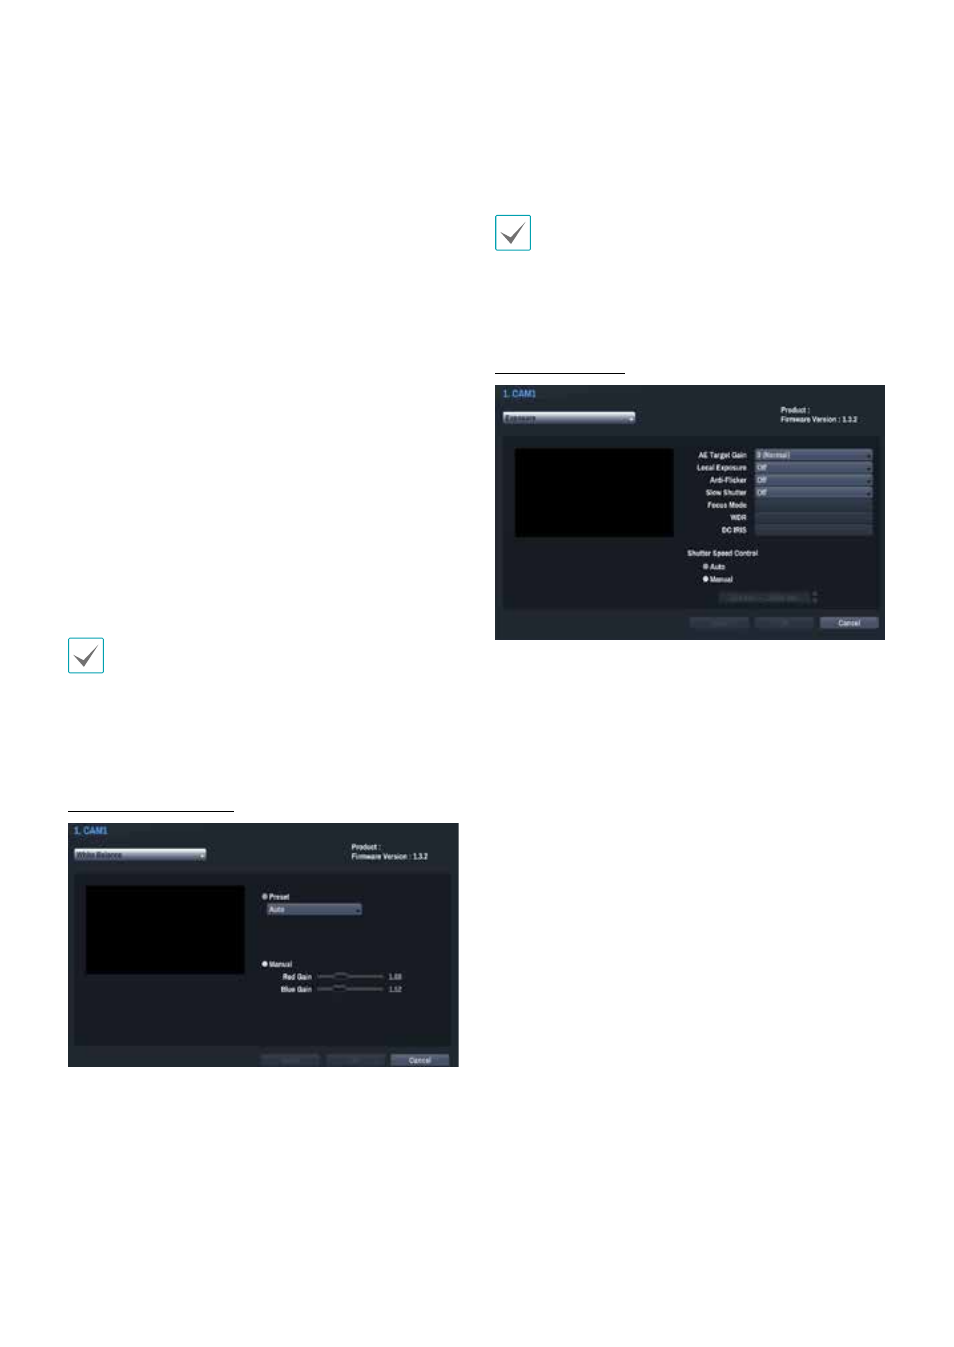
Exposure Options
• AE Target Gain: Specify exposure compensation's
target gain. Exposure is compensated automatically
based on the specified target gain. Higher the gain,
brighter the images.
• Local Exposure: Activate Local Exposure. Use Local
Exposure on images that appear too dark due to
backlighting conditions and on images containing
over-exposed sections. Greater the value, clearer the
image. e.g.) Dark parking lot entrances and gas station
entrances at night (Local Exposure compensates
for the bright light coming from incoming vehicle
headlights and makes it possible to see the license
plates).
• Anti-Flicker: If the lights in the area where the
camera is located use alternating current, specify
the frequency of the lights to minimize flickering.
Matching the frequencies can eliminate flickering
completely. (NTSC: 60Hz, PAL: 50Hz).
• Slow Shutter: Activate Slow Shutter. The slow shutter
mode functions only under low lighting conditions.
When the slow shutter mode is enabled, images
are displayed bright even under the low-lighting
conditions. There may be a difference in the way it
functions depending on the camera model. See the
camera user's manual for details.