Installing a transceiver module (optional), Installing an xfp/sfp+/sfp/qsfp+ module – H3C Technologies H3C S7500E Series Switches User Manual
Page 53
43
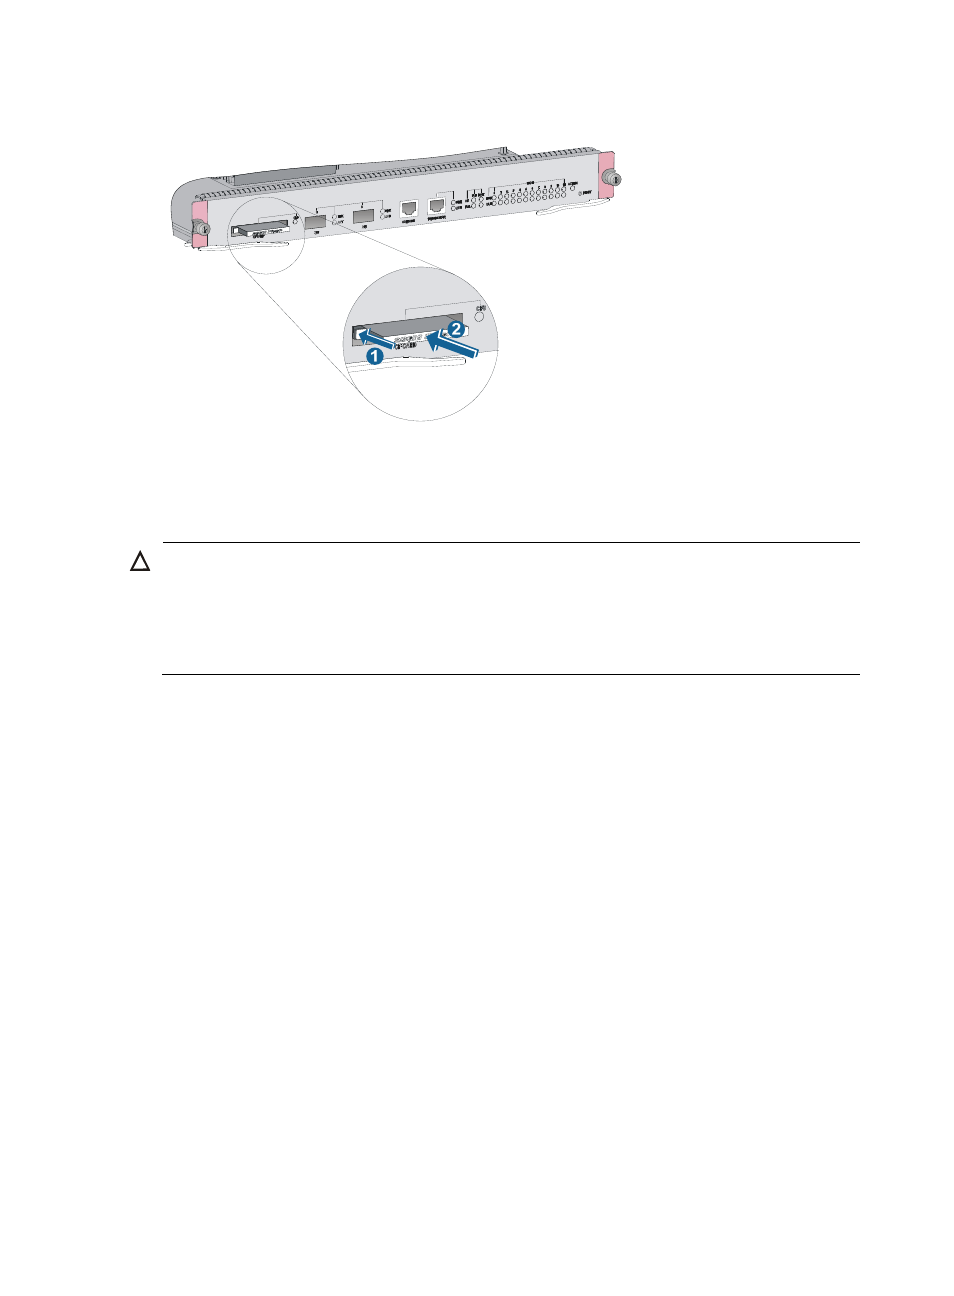
Figure 36 Installing a CF card
Installing a transceiver module (optional)
CAUTION:
•
To avoid component damage, read this section carefully before installing a transceiver module.
•
Do not remove the dust plug from a transceiver module until you are ready to connect an optical fiber to
the module.
•
Before you install a transceiver module, remove the optical fiber (if any) from it.
The transceiver modules available for the switch include SFP, SFP+, XFP, and QSFP+.
Installing an XFP/SFP+/SFP/QSFP+ module
Two types of QSFP+ transceiver modules are available. One type uses a metal pull latch and the other
type uses a plastic pull latch. The installation procedure is the same for the two types of QSFP+
transceiver modules.
The installation procedure is similar for the XFP, SFP+, SFP, and QSFP+ transceiver modules. This section
uses the SFP+ transceiver modules as an example.
To install a transceiver module:
1.
Wear an ESD wrist strap and make sure it makes good skin contact and is reliably grounded. For
more information, see "
."
2.
Unpack the module and make sure the clasp is closed. Do not touch the golden plating of the
module.
Gently insert the SFP+ module into the port until it has firm contact with the slot (when the top and
bottom spring tabs catch in the slot).
If you cannot hold the module by its two sides because of high module density, press the module
on its head end to push it in.
3.
Connect the fiber to the module. For the installation procedure, see "Connecting your switch to the
network."