Using the menus, P. 12, Basic operation – Roland V-1HD+ Compact 4 x HDMI Video Switcher & UVC-01 USB Capture Device Kit User Manual
Page 12: Displaying/exiting menus, Changing setting values
12
Basic Operation
Using the Menus
This explains how to display menus and make settings for video and audio, and for the V-1HD itself.
* The menu is shown on the monitor connected to the PREVIEW connector (p. 9).
* Video-switching operations cannot be performed while a menu is displayed.
Displaying/exiting menus
The V-1HD has three types of menus (SETUP,
MEMORY, and AUDIO).
The “MEMORY = 1” through “MEMORY = 8” items displayed
on the AUDIO menu and the MEMORY menu show that
settings are saved in memories 1 through 8.
When changing settings, you recall the memory number
(1 through 8) containing the settings you want to change
(p. 13).
* For SETUP menu settings, only a single set is saved in the unit.
* The button lights up during menu display.
SETUP menu
1.
Press and hold the [(TAP) BPM] button (for 2
seconds or longer) to display the SETUP menu.
2.
Press the [(TAP) BPM] button to quit the menu.
MEMORY menu
1.
Press the [MEMORY] button to display the
MEMORY menu.
* This activates the memory function (p. 13), and the [A-1]
through [A-4] and [B-1] through [B-4] buttons function as
memory selection buttons 1 through 8.
2.
Press the [A-1] through [A-4] or [B-1] through
[B-4] button for the memory number
containing the setting you want to change.
The currently selected button lights up in blue.
* Selecting a memory number also recalls the saved settings.
3.
Press the [MEMORY] button to quit the menu.
AUDIO menu
1.
Press the [AUDIO] button to display the AUDIO
menu.
2.
Press the [AUDIO] button to quit the menu.
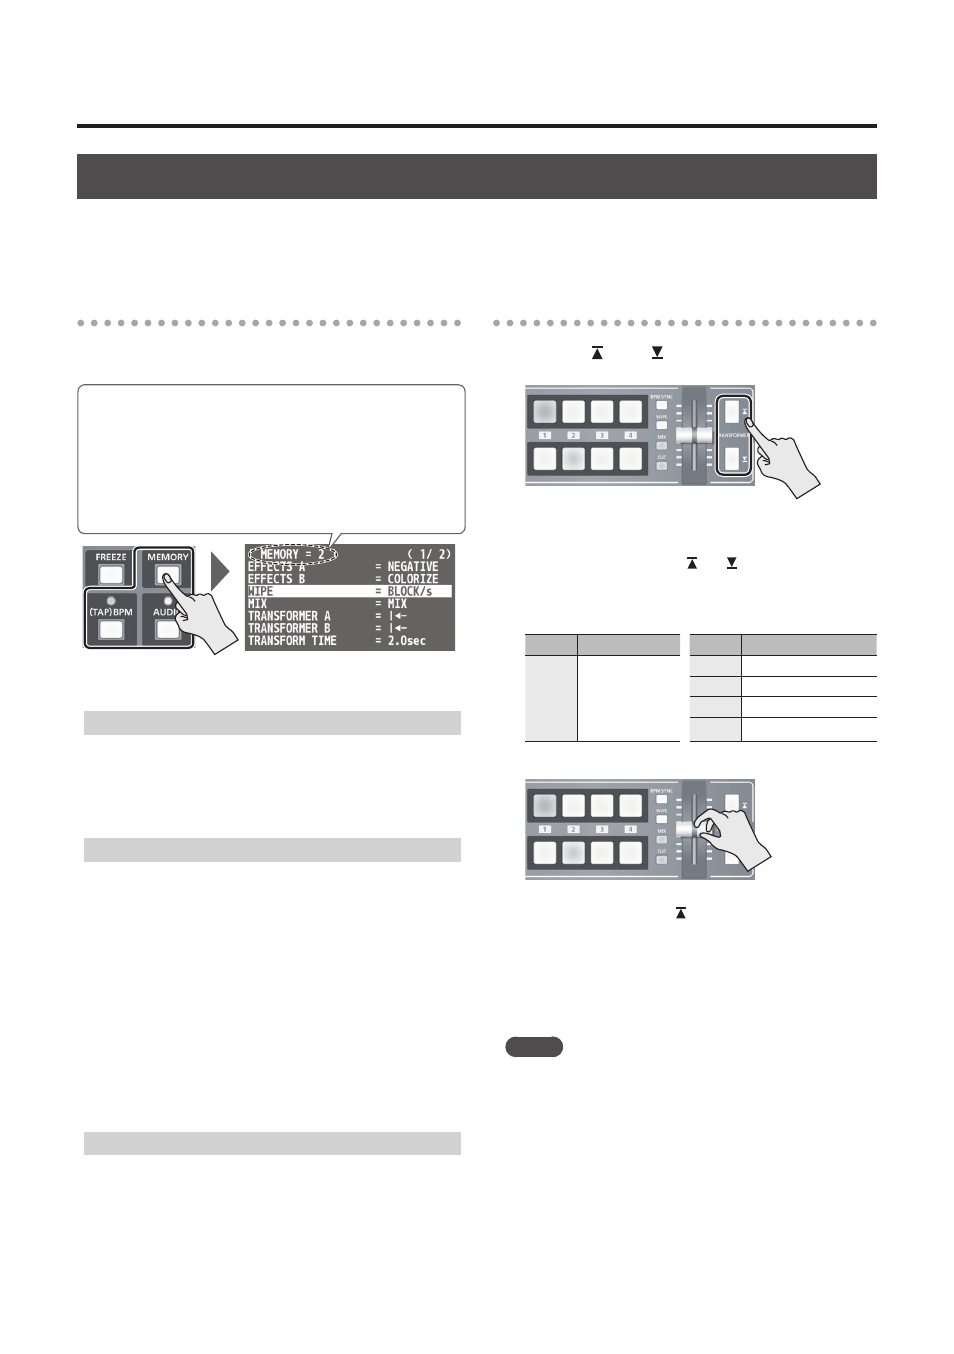
Changing setting values
1.
Use the [ ] and [ ] buttons to move the cursor
and select a menu item.
5
Use the [MIX][WIPE] buttons to move to the previous or
next page.
5
Pressing and holding the [ ] or [ ] button makes the
cursor move rapidly.
5
While the AUDIO menu is displayed, you can also select
menu items by pressing the following buttons.
Button Menu item
Button Menu item
[A-1]
:
[A-4]
HDMI
INPUT 1 LEVEL
:
HDMI
INPUT 4 LEVEL
[B-1]
AUDIO IN LEVEL
[B-2]
MIC LEVEL
[B-3]
MASTER OUT LEVEL
[B-4]
AUDIO FOLLOW
2.
Use the A/B fader to change the setting value.
* For the following SETUP menu items, you apply the
setting by pressing the [ ] button. If 10 seconds elapse
without applying the setting, the setting returns to its
original value, with no change applied.
5
OUTPUT COLOR SPACE
5
OUTPUT DVI-D/HDMI
5
PREVIEW COLOR SPACE
5
PREVIEW DVI-D/HDMI
5
FRAME RATE
MEMO
5
Pressing and holding the [WIPE] button (for 2 seconds)
while a menu is displayed returns the currently selected
menu item to its default value. Continuing to press and
hold the [WIPE] button (for 5 seconds or longer) returns
all menu items on the currently selected page to their
default values.
5
The values of menu settings are saved in the unit when
you exit the menu. After changing settings, if you turn off
the power without first quitting the menu, the changed
setting values are not saved.
5
For detailed information about menu items, refer to