Applying effects to output audio, Audio operations applying effects to output audio, Equalizer (eq) – Roland V-1HD+ Compact 4 x HDMI Video Switcher & UVC-01 USB Capture Device Kit User Manual
Page 27: Mastering (mastering), Reverb (reverb)
27
Audio Operations
Applying Effects to Output Audio
This applies effects and adjusts the sound quality for
output audio.
1.
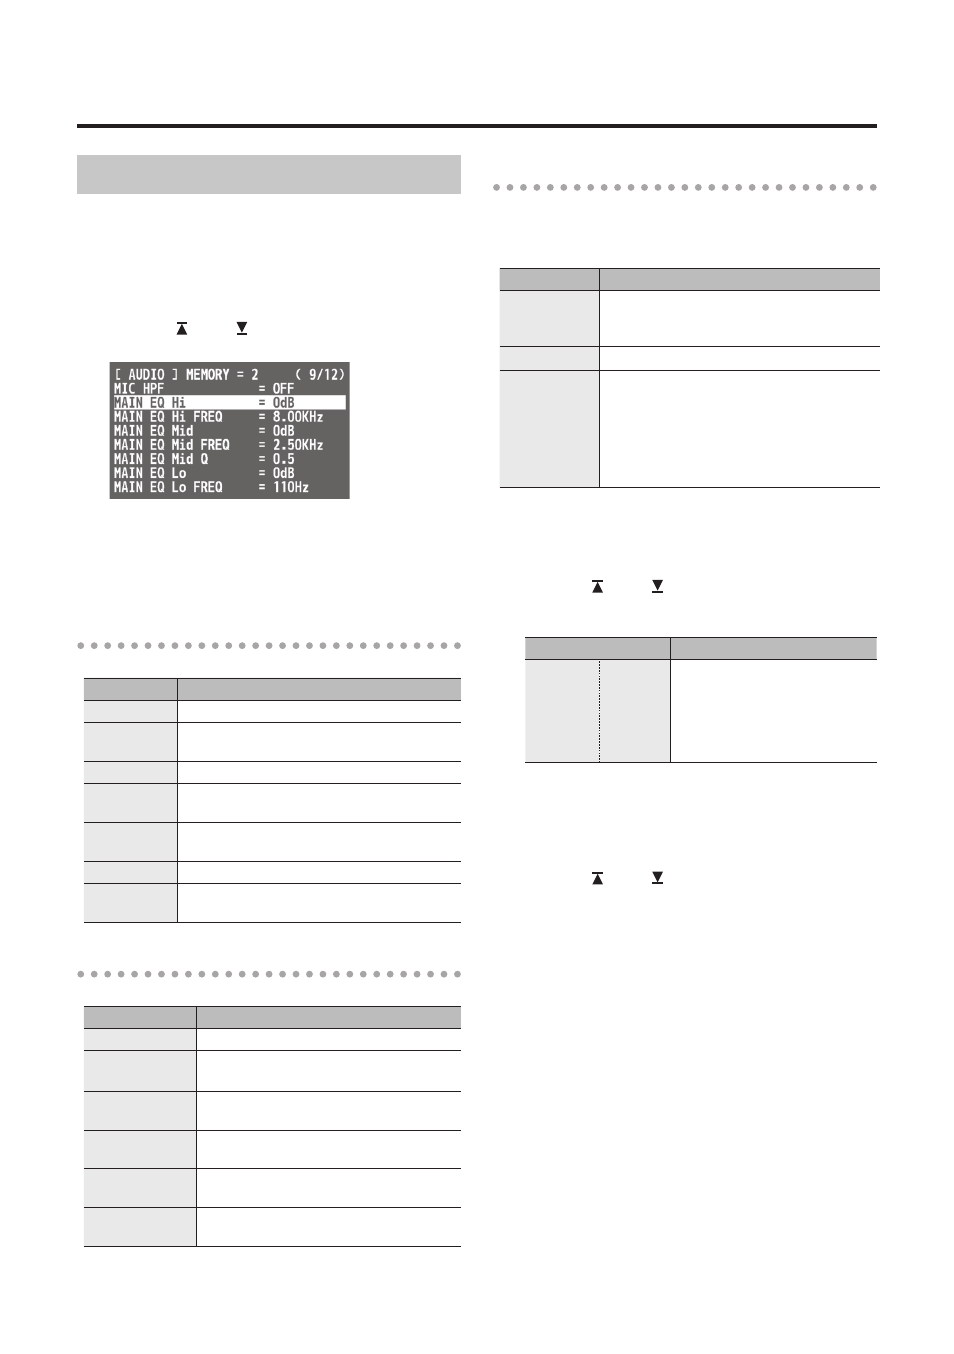
Press the [AUDIO] button to display the AUDIO
menu.
2.
Use the [ ] and [ ] buttons to select the effect
menu item you want to use.
* For more information about effects, refer to the following
section.
3.
Use the A/B fader to adjust the setting value.
4.
Press the [AUDIO] button to quit the menu.
Equalizer (EQ)
Adjusts the tone quality for each frequency band.
Menu item
Explanation
MAIN EQ Hi
Boosts or attenuates the high band.
MAIN EQ Hi
FREQ
Adjusts the center frequency when changing
the tone quality in the high band.
MAIN EQ Mid
Boosts or attenuates the middle band.
MAIN EQ Mid
FREQ
Adjusts the center frequency when changing
the tone quality in the middle band.
MAIN EQ
Mid Q
Adjusts the width of the frequency band when
boosting or attenuating the middle band.
MAIN EQ Lo
Boosts or attenuates the low band.
MAIN EQ Lo
FREQ
Adjusts the center frequency when changing
the tone quality in the low band.
Mastering (MASTERING)
Adjusts the acoustic characteristics and tone quality.
Menu item
Explanation
MASTERING
Turns the mastering on/off.
MASTERING NS
Adjusts the degree of application of the
noise suppressor.
MASTERING
ENHANCER
Adjusts the degree of application of the
enhancer.
MASTERING Hi
Suppresses high-frequency distortion and
adjusts the sound to have sustained tones.
MASTERING Mid
Suppresses midrange distortion and
adjusts the sound to have distinct tones.
MASTERING Lo
Suppresses low-frequency distortion and
adjusts the sound to have stable tones.
Reverb (REVERB)
This adds lingering reverberations to the audio.
You can apply reverb to audio input via AUDIO IN,
MIC, and HDMI IN.
Menu item
Explanation
REVERB LEVEL
Adjusts the return level from reverb of the
audio. A setting of “0” results in no reverb
applied.
REVERB TIME
Adjusts the length of the reverb.
REVERB TYPE
Specifies the type of reverb.
ROOM: Produces the natural-sounding
reverberation of a room.
HALL: Produces the reverberation that
is typical of a performance in a
concert hall.
1.
Press the [AUDIO] button to display the AUDIO
menu.
2.
Use the [ ] and [ ] buttons to select “REV
SEND” for the input audio on which you want to
apply reverb.
Menu item
Explanation
HDMI IN 1
:
HDMI IN 4
AUDIO IN
MIC
REV SEND
Adjusts the amount of audio
sent to reverb for each different
input audio stream.
3.
Use the A/B fader to adjust the amount of audio
sent to reverb.
Repeat steps 2 and 3 as needed to individually
adjust the amount of reverb applied.
4.
Use the [ ] and [ ] buttons to select “REVERB
LEVEL.”
5.
Use the A/B fader to adjust the amount of audio
returned from reverb.
This adjusts the depth of overall reverb applied
while maintaining the balance in the degree
of reverb applied to the individual input audio
streams.
6.
Press the [AUDIO] button to quit the menu.