Wcc3.exe screen descriptions, Wcc iii main menu tool bar, Wcc iii technical guide 3-4 action menu – WattMaster WCC III part 4 User Manual
Page 8
WCC3.EXE SCREEN DESCRIPTIONS
WCC III Technical Guide
3-4
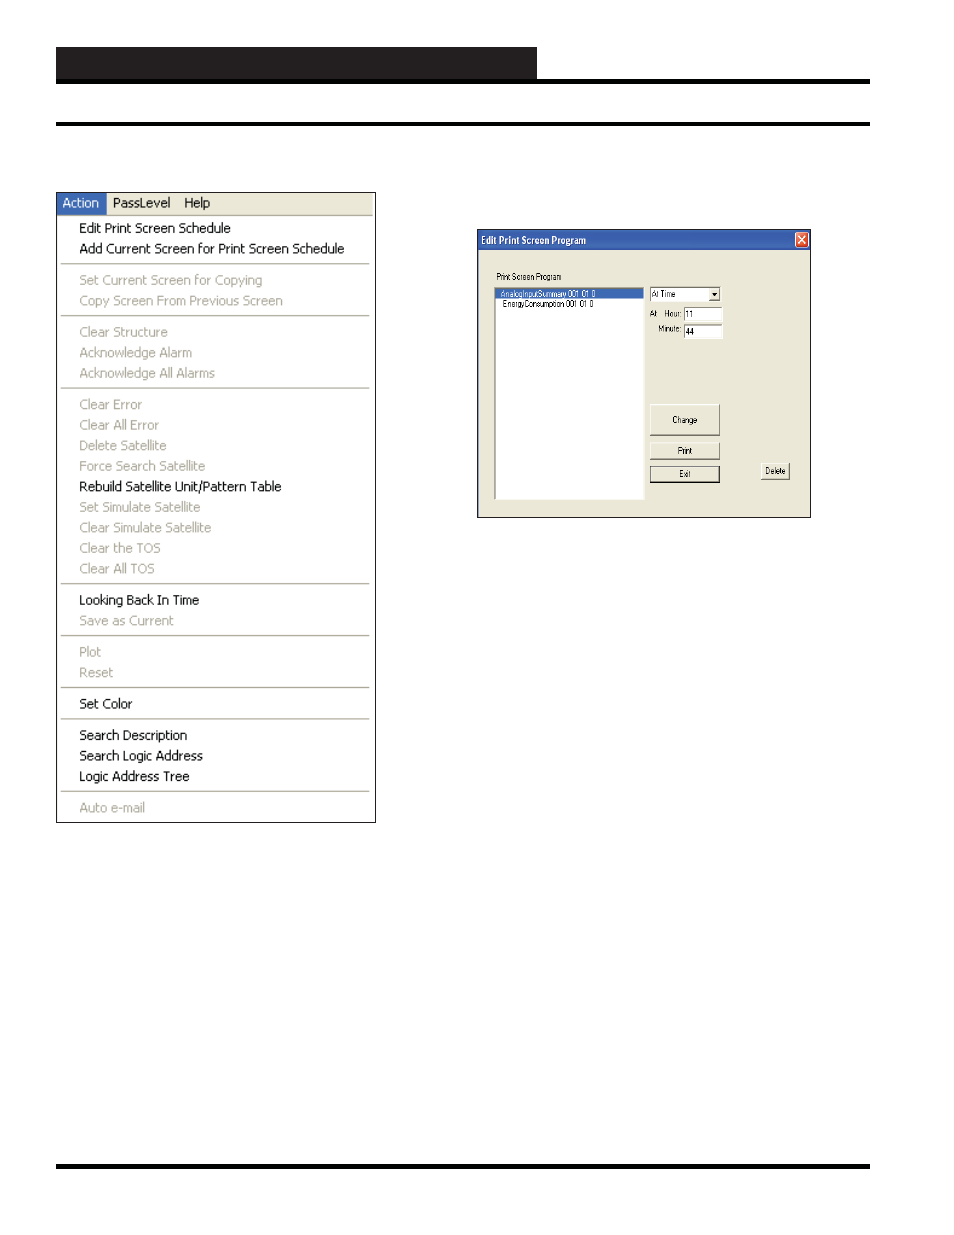
Action Menu
The
<Action>
menu has many functions. These functions’
availability are tied to individual screens. Available menu items
will be bolded.
Edit Print Screen Schedule/ Add Current
Screen
The fi rst two menu items
<Edit Print Screen Schedule>
and
<Add Current Screen for Print Screen Schedule>
are used to
automatically generate screen prints based on the schedule you set
up for each screen.
While in a screen, if you select
<Action>
,
<Add Current Screen
to Print Screen Schedule>
, the screen will be immediately added
to the Print Screen Schedule Program.
To set up the printing schedule for each screen, you must then
select
<Action>
,
<Edit Print Screen Schedule>
. The Edit Print
Screen Program Window will pop-up.
You can select the printing schedule by time, interval, or global
binary.
If you select
<At Time>
, the At Hour: and Minute: fi elds will
appear. Enter the time of day with a two-digit hour value (military
time) and a two-digit minute value. The hour value should be less
than 24, and the minute value should be less than 60.
If you select
<With Interval>
, the Interval: fi eld will appear. Enter
the interval and select minutes, hours, or days from the drop down
menu. The interval should be less than 256 and greater than 0.
If you select
<Global Binary>
, the Global Binary Number: fi eld
will appear. Enter a global binary number. If you wish to temporarily
remove the screen from the print schedule, select
<None>
from the
drop down menu. The global binary value should be less than or
equal to 512 and greater than 0.
You must click
<Change>
to have the system accept the assigned
schedule. If you wish to remove a screen from the schedule,
highlight the screen name and then click
<Delete>
. To print a
screen immediately, highlight the screen name and then click
<Print>
. Click
<Exit>
to exit the program.
Set Current Screen for Copying
To copy a set of data points from one satellite to the next, while
at the point you wish to copy from the current screen or within
the same satellite, select
<Action>
,
<Set Current Screen for
Copying>
.
A message similar to the following will appear at the bottom of
the screen:
Point __ of Satellite __ was tagged for copy!
WCC III Main Menu Tool Bar