8 installation of the inverter, 1 installing the inverter, 1 installing the inverter on a foundation – SMA SC 500CP-US User Manual
Page 53: 2 removing the connection area panels
SMA America, LLC
8 Installation of the Inverter
Installation Manual
SCCP-US-IA-US_en-41
53
8 Installation of the Inverter
This section contains all information necessary for installing the inverter. The various installation options are described
consecutively.
8.1 Installing the Inverter
8.1.1 Installing the Inverter on a Foundation
Once the inverter has been aligned on the foundation, you can attach it to the foundation using concrete screw anchors.
Additionally required mounting material (not included in the scope of delivery):
☐ Six suitable concrete screw anchors
Requirements:
Procedure:
1. Insert the concrete screw anchors through the brackets of the inverter into the foundation. The exact procedure
depends on the type of screw anchors used.
2. Tighten the concrete screw anchors using the torque specified by the screw anchor manufacturer.
3. Make sure that all concrete screw anchors and the inverter are securely connected to the foundation.
8.2 Removing the Connection Area Panels
1. Remove all eight screws of the front panel using a TX screwdriver.
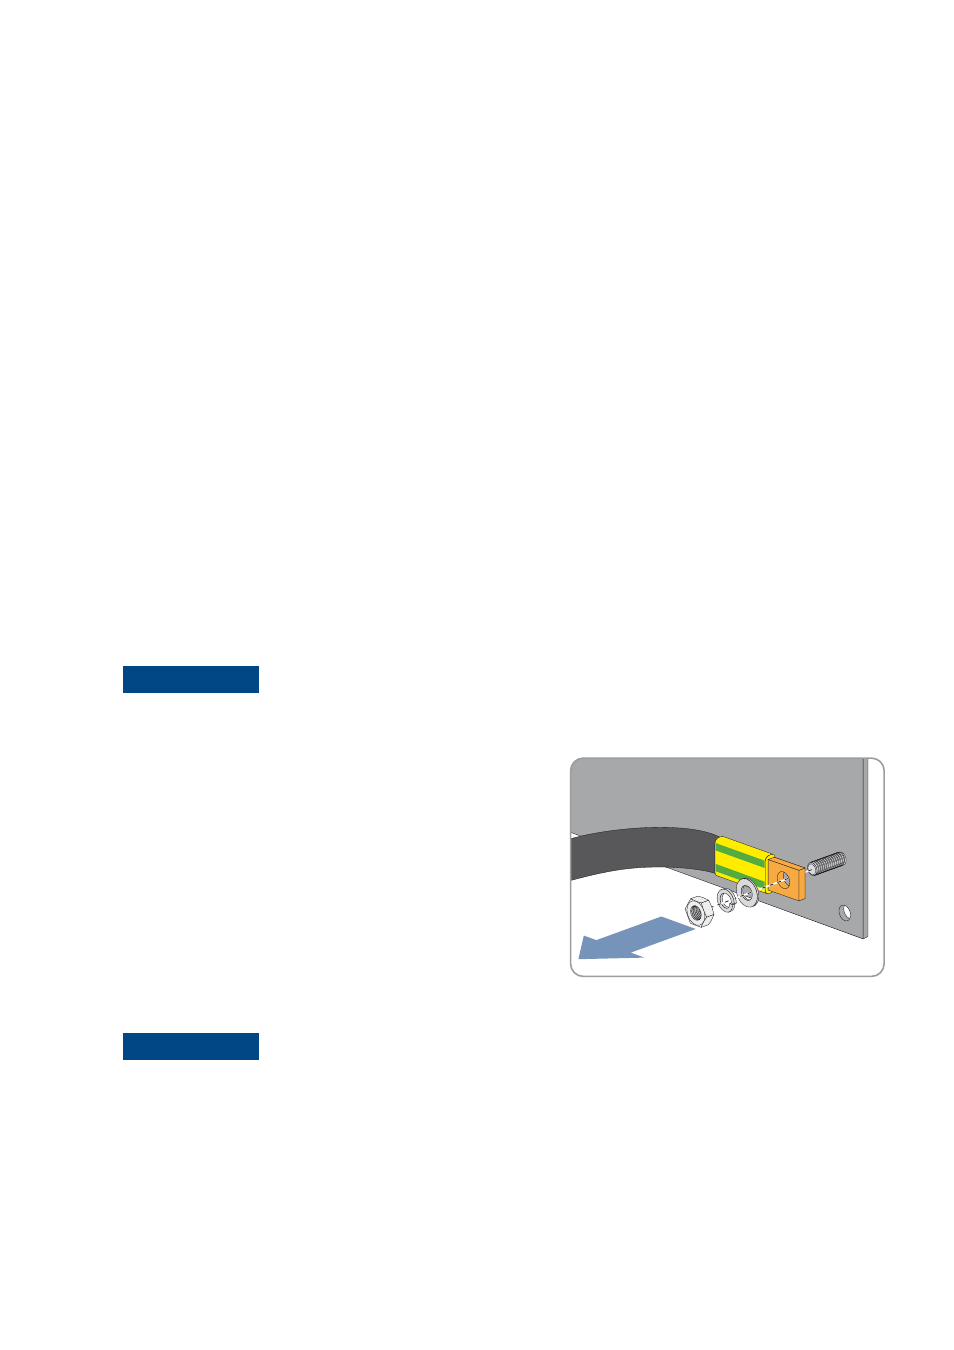
3. Unscrew the grounding strap of the front panel.
4. Remove the panel and store the screws safely.
5. Remove all 17 screws of the side panel using a TX screwdriver.
2.
/05*$&
Damage to the inverter due to the grounding strap being ripped off
• Pull the panel approximately 8 in. (200 mm) away from the inverter.
6.
/05*$&
Damage to the inverter due to the ripping off of the grounding strap
• Pull the panel approximately 8 in. (200 mm) away from the inverter.