Yaskawa MPLoad Maker User Manual
Page 14
4 Creating Auto_MPLCD
4.2 Creating Auto_MPL
14
< When USB is selected as Port No. >
Local Address : Select the USB port address of the transfer destination Machine Controller.
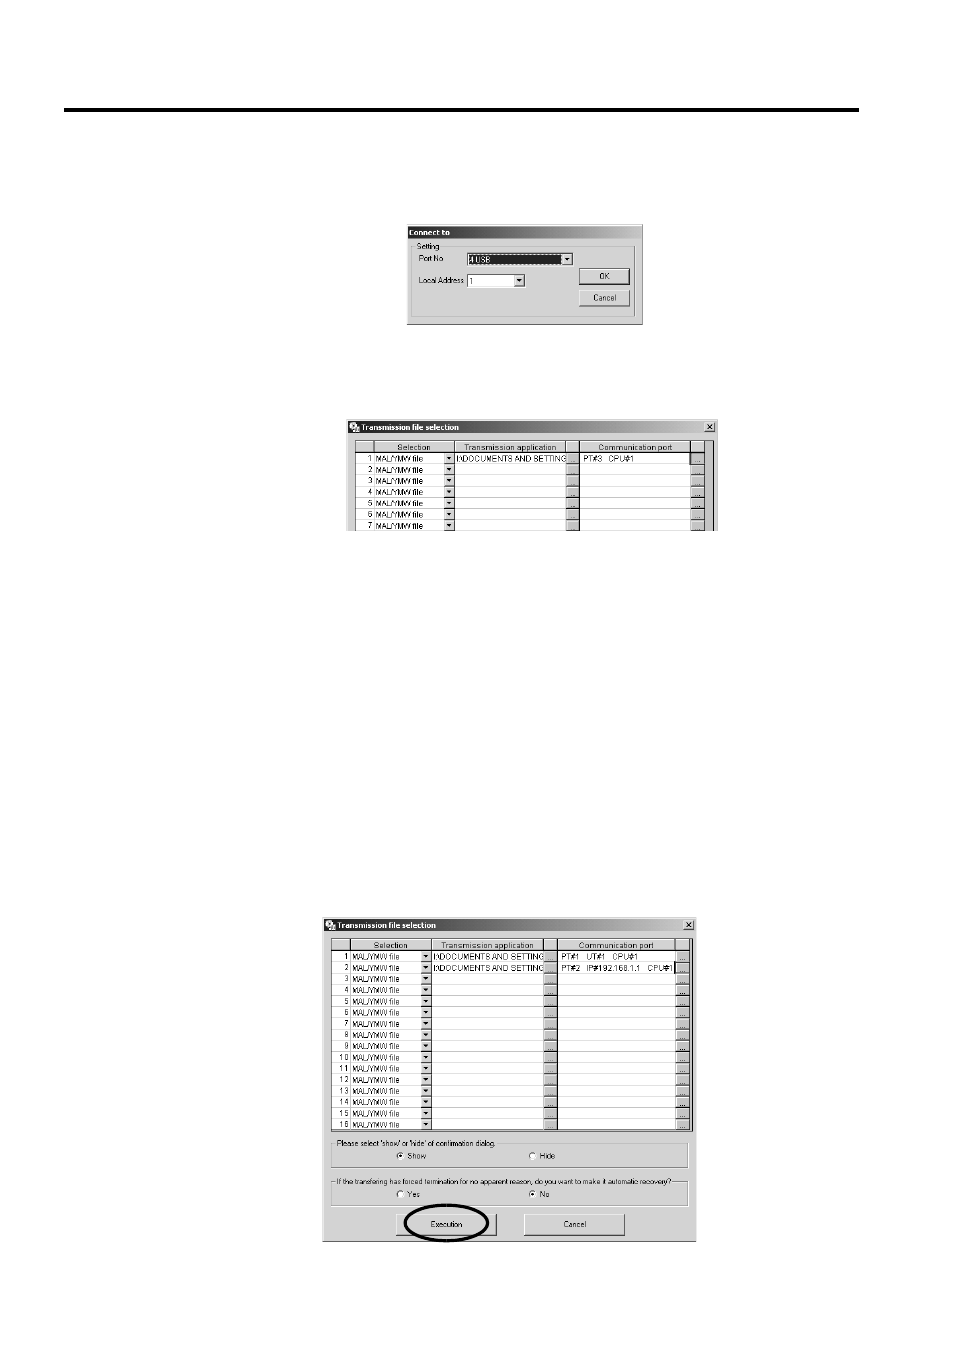
Click the OK Button to complete the settings. The Transmission file selection Dialog Box will be displayed
again.
The selected logical port number and the contents assigned to the port are displayed in the Communication
port column.
9.
Repeat Steps 3 through 8 to set all the applications to be transferred and the transfer destinations.
Also repeat Steps 3 through 8 (file selection to communications port settings) when setting one application to
multiple transfer destinations.
Do not close the Transmission file selection Dialog Box until the application selection and communications
port settings have been completed and the Auto_MPL has been created by clicking the Execution Button.
Closing the Dialog Box before clicking the Execution Button will delete all the information set for the applica-
tion.
10.
When you have finished selecting all of the applications to be transferred and completed all communi-
cations port settings, click the Execution Button.
When the Show Option is selected under Please select ‘show’ or ‘hide’ of confirmation dialog, the
Confirmation Dialog Box will be displayed when the Auto_MPLCD is inserted in the CD-ROM drive of the
Target PC to check the transfer file names and communications port settings.
If the auto start CD-ROM is forcibly terminated by Windows Task Manager or the Target PC power supply is
turned OFF in the Target PC where the MPE720 is installed, the MPE720 may not be able to run any more.
When the Yes Option is selected under If the transfering has forced termination for no apparent reason,
do you want to make it automatic recovery?, a backup file will be created to restore the original environ-
ments so that the MPE720 will start properly in the above case.