Step 2: job-site set-up, Job-site setup – Auto-Zone Control Systems Prism 2 Graphical Interface Technical Guide (Version 01J) User Manual
Page 11
STEP 2: JOB-SITE SET-UP
Prism 2 Technical Guide
11
Phone Number
If you are confi guring Prism 2 to access to a remote job-site that
uses a modem connection instead of an Internet connection, enter
the modem phone number in this box. It may be necessary to put
a pause in with a comma to successfully dial out. Prism 2 will dial
this number to make a connection when you select this job-site and
the
< Dial-Out>
button.
Alarm Polling Enabled
If you require a time and date stamped log of alarming or you
require e-mail notifi cation of alarms, check this box to enable
Prism 2 to poll for alarms. Checking this option will cause the
Alarm button to light up on the Prism 2 Main Screen. Prism 2 must
be left running on a computer 24 hours a day, 7 days a week for this
function to operate correctly.
Tenant Logging Enabled
If you require tenant unoccupied override information for billing
purposes and have installed the MiniLink Polling Device, check
this box. Prism 2 can be confi gured to monitor for individual tenant
space temperature sensor push-button overrides and can create
reports totalizing each zone’s after- hours usage. See Section 11 -
Tenant Override Logging for more information.
Auto-Zone Setpoint Verifi cation
Only check this box if you are using Auto-Zone Controllers. Do not
check this box if you are not using Auto-Zone Controllers, because
it will slow communications.
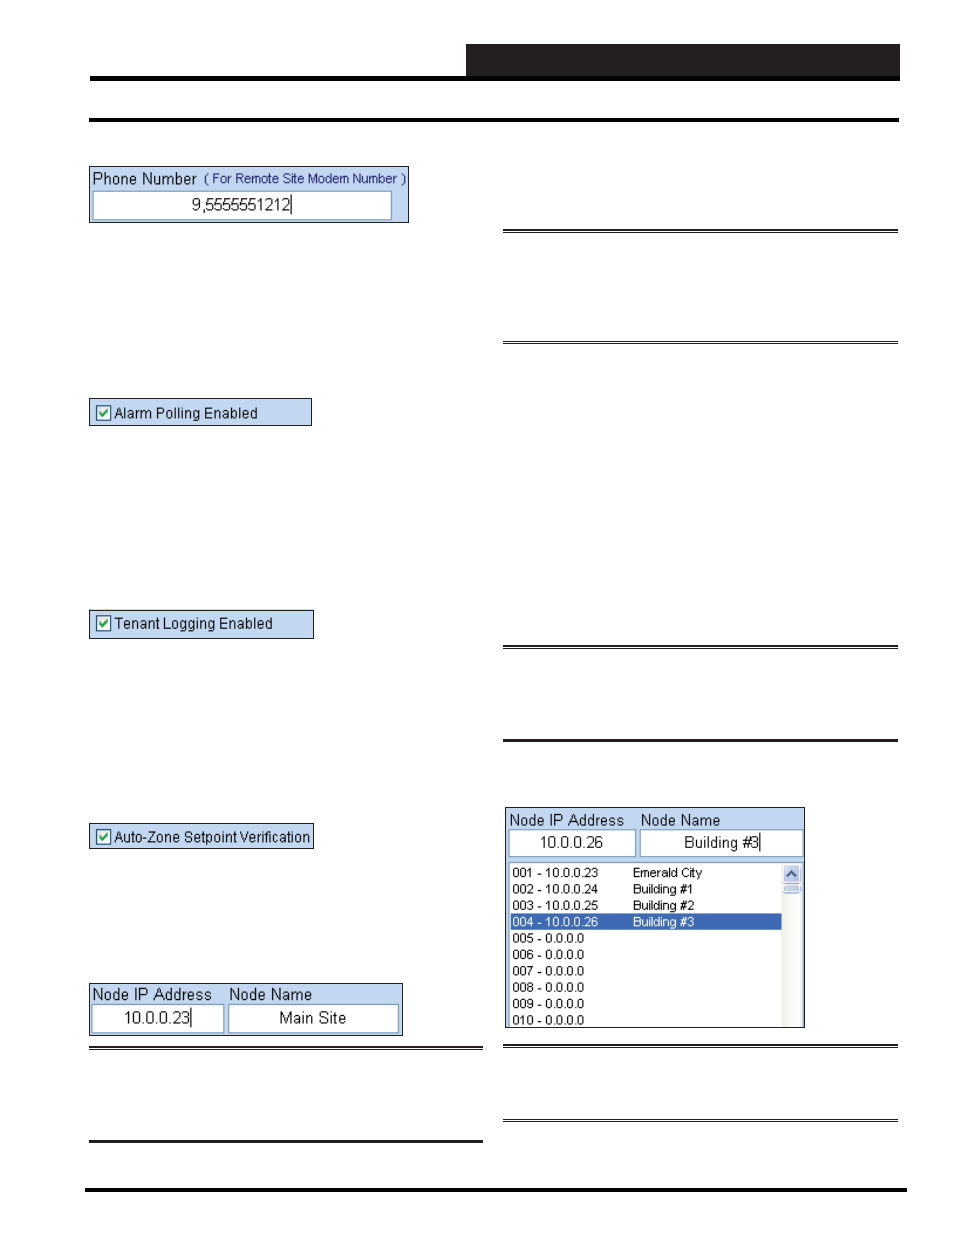
Node IP Address and Node Name
NOTE:
Only CommLink IV w/IP or CommLink 5 w/IP
devices can be confi gured and used as multiple Node devices.
Serial versions and older versions of the CommLink are not
supported.
If you are not using an Internet connection, enter 0.0.0.0 in this
fi eld and press
<ENTER>
. If using TCP/IP, enter the IP address of
your CommLink IV w/IP or CommLink 5 w/IP device and press
<ENTER>
.
NOTE:
If you are using a
crossover cable to connect your
CommLink IV w/IP or CommLink 5 w/IP to your computer,
you will need to access your Network Settings in your Windows
®
Control Panel, change from DHCP to a Static IP Address, and
enter the IP Address and Mask provided by your IT personnel.
The Node IP Address identifi es the
TCP/IP address of the
CommLink IV w/IP or CommLink 5 w/IP that you will be accessing
for the selected job-site. If your job-site has multiple buildings with
multiple CommLink IV w/IP or CommLink 5 w/IP devices, each
device address can be programmed here.
Simply select the location from the list box to program and type in
the IP address in the xxx.xxx.xxx.xxx format. You can also enter a
name for each Node or CommLink IV w/IP or CommLink 5 w/IP
to aid in identifying which building you are communicating with.
This allows multiple CommLinks to appear as one job-site, and
Prism 2 will then be able to monitor all nodes for alarming or trend
information instead of a single node. You can enter up to 500 nodes
per job-site.
NOTE:
Please avoid skipping Node addresses in the list box
and keep all your CommLinks consecutively listed. 001 is
always the Main Job-Site. The 001 Node Name defaults to Main
Site, but you can change the name.
The fi gure below shows an example of Node IP Addresses and
Node Names for a job-site with multiple buildings.
NOTE:
You should never have a Serial Port and a Node
IP address entered at the same time. Only one method of
communications is available per job-site.
Job-Site Setup
Revised 7/25/11