Step 4: setting up communications – Auto-Zone Control Systems Prism 2 Graphical Interface Technical Guide (Version 01J) User Manual
Page 18
STEP 4: SETTING UP COMMUNICATIONS
Prism 2 Technical Guide
18
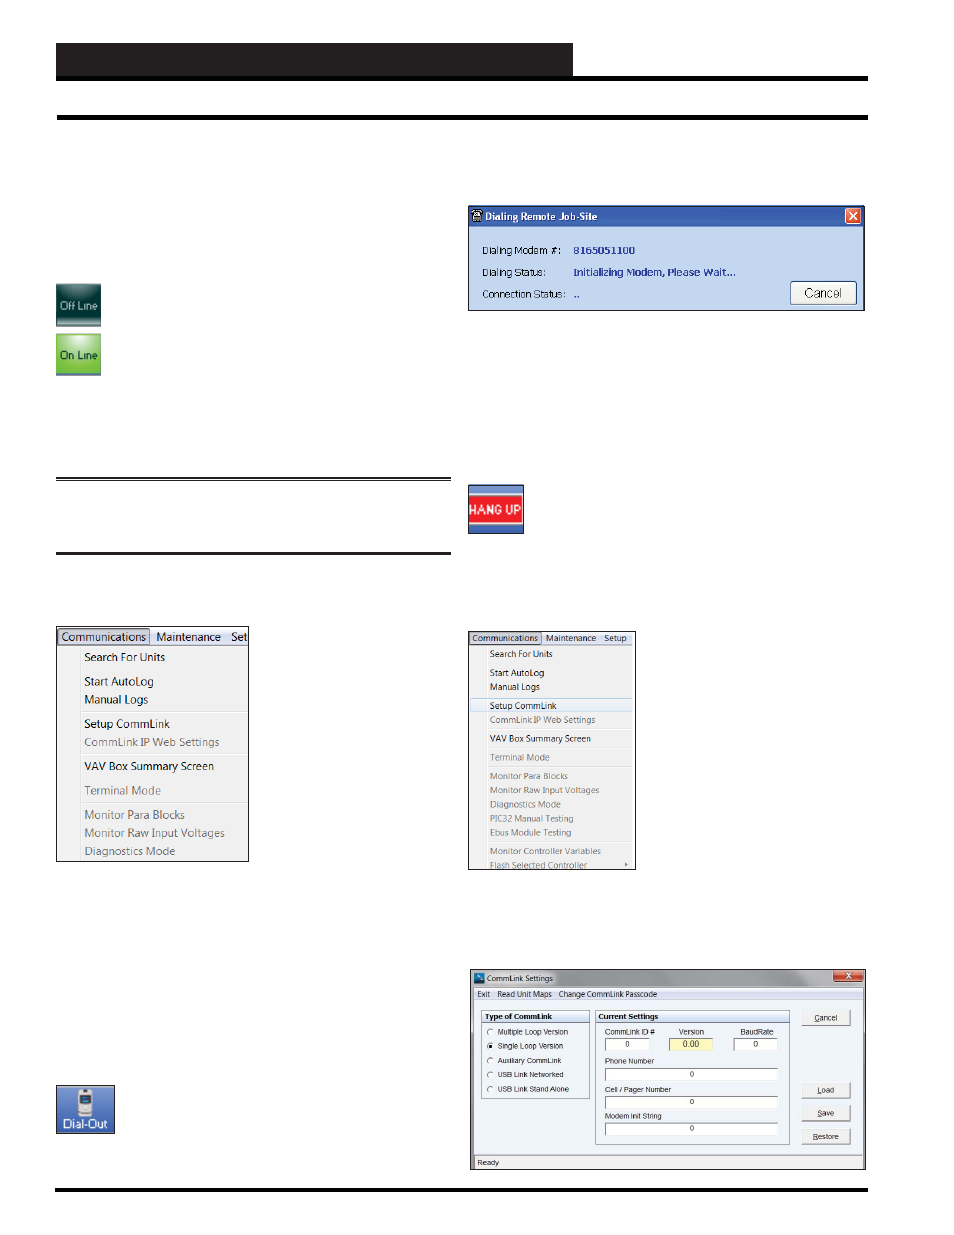
The Dialing Status and Connection Window will appear and the
<Dial Out>
button will display
< Cancel Dialout>
. Verify that you
are dialing the correct job-site.
Click the
<Cancel>
button if you need to terminate the dialing
sequence before it has fi nished.
The Dialing Status and Connection Window will provide all of the
information you need to determine the dialing state and its success
or failure. Once the Connection Status indicates a successful
connection, simply click
<OK>
to close the window and begin
normal communications with the remote job-site.
When you are done completing the tasks for the job-site
you dialed, click the
< Hang Up>
button. This button
replaces the
<Cancel Dialout>
button once a modem
connection is successful.
CommLink Setup
(For Remote Connection Only)
If Prism 2 is able to open
communications, you can now
confi
gure the CommLink with
the proper settings.
From
the
Communications Menu
,
click
< Setup CommLink>
. The
CommLink Settings Window will
appear.
Verify the
Type of CommLink
-
Multiple Loop,
Single Loop,
Auxiliary, USB Link Networked,
and USB Link Stand Alone. This
selection should default to what
you set up for the job-site in the Job
Sites Window.
Click
< Load>
to retrieve the current settings from the CommLink
device.
TCP/IP Connection and CommLink Setup
Step 4: Setting Up Communications
This section discusses the initial settings required to get Prism
2 communicating with your WattMaster digital controls. Your
CommLink communications device must already be installed and
all communications wiring must be completed before Prism 2 can
communicate with your system.
Once the job-site has been confi gured, you should be able
to initiate communications with the attached CommLink
device. Click on the
< Off Line>
button to force Prism 2 to
open a communications port or socket to the CommLink.
If it is successful, the button indicator will light up and
display
< On Line>
.
Each time you click this button, Prism 2 will either open
communications and display
<On Line>
or close communications
and display
<Off Line>
.
NOTE:
If you are using a USB-Link or auxiliary CommLink,
you can skip the rest of this section and go directly to “Searching
For Units” on page 20.
TCP/IP Connection
If you are using a CommLink
IV w/IP or CommLink 5 w/
IP device, you need to set up
initial settings by clicking
< CommLink IP Web Settings>
from the
Communications
Menu
. In the menu at left,
this item is grayed out, but
when you actually plug in
your CommLink IV w/IP or
CommLink 5 w/IP device, this
menu item will be accessible.
A separate document is provided
with the CommLink IV w/IP or
CommLink 5 w/IP device which details all required settings and
confi gurations and will not be discussed in this manual.
The initial setup is performed with your installed web browser. This
option is provided in Prism 2 to eliminate the need to run a separate
program to verify settings while troubleshooting or performing
other changes as specifi ed by WattMaster Technical Support.
Modem Connection
If you are connecting to a remote job-site via a modem
connection, you must select the
< Dial-Out>
button
located next to the
< On Line/Off Line>
button.