Step 12: creating custom screens, Placing an image, Main screen image hot spot selection – Auto-Zone Control Systems Prism 2 Graphical Interface Technical Guide (Version 01J) User Manual
Page 37
STEP 12: CREATING CUSTOM SCREENS
Prism 2 Technical Guide
37
Placing an Image
If you want graphics displayed along with the data and
text, click the
< Place Image>
button to open a File
Open Window and load a graphic onto the form. The
fi le format is limited to BMPs, JPEGs, and GIFs.
Prism 2 always places the graphic in the upper left corner of the
custom screen, so if you have a small graphic, you may want to edit
it and make it larger so that the graphic appears more centered on
the screen resolution you are currently using.
To edit the graphic, click the
< Edit Bitmap>
button to
launch the Windows
®
Paint program or use your own
graphics program and then reload the graphic when you
are fi nished.
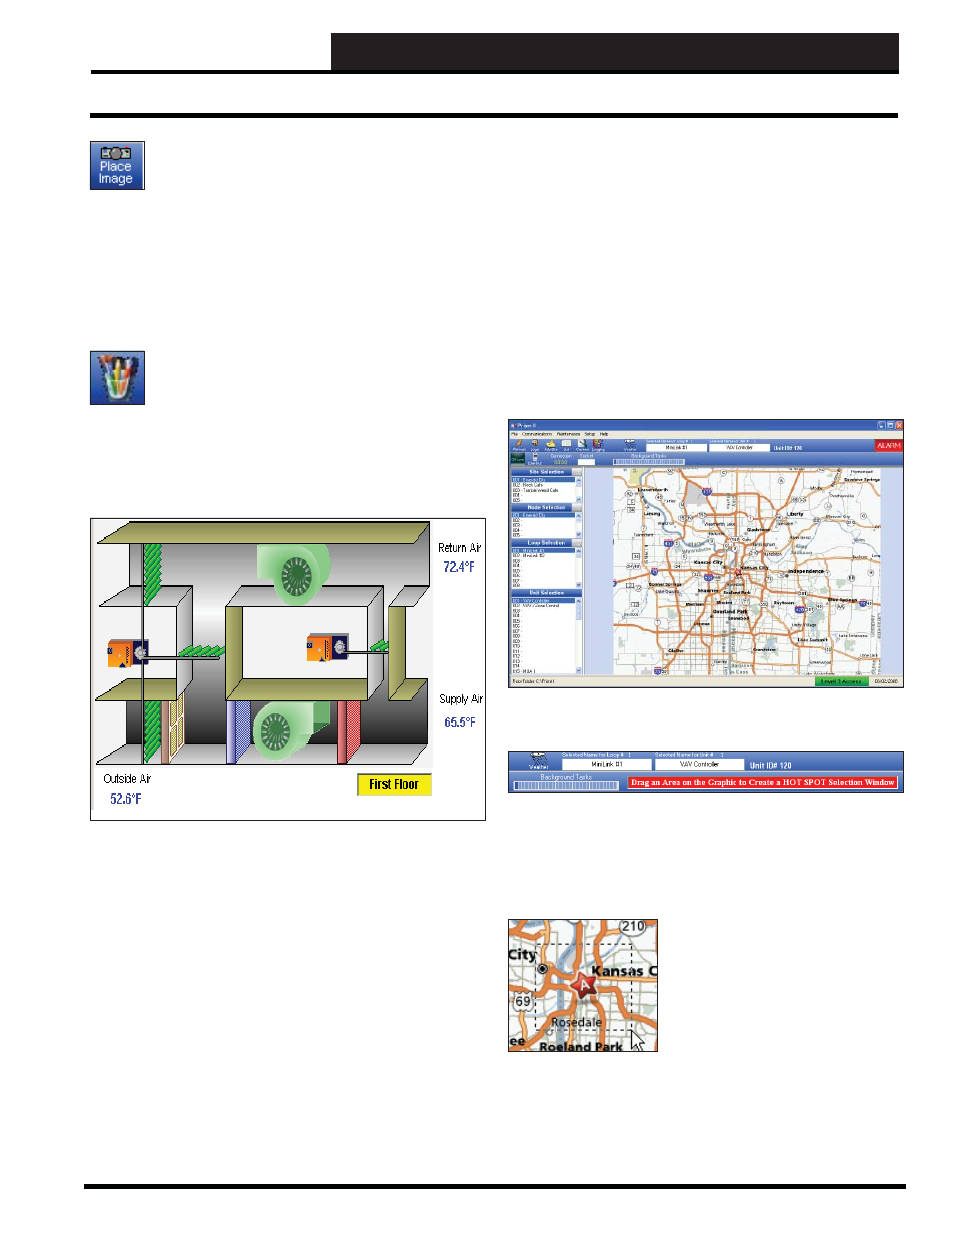
The sample screen that follows shows a bitmap in the background
with three data fi elds, three text fi elds, and one Jump button
<First
Floor>
placed so that you can jump back to the custom screen that
you originated from.
Main Screen Image Hot Spot
Selection
To immediately access different job sites or custom screens, an
Easy Access Hot Spot can be created for each job-site on Prism 2’s
Main Screen image.
You can associate a custom screen with a job-site in the Job Sites
Window’s Custom Screen fi eld and then you can create a link or
hot spot on the Prism 2 Main Screen to automatically access that
job-site’s custom screen.
From the Prism 2 Main Screen, right-click anywhere inside the
main screen area. In our example, we have a map of Kansas City
as our Main Screen Image.
The message, “Drag an Area on the Graphic to create a HOT SPOT
Selection Window” will appear in red in the Lower Toolbar.
To select the whole image, position the mouse in the upper left
corner of the image, hold the left mouse button down, and drag
the selection box to the lower right corner. In our example, we will
select a small area surrounding the star that indicates a job-site
location on the map.
As you can see, the dashed lines create
a border around the star, making this
the only area on the map currently
selected as the Easy Access Hot Spot.
Once you release the left mouse button,
the
Hot Spot Job Selection Window
will appear:
Placing an Image