Step 9: polling for alarms, Step 9: alarm polling, Alarm polling – Auto-Zone Control Systems Prism 2 Graphical Interface Technical Guide (Version 01J) User Manual
Page 28
STEP 9: POLLING FOR ALARMS
Prism 2 Technical Guide
28
Step 9: Alarm Polling
NOTE:
This section applies to Prism 2 Alarm Polling only. For
System Manager Touch Screen Alarm Polling, see Appendix E.
Prism 2 can be confi gured to poll the system consistently for alarm
information reported by each installed controller. For the system to
poll for alarms, you must have Alarm Polling Enabled checked in
the Job Sites Window.
Only the alarms that have been previously confi gured on the Unit
Alarm Status & Confi guration Screen for each type of controller
will activate an alarm in this display window. Alarms not confi gured
will only be reported on the Unit Alarm Status & Confi guration
Screen accessed from each individual controller’s status screen.
Whenever Prism 2 indicates it is On Line, it will poll the system
every 30 seconds for new alarm conditions. If any new alarms are
detected on the system, the Alarm Indicator located in the upper
right corner of the Prism 2 Main Screen will turn red and display
< ALARM>
.
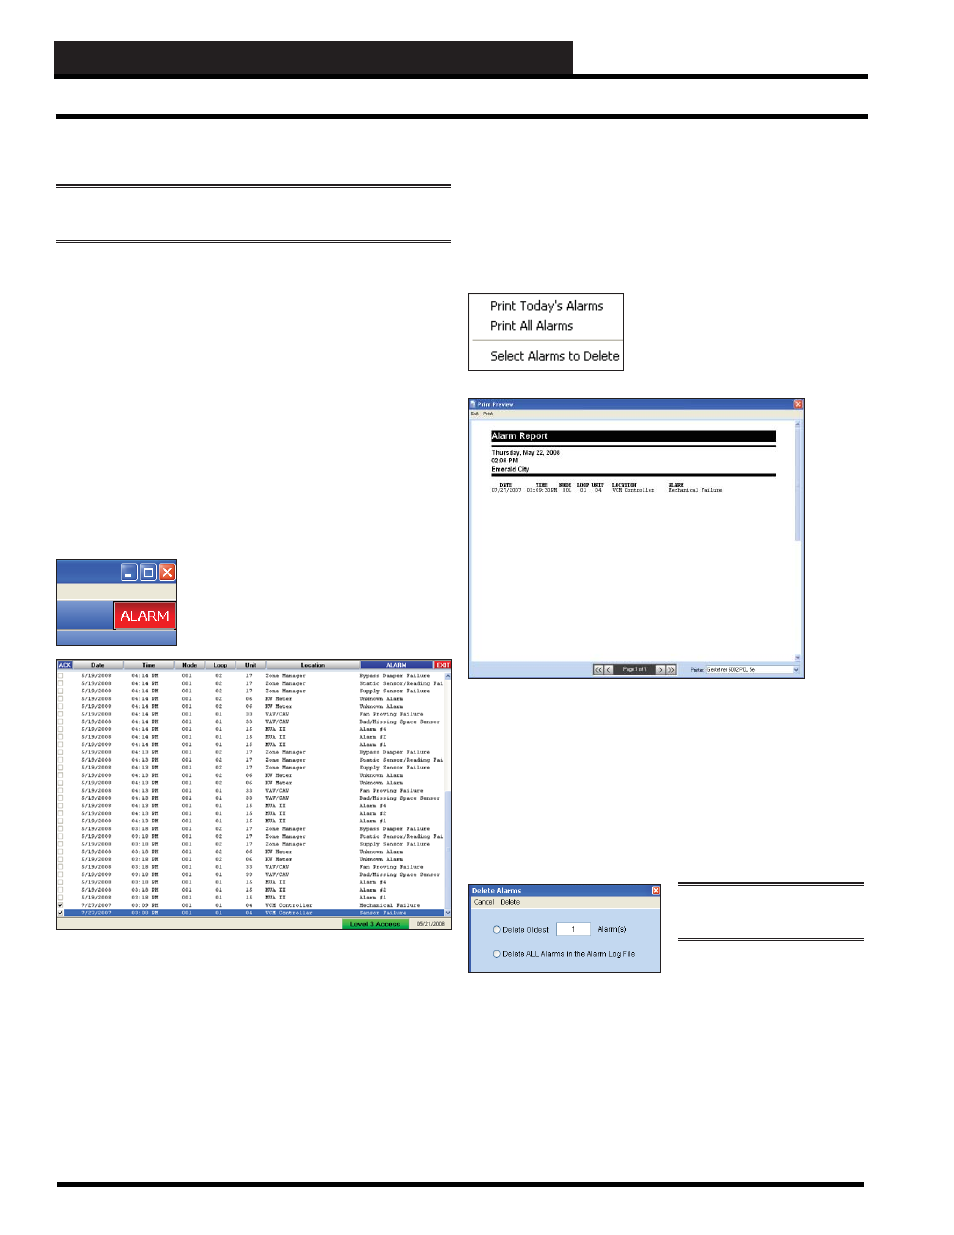
When you click on the alarm indicator, the
Alarm Display will appear on the Main
Screen with a list of the new alarms and any
old alarms still left in the alarm log fi le.
Alarms are displayed with the newest ones appearing at the top
of the list. This sample list shows two old alarms that have been
acknowledged with a checkmark and numerous alarms that have
not been acknowledged yet.
The Date and Time of the alarm are recorded when Prism 2 actually
polls and receives the alarm condition. It does not accurately refl ect
when the alarm occurred unless Prism 2 is left running continuously
and can log the alarms as they occur.
Alarm Polling
Acknowledging the alarms lets the system know you have been
notifi ed and are fi xing the problem.
To acknowledge all alarms, click the blue
< ACK>
button. A
checkmark will appear in front of each alarm.
For printing and deletion options, click the blue
< ALARM>
button,
and the following menu will appear:
To print just the alarms that have
come in today, select the fi rst option
< Print Today’s Alarms>
. You should
see a Print Preview Window like the
one shown below.
The printer you actually send it to can be selected in the lower right
corner.
If you select
< Print All Alarms>
, all old and new alarms that still
exist in the alarm log will be sent to the Print Preview Window for
printing.
To keep the alarm log fi le from growing too large, you can delete
specifi ed alarms from the log by selecting
< Select Alarms to
Delete>
. The following window will appear.
NOTE:
Only a Level 3 user
can delete alarms.
You can delete the oldest
alarms that no longer need to
be maintained, or you can delete the entire alarm log fi le and start
fresh. Once you make your selection, click
< Delete>
.
You should periodically delete logged alarms because the fi le can
grow quite large and can slow down the system.