Step 2: job-site set-up, Alarm e-mailing and display picture, Prism 2 technical guide 13 – Auto-Zone Control Systems Prism 2 Graphical Interface Technical Guide (Version 01J) User Manual
Page 13
STEP 2: JOB-SITE SET-UP
Prism 2 Technical Guide
13
Alarm E-mailing and Display Picture
When using Sprint cellular service, the text messaging e-mail
address is your 10-digit phone number followed by @messaging.
sprintpcs.com. For example, if your phone number is 1-555-555-
5555, your e-mail address (for TEXT MESSAGING) would be
[email protected].
When using AT&T cellular service, the text messaging e-mail
address is your 10-digit phone number followed by @txt.att.net.
For example, if your phone number is 1-555-555- 5555, your e-mail
address (for TEXT MESSAGING) would be [email protected].
net.
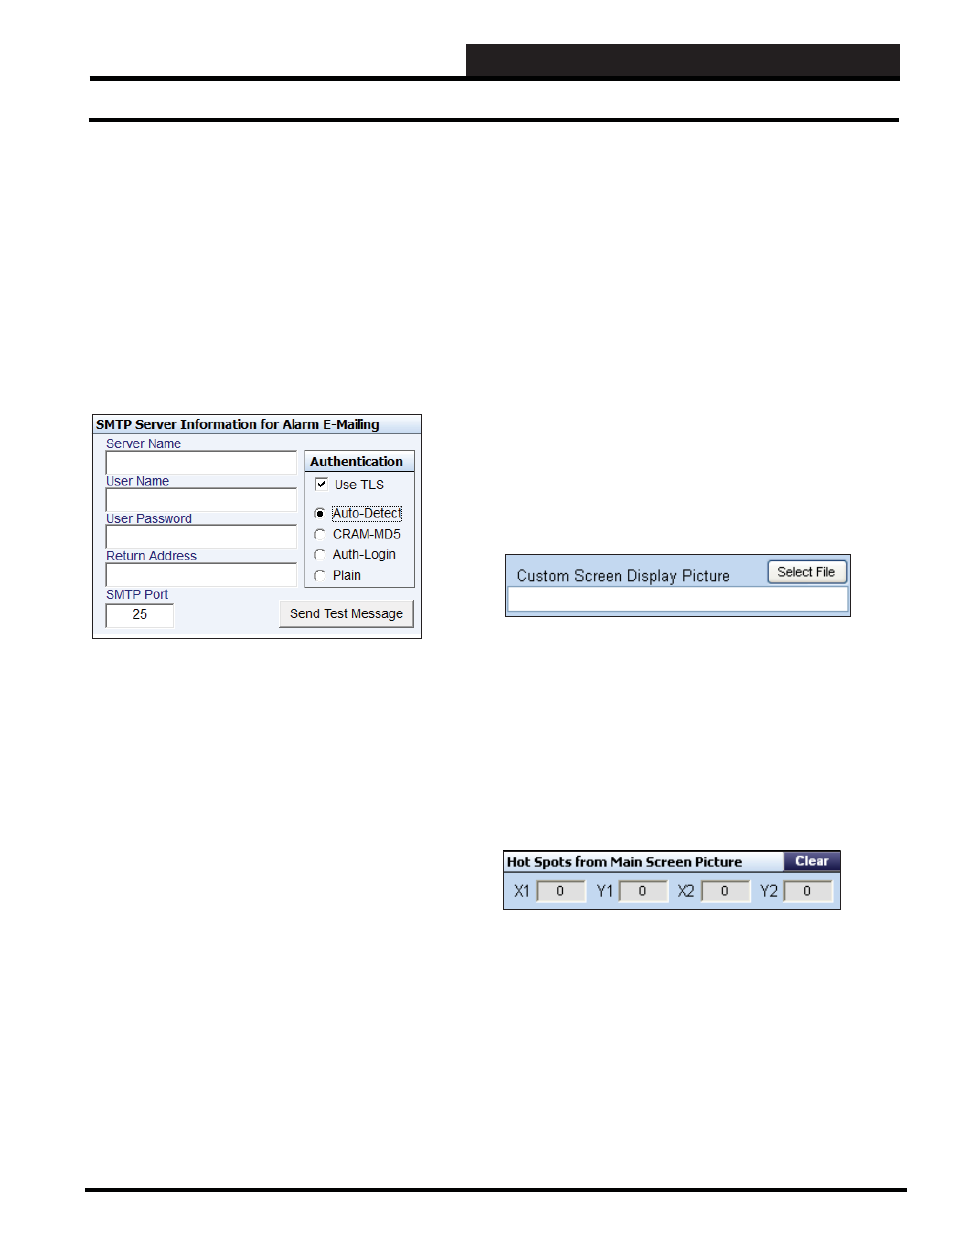
SMPT Server Information for Alarm E-Mailing
Server Name:
This is the SMTP mail server provided when you set up your e-mail
account. For example, Time Warner Cable uses smtp-server.kc.rr.
com and WattMaster uses mail.wattmaster.com
User Name:
This is the e-mail address you created when you set up your e-mail
account.
User Password:
This is the password required to send and receive mail on your
account.
Return Address:
This is the address that is notifi ed when the mail is undeliverable.
SMTP Port:
Use the default port #25 unless your IT department specifi es
otherwise.
In the Authentication Window:
Use TLS:
This should be checked unless your e-mail service does not require
secure e-mail transactions.
Auto-Detect:
If you don’t know which method your server uses, you can select
this option and the MailSend program will try each method and use
the one that operates on your system.
CRAM MD5:
This would be the default method if TLS is checked. It is not
available if TLS is not checked, but the other 3 methods are. Your
service provider can tell you if this is the preferred method.
Auth Login:
Your service provider will tell you if this is the required method to
send authenticated e-mail.
Plain:
No authentication is required to send e-mail.
Send Test Message:
Click this button to send an alarm notifi cation test message to
everyone listed in the Alarm E-Mail Notifi cation Dialog Box.
Custom Screen Display Picture
Once you have created your Custom Screen(s) you can revisit this
fi eld. Custom Screen instructions are found on page 33. Custom
Screens can be fl oor plans or groups of controllers or whatever you
decide is necessary to ease the monitoring of your system. When
you revisit this fi eld, click the
<Select File>
button to select the
custom screen you wish to be associated with the job-site. Once
you choose a Hot Spot from the Main Screen display (described
on page 38), you can click on the Hot Spot and go straight to the
custom screen.
Hot Spots from Main Screen Picture
Once you create a Hot Spot on the Main Screen display (described
on page 38), the coordinates for the Hot Spot will show up in this
fi eld. If you have forgotten where you placed a Hot Spot, these
coordinates will allow you to troubleshoot the location. If you want
to delete a Hot Spot, click the
<Clear>
button.