Step 12: creating custom screens, Save screen and view live screen – Auto-Zone Control Systems Prism 2 Graphical Interface Technical Guide (Version 01J) User Manual
Page 35
STEP 12: CREATING CUSTOM SCREENS
Prism 2 Technical Guide
35
You should have changed the appearance of the text in the text box
and changed the text to read Space Temperature. You will notice
that only the word Space can be seen. You need to re-size the text
box so that both words appear.
Right-click on the word Space. The text box will
change to yellow and drag handles will appear.
Keep holding the right mouse button
down and drag the text box so that
it is large enough to contain the
words Space Temperature. Now
click your mouse outside of the text
box and the yellow appearance will
disappear.
Now that the text box is correctly
sized, left-click on it and drag it
to the left to center it on top of the
Data 1 box.
Now format the Data 1 box to
remove the border and background
color. Use a bold font and change
the text color to blue (or any desired
color) to indicate a data fi eld.
Now you need to assign a data point to the Data 1 box so that the
program knows which controller to read the Space Temperature
from.
Click on the Data 1 box and then click the
<Edit Data>
button.
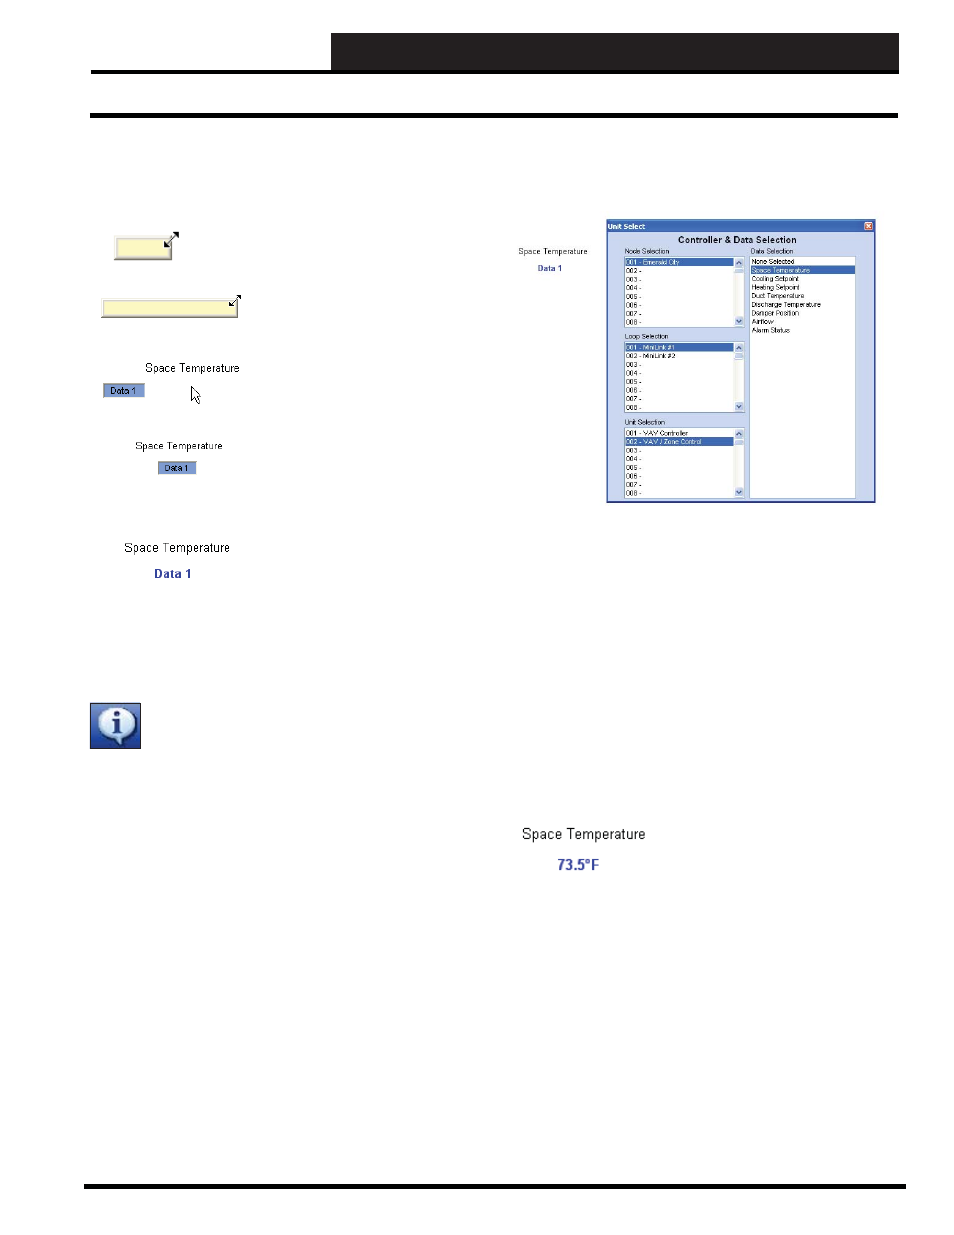
The Unit Select Window will appear. Remember, you must have
previously performed a Search For Units or manually confi gured
units before this function will work properly.
In the example above, the second Controller on Loop #1 along with
the Space Temperature data point is selected. Once the data point is
selected, this window will automatically close. If you re-open this
window on a previously defi ned data box, it will show the selected
unit and data point.
Now that you have formatted your text and data box and assigned
a data point, you should save the fi le and then test it to see if live
data actually appears.
Click
<Save Screen>
from the
File Menu
to save this custom
screen. Next, click
< View Live>
to activate the File Open Window
so that you can select which custom screen to view. Reselect this
SampleCustom.CUS screen fi le.
If you are On Line and connected
to your system, you should now see
live data appear from the selected
controller as shown at left.
You can left-click on any active data fi eld displaying live data and
be taken to the status screen for the controller. When you close the
status screen, you will automatically return to the previous custom
screen you had open.
Save Screen and View Live Screen