Step 12: creating custom screens, Overview step 12: creating custom screens, Prism 2 technical guide 33 – Auto-Zone Control Systems Prism 2 Graphical Interface Technical Guide (Version 01J) User Manual
Page 33
STEP 12: CREATING CUSTOM SCREENS
Prism 2 Technical Guide
33
Overview
Step 12: Creating Custom Screens
Once all units have been detected and named and the system is
up and running, you can begin creating your own custom status
screens using the built-in Graphics Editor.
You can create simple fl oor-plans, summary screens, and even
screens containing an equipment photograph with temperatures
overlaid on the equipment.
Not all status fi elds on the standard status screens are available on
custom screens. But you can place temperatures, damper positions,
carbon dioxide, and other similar types of readings. You can also
add an alarm indicator for specifi ed units. Some items that cannot
be displayed are occupied/unoccupied modes, fan status, or any
other binary style of data.
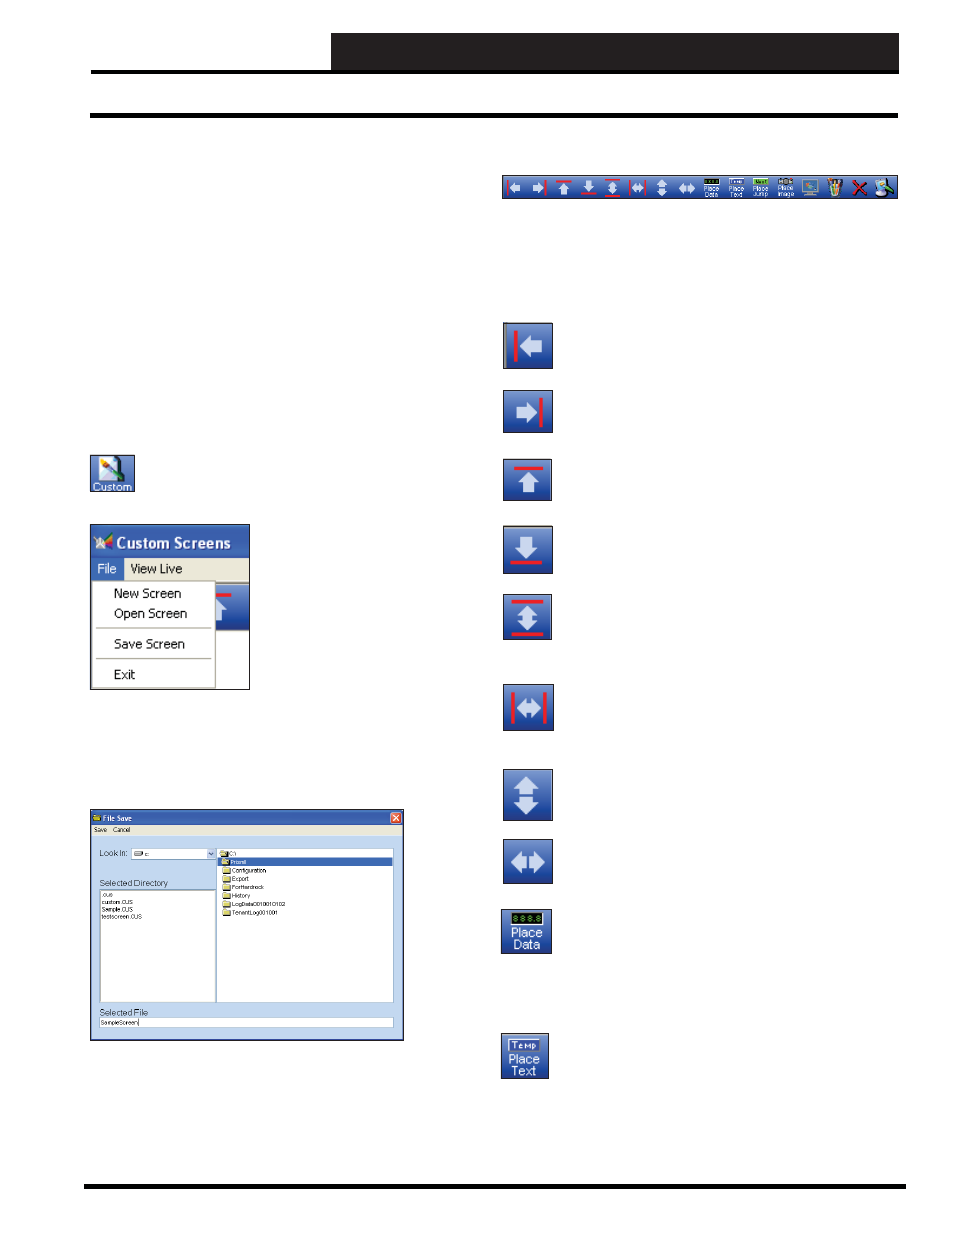
To access Custom Screens, click
<Custom>
on the Prism
2 Main Screen Top Toolbar. You must have a Level 3
passcode to access this item.
From the Custom Screens Window’s
File Menu
you can start new custom
screens, edit existing screens, or open
a custom screen for viewing live data.
To start a new screen, click
< New
Screen>
from the
File Menu
.
Selecting
<New Screen>
will clear
any old screen data if any exists or
will refresh the memory to begin a
new screen. Before you start, it’s a good idea to create a fi lename
for the screen you are about to create.
Click
< Save Screen>
from the
File Menu
to open the File Save
Window.
In the example above, you can see we gave the screen the fi lename
SampleScreen in the Selected File box. This sample screen will be
saved in the main Prism 2 directory once you click
<Save>
.
<Open
Screen>
defaults to the main Prism directory, so if you save your
fi le to a different folder or drive, you will have to remember where
you saved it.
At the top of the Custom Screens Window is the Placement Toolbar.
To see a text message overview of a button’s function, hold the
mouse cursor over a button without clicking.
Following is a quick overview of each Placement Toolbar button’s
function and when it should be used.
Align Left
: Use this button to align a group of selected
text or data boxes with the left edge of the left most
selected item.
Align Right
: Use this button to align a group of selected
text or data boxes with the right edge of the right most
selected item.
Align Tops
: Use this button to align a group of selected
text or data boxes with the top edge of the uppermost
selected item.
Align Bottoms:
Use this button to align a group of
selected text or data boxes with the bottom edge of the
lowermost selected item.
Equal Vertical Space
: Use this button to equalize the
vertical spacing between a group of selected text or data
boxes. Boxes are equally spaced between the uppermost
and lowermost selected items.
Equal Horizontal Space
: Use this button to equalize
the horizontal spacing between a group of selected text
or data boxes. Boxes are equally spaced between the left
most and right most selected items.
Equal Height
: Use this button to make all selected items
the same height as the uppermost and left most selected
item.
Equal Width
: Use this button to make all selected items
the same width as the uppermost and left most selected
item.
Place Data
: Use this button to place a new data fi eld
on the screen. New data fi elds are always placed in the
upper left corner of the screen and you will need to move
them to the desired location. If you place several data
fi elds at one time, they will overlay on top of each other
until you drag them apart for placement.
Place Text:
Use this button to place a text fi eld on the
screen. As with the data fi elds, these will always be
initially place in the upper left corner. You will need to
move them to the desired location.