K-Patents PR-03 User Manual
Page 58
58
58
58
58
52
PR-03 instruction manual
8. Loosen carefully the six M4 screws (G) of the disc spring holder. Turn in small steps, alternating
between the screws.
Warning!
Never touch the screws (G) when the instrument is in the line!
!
9. Remove the disc spring holder (H), the disc spring (J), and the thermal conductor (K).
6.4.2 Replacing the prism and prism gaskets
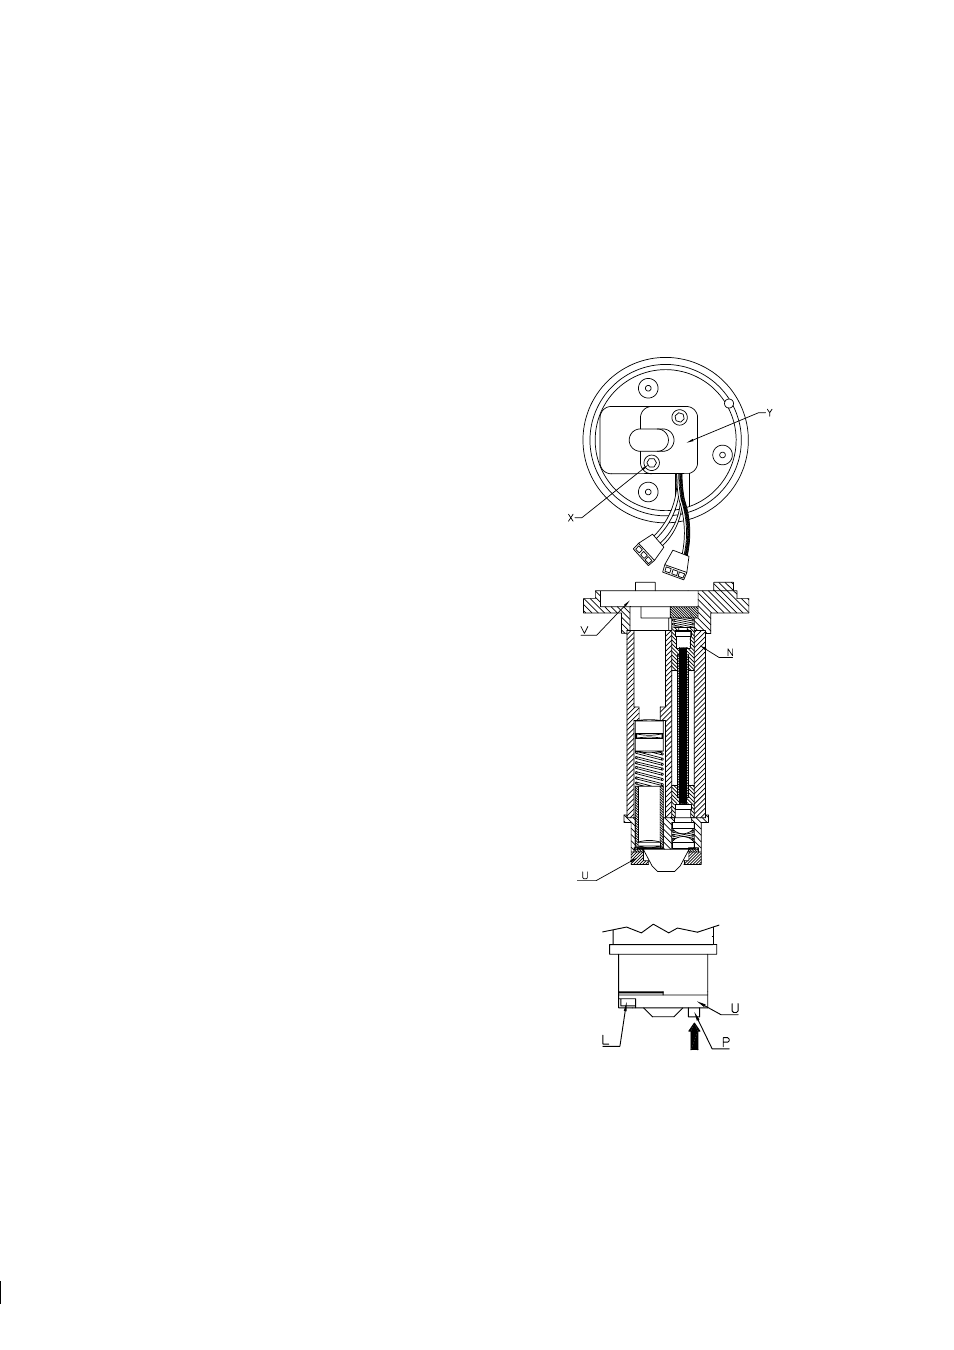
1. Lift out the Core module, Figure 6.6 (a). The module does not turn
due to the alignment pin (R) Remove the Prism support (U) fixed by
two M3 screws (L), Figure 6.6 (b).
Note:
The temperature sensor (P)
restricts the movements of the Prism support (U).
2. To remove the prism, push it gently against the springs in the prism
plate (M), as indicated by an arrow in 6.3(a).
3. The LED assembly can now be removed by gently pulling the cable
(c), Figure 6.5.
4. Remove the connector (D) from the temperature sensor cable, Fig-
ure 6.5. Use a pointed tool to press on the small metal springs through
the openings at the flat side of the connector.
5. Now pull out the temperature sensor (P). Pull one lead a little further
on than the other, to prevent the cable ends from plugging the hole.
6. To remove the lenses, loosen the two M2 screws (Z), Figure 6.7.
Warning!
The lenses are springloaded.
!
7. Remove Prism plate (M) and Lens locking ring (under the Prism
plate).
8. Now the lenses, springs and lens spacers are free to be removed, Fig-
ure 6.6 (a).
9. Both end pieces of the Core module body are fixed with only one
screw each.
10. For assembly of the CORE module, use this procedure in reverse
order, then proceed to the sensor assembly instructions below.
Note:
When mounting the temperature sensor (P) back again, do
not push it the whole way in. Leave leads visible, so that the Prism
support (U) can be mounted.
Note:
When inserting the temperature sensor leads in the connector
(D), the middle hole in the connector should be empty.
11. Clean the prism.
Important:
Do not leave any finger prints on any of
the four optical surfaces!
(a)
(b)
Figure 6.6
The Core module