Replacing a fan tray, Preparing for the replacement, Replacement procedure – H3C Technologies H3C S12500 Series Switches User Manual
Page 94
84
Replacing a fan tray
CAUTION:
•
To avoid injury, do not touch any wires, terminals, and parts with a high-voltage hazard sign.
•
Fan trays are hot-swappable. To replace a fan tray when the switch is operating, pull out the fan tray
after it stops rotating. Keep your hands away from the spinning fan blades when removing the fan tray.
•
To ensure normal operation of the switch, do not keep the switch working without a fan tray for a long
time.
•
When removing a fan tray, hold the bottom of the fan tray to pull it out thoroughly.
Preparing for the replacement
1.
Put on an ESD wrist strap, and make sure the wrist strap makes good skin contact and is correctly
grounded.
2.
Unpack the fan tray to be installed.
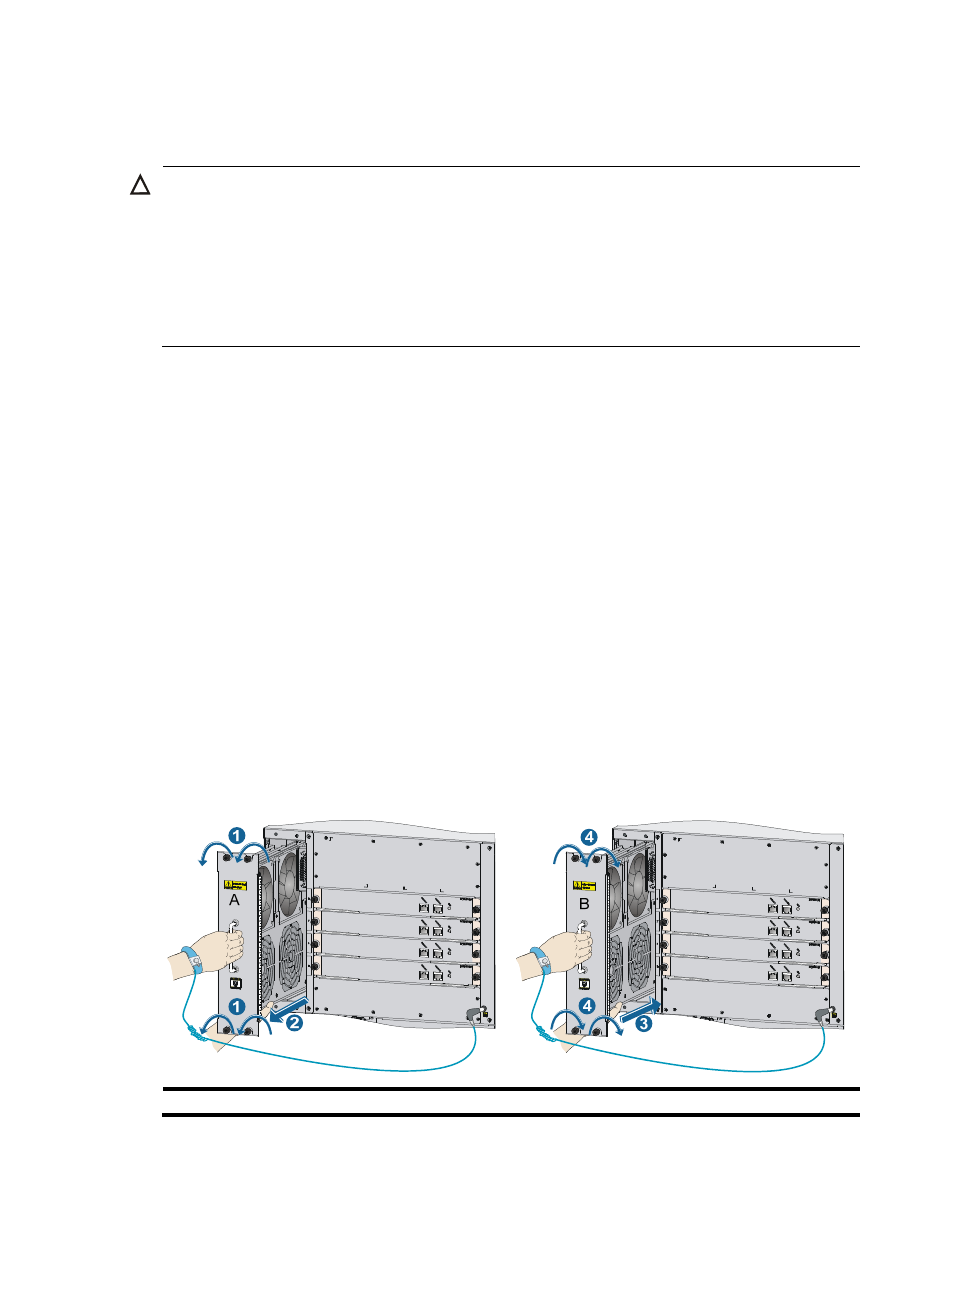
Replacement procedure
To replace a fan tray:
1.
Loosen the captive screws on the fan tray.
2.
Pull out the fan tray along the slide rails. Put the removed fan tray in an antistatic bag or in its
original shipping materials.
3.
Insert the new fan tray into the fan tray slot along the slide rails. Push the fan tray in the slot until
it makes close contact with the backplane of the chassis.
4.
Finger-tighten the captive screws and then use a screwdriver to fasten the screws to make sure the
fan tray is firmly fastened.
Figure 70 Replacing a fan tray for the S12504
A: Fan tray to be removed
B: Fan tray to be installed